How to upgrade Advent laptop hard drive to SSD in Windows 11,10, 8, and 7? If you are searching for answers to this question, you come to the right place. Here, Partition Magic provides a full guide to Advent laptop hard drive replacement.
About Advent Laptop
Dixons Retail plc was one of the largest consumer electronics retailers in Europe. It operates Currys, Currys Digital, Dixons Travel, Knowhow, PC World (also Currys PC World), and Advent (It sells computers, peripherals, and other accessories). In this post, I will mainly discuss the Advent laptop.
Compared with other computer brands, this computer brand provides great usability and an incredibly affordable price. Users often choose it while they are on a tight budget.
Typically, the Advent laptops come with a 250GB, 320GB, or 500GB hard drive (HDD) to store all the content. Over time, you might find that the running speed of your PC becomes slower. In this situation, upgrading the hard drive to an SSD is the fastest way to increase running speed. How to replace Advent laptop HDD with SSD? If you also need to upgrade Advent HDD to SSD, you can continue reading to get a full guide.
Which SSD Should You Choose for Advent Laptop?
The Avent laptop uses a SATA HDD, which means that only SATA SSDs are compatible with it. After investigating it on the Internet, I found these 2.5” SSDs compatible for Advent laptops:
- Samsung 860 EVO 2.5-inch SSD
- Samsung 870 EVO 2.5-inch SSD
- Crucial BX500 2.5-inch SSD
- Crucial MX500 2.5-inch SSD
- SanDisk SSD Plus 2.5-inch SSD
- Kingston A400 2.5-inch SSD
- Western Digital WD Blue 3D NAND 2.5-inch SSD
- TEAMGROUP GX2 2.5-inch SSD
- ADATA SU635 2.5-inch SSD
- Acclamator 2.5-inch SSD
- …
How to Upgrade Advent Laptop Hard Drive to SSD?
How to upgrade Advent laptop hard drive to SSD? In this section, you can get a detailed guide. The whole process of Advent laptop hard drive replacement can be divided into two parts:
- Clone the data on the HDD to the new SSD.
- Replace the HDD with a new SSD.
To clone the data on the HDD to the new SSD, you can use MiniTool Partition Wizard. It is a professional and reliable partition disk manager that can help you migrate OS to HDD/SSD, copy disk/partition, format USB to FAT32, create/delete partitions, rebuild MBR, convert MBR to GPT, move/resize partitions, change cluster size, do data recovery, and more.
Here’s how to use MiniTool Partition Wizard’s Migrate OS to HD/SSD feature to clone the data on the HDD to the new SSD:
Step 1. Put the new SSD into a compatible enclosure and connect the enclosure to your Avent laptop. Then, click the Download button to get the MiniTool Partition Wizard installation package, and follow the on-screen instructions to install it on your Avent laptop.
MiniTool Partition Wizard FreeClick to Download100%Clean & Safe
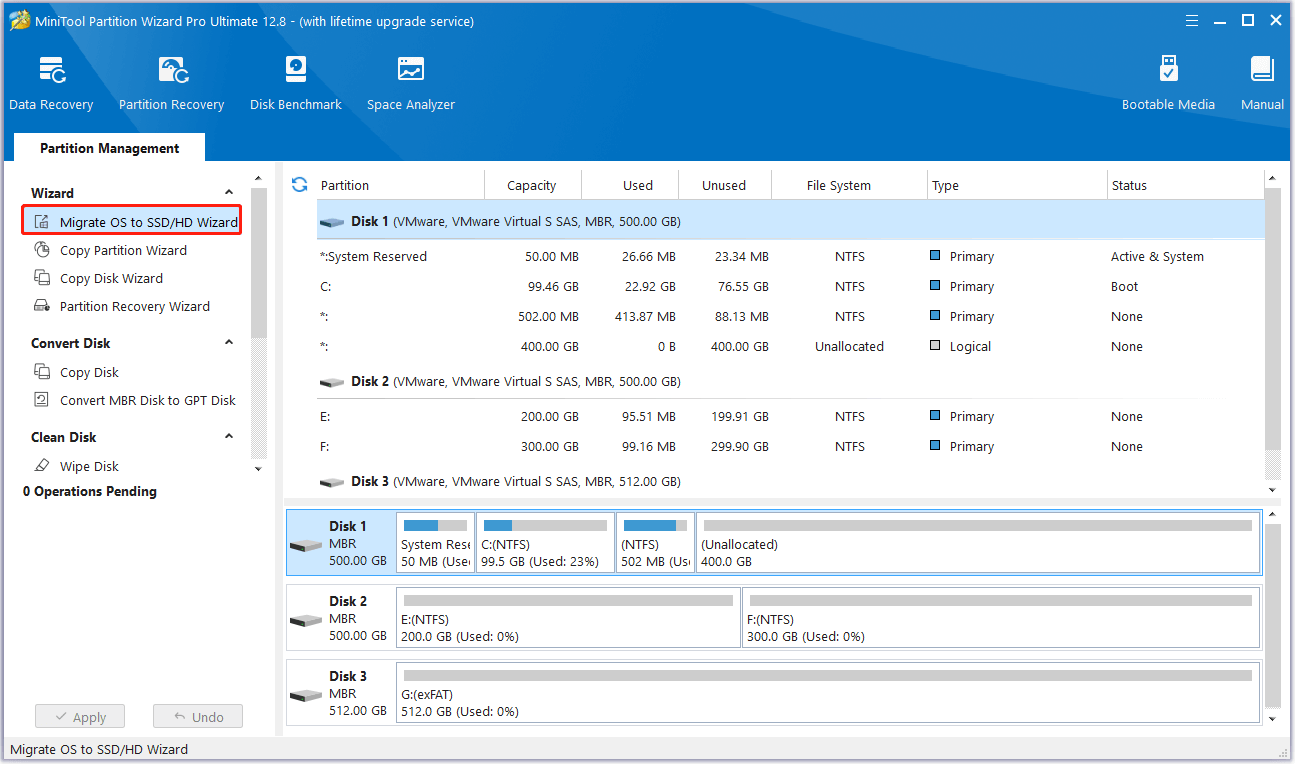
Step 2. Launch it into its main interface and select the Migrate OS to SSD/HD Wizard feature in the left panel.
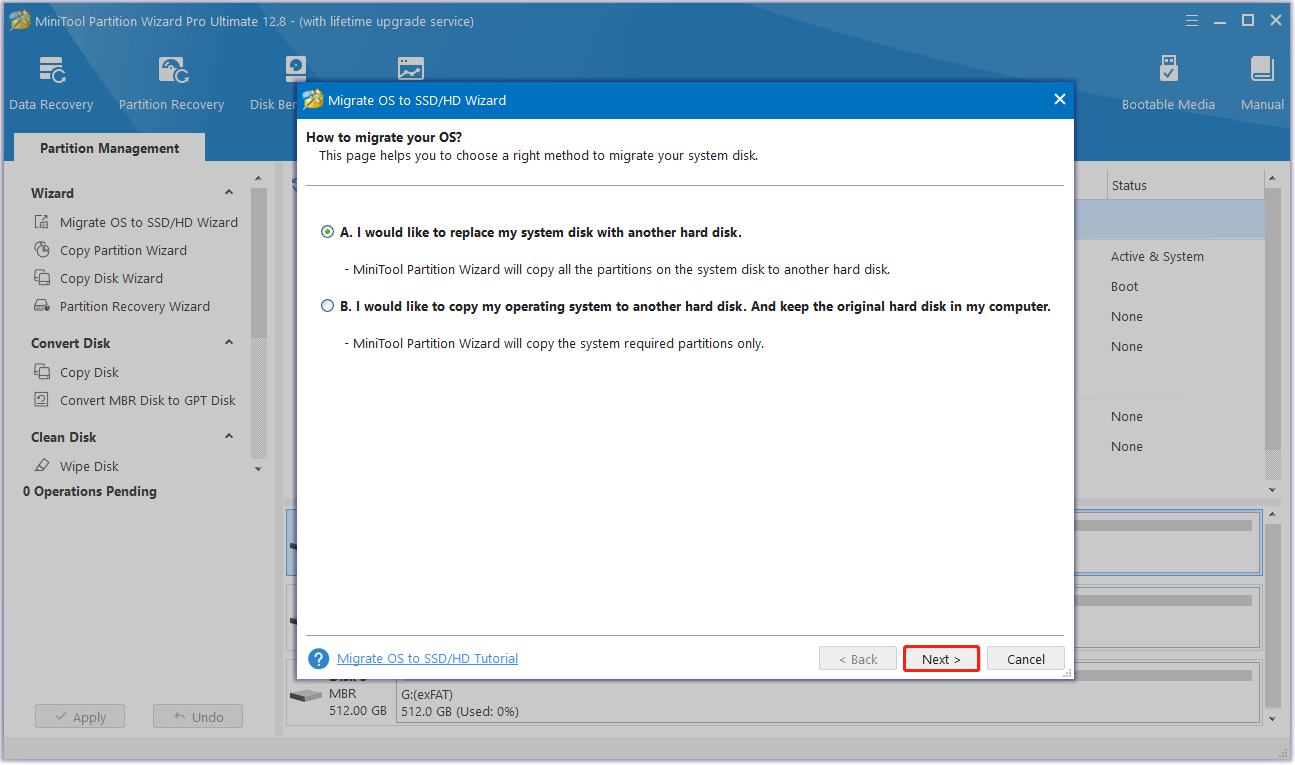
Step 3. In the Migrate OS to SSD/HD Wizard window, choose “A. I would like to replace my system disk with another hard disk.” and click Next.
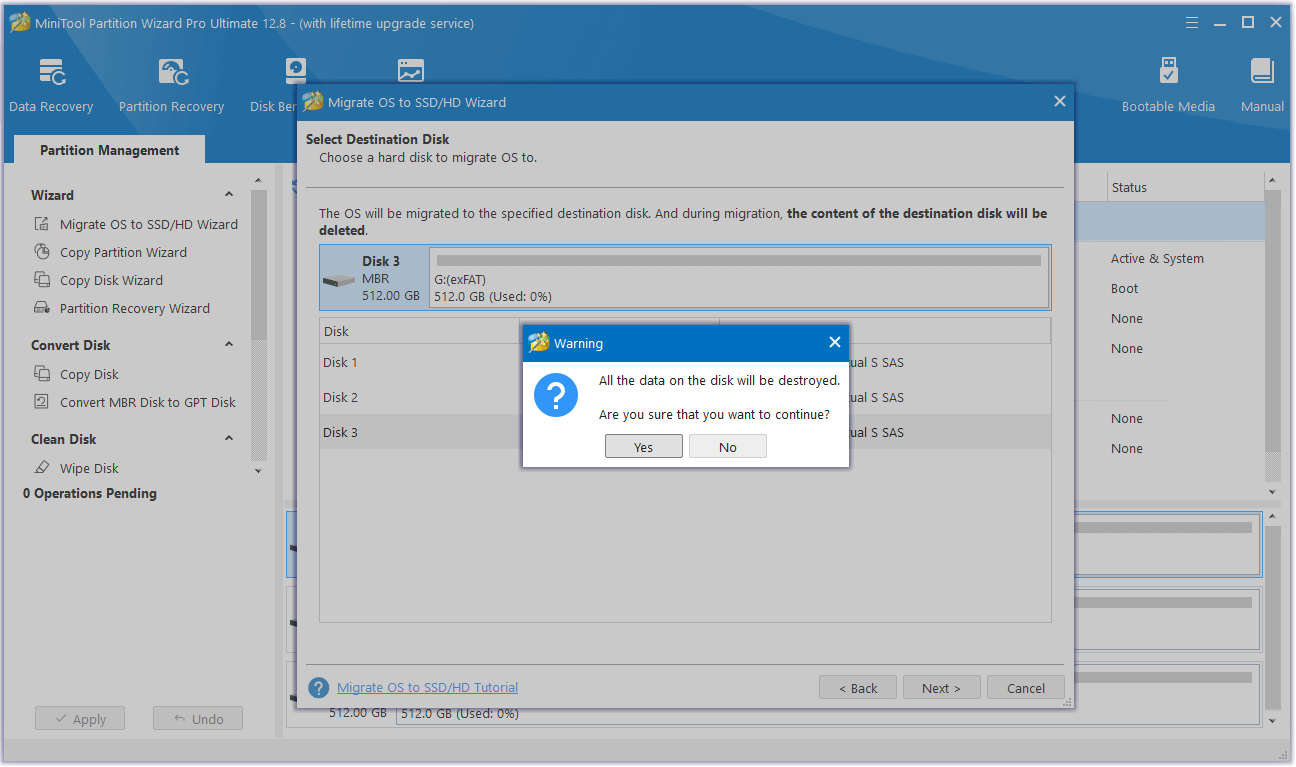
Step 4. Select the destination disk and click Next. Then, click Yes in the Warning window.
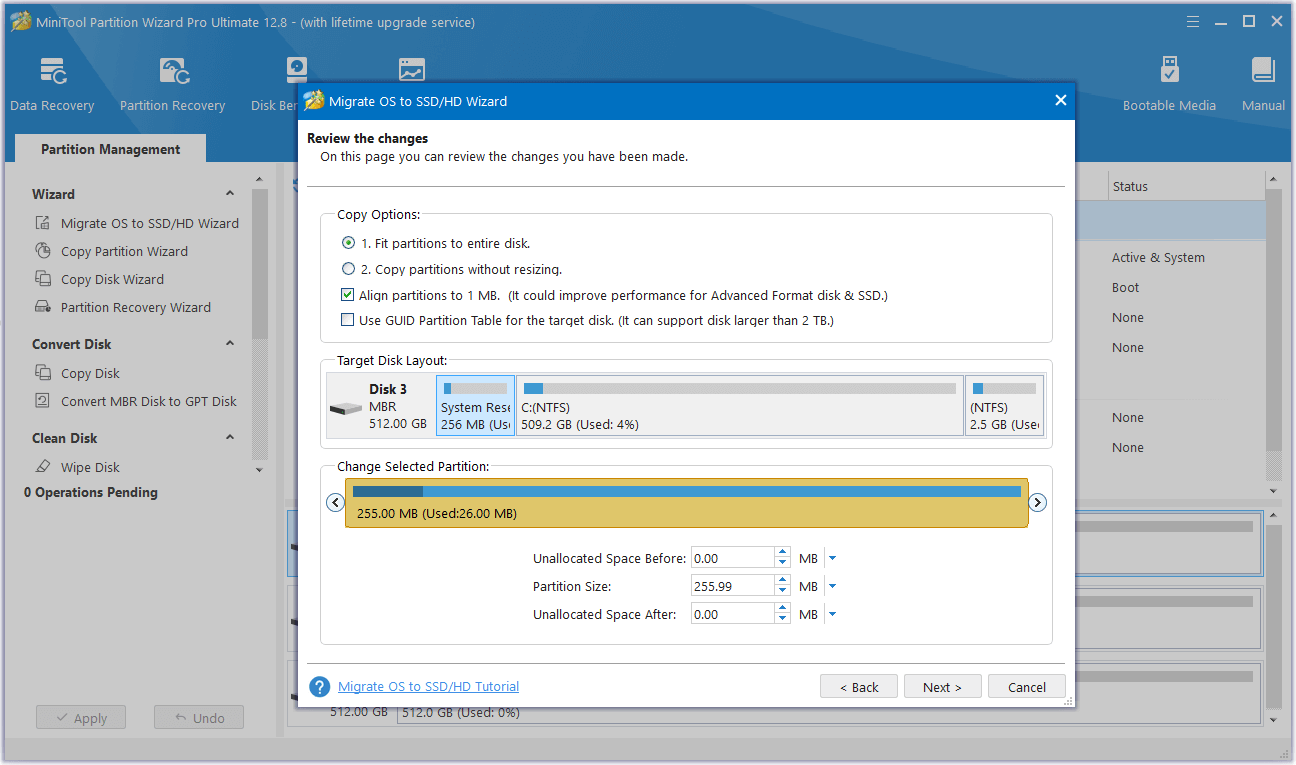
Step 5. Choose the copy options and configure the disk layout to change the default settings according to your needs.
Step 6. Read the pop-up note and click the Finish button. After that, click Apply and Yes sequentially to initiate the cloning process.
After cloning the data on the HDD to the new SSD, you can continue to replace the HDD with SSD. Here are the detailed steps:
- Remove the new SSD from the external drive enclosure.
- Turn off the power of your Advent laptop. For some models, you need to disconnect the power supply and remove the battery.
- Use the screwdrivers to unscrew all the screws on the back, and then open the back case.
- Remove the hard drive from the hard drive caddy.
- Install the new 2.5″ SSD into the caddy.
- After that, cover the back case, use screws to tighten it, connect the battery and power it on. Then you upgrade Advent laptop hard drive to SSD successfully.
To Sum Up
How to upgrade Advent laptop hard drive to SSD? This post introduces some compatible SSDs for the Advent laptop and provides a step-by-step guide to show you how to replace Advent laptop HDD with SSD. If you need to do Advent laptop hard drive replacement, you can follow the guide in this post.
In addition, if you encounter any issues while using the MiniTool Partition Wizard, you can send us an email via [email protected]. We will send it back as soon as possible.
About The Author

Position: Columnist
Charlotte is a technology columnist with a strong focus on the Windows operating system, specializing in disk management, backup, and data recovery. She is passionate about analyzing computer errors, identifying root causes, and delivering practical solutions. In her free time, she stays updated on the latest developments in computer systems and hardware while continuously learning new technologies to broaden her expertise. Her writing style is clear and easy to understand, making complex technical topics accessible even to users with limited computer knowledge.
User Comments :