For PS4 users, insufficient storage space and slow loading speeds are commonplace. With the ever-increasing size of modern AAA games, and updates typically adding 10-20GB of space, the console’s standard 500GB or 1TB hard drive quickly becomes full.
Upgrading your PS4 hard drive is one solution, offering improved storage capacity and performance. In the following part, this guide will offer a step-by-step guide.
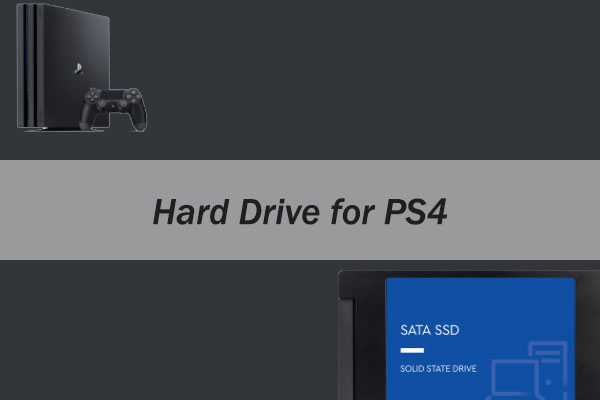
Why Do You Need to Upgrade PS4 Hard Drive?
PS4 comes pre-installed with a 2.5-inch 5400 RPM SATA hard drive, an economy component designed for basic functionality rather than speed. While sufficient for casual gaming, it’s far from adequate for modern games and heavy use.
There are three main reasons to upgrade the hard drive:
- Increase storage capacity: The significant increase in game size makes the PS4’s original storage capacity insufficient for many players. Upgrading to a larger hard drive means you can install and retain more games and downloadable content (DLC) without constantly deleting content to make room.
- Improve performance: The PS4’s original 5400 RPM hard drive is one of the main reasons for slow loading speeds because it uses mechanical rotating platters to read data. Upgrading the hard drive can significantly improve loading speeds and provide a smoother gaming experience.
- Get greater durability and reliability: Solid-state drives (SSDs) have no moving parts. Compared to mechanical hard drives, SSDs are more durable and less prone to physical damage or failure from drops or impacts, potentially extending the lifespan of your storage solution.
How to Upgrade PS4 Hard Drive?
Now, it’s time to upgrade PS4 hard drive. You can follow the steps below to complete.
Preparation Before PS4 Hard Drive Upgrade
Before performing a PS4 hard drive replacement, you need to prepare some things for success.
#1. Choose a Compatible Internal Hard Drive or SSD
The PS4’s internal drive bay accepts 2.5-inch SATA drives with a maximum thickness of 9.5mm. Capacities of 2TB or 4TB are popular choices, with SSDs providing speed benefits and HDDs offering more affordable storage.
#2. Back Up Your Game Data
Reinstalling the system software on your PS4 will delete all of the data. So, you need to back up your PS4 game data. To back up games, apps, saved data, screenshots, video clips, and settings, here are the steps:
Step 1. Prepare a USB drive that is large enough to store all the data in your PS4 and connect it to the computer.
Step 2. Format the partition on the USB drive to exFAT so that it can be recognized by the PS4.
MiniTool Partition Wizard FreeClick to Download100%Clean & Safe
- Download and launch MiniTool Partition Wizard to its main interface.
- Highlight the partition on the USB drive and choose Format Partition from the left action panel.
- Select exFAT next to File System.
- Click OK and then Apply.

Step 3. Connect the formatted USB drive to your PS4, and then back up your data in PS4 to the drive.
- Select Trophies from the function screen, press the OPTIONS button, and select Sync Trophies with PSN.
- For game saves and other data, go to Settings > System > Backup and Restore > Back Up. Confirm which data you’d like to back up.
- Customize the backup file name and select Back Up.
- Then transfer the backup file from that USB to your PC.
- Once you have verified that the file is safely copied to your PC, you can delete the data from the USB for downloading the PS4 system software.
#3. Download the PS4 System Software
The new hard drive won’t have the PS4’s operating system, so you need to download the full system software from Sony’s official website.
- On your computer, create a folder named PS4 on a USB drive formatted as FAT32 or exFAT, then a subfolder named UPDATE inside it.
- Go to the official PlayStation website’s system software page and download the “PS4 console reinstallation file” (not the standard update file). Save the downloaded file as PS4UPDATE.PUP in the UPDATE folder.
- Safely eject the USB drive from your computer.
#4. Gather Tools
You’ll need a Phillips-head screwdriver and a soft cloth to protect the console’s exterior during disassembly.
PS4 Hard Drive Replacement
Now that everything is ready, you can replace PS4 hard drive, install the system software on PS4, and then restore data.
#1. Replace the Hard Drive
The location of the hard drive bay varies slightly by model:
- Original PS4 (CUH-1xxx): The hard drive is under the glossy top panel on the left side. Apply moderate, even pressure with your palms and slide the glossy panel away from you until it clicks to reveal the hard drive caddy.
- PS4 Slim (CUH-2xxx): The hard drive bay is at the rear-left side of the console. Locate the small L-shaped plastic cover and slide it to the right to unclip it, exposing the hard drive caddy.
- PS4 Pro (CUH-7xxx): The hard drive bay is located on the back of the console, positioned on the right side. It is hidden behind a removable plastic piece, and the console should be tilted to access the securing screw and pull the bay out with a tab.
To replace the drive on PS4, the steps are as follows:
- Turn off the PS4 completely (not Rest Mode) and unplug all cables.
- Remove the hard drive bay cover.
- Unscrew the single large screw holding the hard drive caddy in place.
- Pull the hard drive caddy out of the console.
- Remove the four screws on the sides of the caddy that secure the old hard drive to it. Leave the rubber inserts in place.
- Insert your new hard drive into the caddy, ensuring the connectors are properly aligned, and secure it with the four screws.
- Slide the caddy with the new drive back into the PS4 and fasten the main screw.
#2. Reinstall the System Software
- Reconnect all cables to the PS4 and connect your controller to the console using a USB cable.
- Connect the USB drive with the system software to the PS4’s front USB port (rightmost port on the Pro).
- Boot the PS4 into Safe Mode by pressing and holding the power button until you hear a second beep.
- Select Initialize PS4 (Reinstall System Software) from the Safe Mode menu, and follow the on-screen prompts to complete the installation.
#3. Restore Your Data
Once installation is complete, the PS4 will restart and guide you through initial setup (language, Wi-Fi, PSN login). To restore data, the steps are:
- Transfer PS4 data from your PC to the USB drive.
- Plug the USB drive containing the backup into the PS4 console.
- Go to Settings > System > Backup and Restore > Restore PS4.
- Select the backup file you’d like to restore, and then click Yes to restore it to the PS4 console from the USB.
Further reading:
If you don’t want to disassemble the console, an external hard drive is the most convenient way to expand storage space. The PS4 supports USB 3.0/3.1/3.2 hard drives with capacities ranging from 250GB to 8TB. You can run games directly from an external hard drive without transferring files back and forth.
- Connect your USB storage drive directly to the PS4’s USB port.
- Go to Settings > Devices > USB Storage Devices.
- Select your USB storage device and then select Format as Extended Storage. This operation will erase all data on the hard drive, so please back up your files first.
- The PS4 will automatically set the external hard drive as the default location for new game installations.
To move an existing game, go to Settings > Storage > System Storage > Applications, select the game, press the OPTIONS button, and then select Move to Extended Storage.
Common Issues After PS4 Hard Drive Upgrade
After upgrading a PS4 hard drive, you may encounter some common issues. For example:
Issue 1. System Software Installation Failed
- Double-check the file path (PS4 > UPDATE > PS4UPDATE.PUP) and ensure the USB drive is formatted as exFAT or FAT32.
- Download the software again if the file is corrupted.
- Use a different USB port.
Issue 2. PS4 Won’t Recognize the New Drive
This is often due to the drive not being properly seated in the internal bracket and slot. Ensure it is screwed in securely and fully inserted.
Issue 3. PS4 Freezes, Crashes, Slow Load
Boot into Safe Mode and select Rebuild Database to clean up system files. This doesn’t delete games.
How to Deal with Your Old PS4 Hard Drive?
After upgrading your PS4 to a hard drive, what should you do with the original PS4 hard drive? Some people might want to use it as an external storage device to back up computer data.
When a PS4 internal drive appears in Windows Disk Management, you’ll see multiple, often small, partitions using a Linux-based file system, not typical Windows NTFS, appearing as “Healthy” or “Unallocated”, but inaccessible.
For Windows use, you need to delete these partitions to create a single new simple volume, which makes it usable as a standard storage drive (NTFS format) for your PC.
To do that, you can use MiniTool Partition Wizard. It is a free partition manager that can format/delete/resize/extend/create partitions, check hard drive health, copy partitions, and wipe hard drives.
Now, follow the steps below to do that with MiniTool Partition Wizard.
MiniTool Partition Wizard FreeClick to Download100%Clean & Safe
Step 1. Connect the old PS4 hard drive to your PC via a SATA to USB adapter.
Step 2. Launch MiniTool Partition Wizard to enter its main interface. Then right-click the PS4 drive and choose Delete All Partitions. Click Yes to confirm.

Step 3. Right-click the Unallocated space and select Create.
Step 4. In the pop-up window, set some parameters, including Partition Label, Partition Type, Drive Letter, File System, Cluster Size, Partition Volume, and Partition Location. Then click OK.

Step 5. Finally, click Apply to execute the pending operations.
PS4 Hard Drive Upgrade FAQ
You will need to back up your game saves to the cloud/USB drive and then reinstall all games.
Bottom Line
A PS4 hard drive upgrade is one of the most impactful modifications you can make to your console, solving storage shortages and performance issues in one fell swoop.
Whether you choose an internal SSD for blistering speed or an HDD for budget storage, the process is accessible to gamers.
If you have any questions or suggestions on how to use MiniTool Partition Wizard, do not hesitate to contact us via [email protected]. We’ll reply as soon as possible.
About The Author

Position: Columnist
Vega enjoys helping people with computer problems, including disk management, data recovery, data backup, and more. She is constantly expanding her knowledge in related fields. And she will continue to bring more easy-to-understand professional articles to help people solve various problems on the PC.
User Comments :