Sometimes when booting your computer to Windows 10 operating system, you receive the following error message displaying on a black screen (as shown below), making it impossible for you to log in to Windows desktop.
DISK BOOT FAILURE, INSERT SYSTEM DISK AND PRESS ENTER
Reasons for Disk Boot Failure Windows 10
In brief, disk boot failure Windows 10 can be caused by any of the following factors:
- Incorrect BIOS boot order. This is the most possible reason for disk boot failure SSD. Usually, BIOS tries to find the boot device by the arranged boot order. And if a wrong drive is set the default boot drive, disk boot failure Windows 10 occurs.
- Faulty data cables. If the same data cable has been used for years and for multiple computers, it might be the cause arousing disk boot failure.
- Damaged hard drive. If a hard drive gets damaged due to virus attack, power outages, read/write error, then it should be checked and fixed for errors for a successful boot.
Let’s talk about how to fix that on Windows 10 one by one:
Fix #1: Remove Newly Connected Devices
We suggest you first of all removing all the hard drives newly connected, such as USB flash drives, webcam, printer and monitor. Just keep the devices required for normal system operation like the boot drive, the keyboard and the mouse. Then restart your computer and see how this works.
Fix #2: Confirm the Boot Order
You need to enter the BIOS utility and check if the primary boot option is the primary HDD. If not, change the boot order. Follow the steps below.
Step 1. Restart the PC and pay attention to the BIOS setup message like Press DEL to enter Setup. Press the key as soon as you see that message.
Step 2. When you have entered the BIOS Setup utility, view the options listed horizontally at the top of the screen and locate the option for changing boot sequence. It could be Boot, Boot Order, Boot Options, or even under Advanced Options. All BIOS utilities are not the same, but they are basically similar.
Step 3. All hardware connected to your motherboard will be listed there. Now view their sequences and make sure the drive containing the operating system ranks first or is highlighted and selected as the first boot device.
Step 4. Save the changes to BIOS utility and exit.
Step 5. Restart your PC with the new boot order and see if the “disk boot failure insert system disk and press enter” message disappears.
If your system hard disk cannot be found in the Boot Settings, then you’ve got yourself a hardware problem, at this time, check the SATA cables first.
If you have a spare SATA cable, you try to replace the one being used and see if the disk boot failure persists. In case you do not have a spare one, see if any of your other hard drives is being detected. Take out its cable and use it to replace the faulty one for a test.
And if replacing SATA cable works, you need to buy a new cable for the boot drive. But if this does not make any difference, that’s got to be painful, for your hard drive might be failing.
Fix #3: Use Windows Startup Repair Tool
Step 1. Boot your computer with Windows installation media. Then at the initial Windows Setup, go through the preparatory job and choose Repair this computer link.
Step 2. Then you need to follow this path: Troubleshoot >Advanced options > Startup Repair.
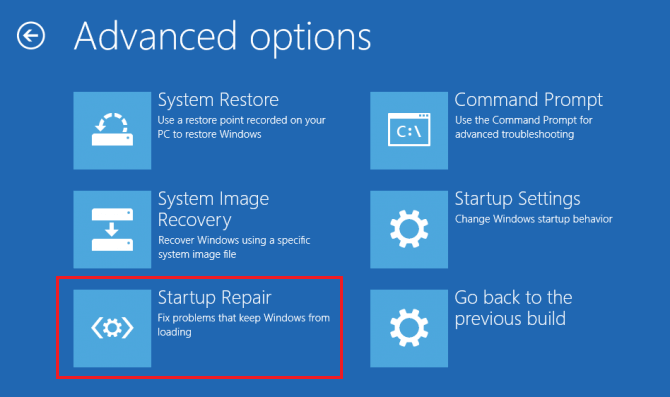
Step 3. Choose the operating system to manage and then Startup Repair tool will diagnose the system and try to fix the issues it has found or give some suggestions.
Step 4. When it completes, restart your computer and check if the “disk boot failure insert disk and press enter” message disappears now.
RECOMMENDED: How to Fix Slow Startup Speed after Upgrading to Windows 10
Fix #4: Run CHKDSK
Hard drive errors might also bring “disk boot failure insert system disk and press enter” error. And if this is the case, you have two options to detect and fix the errors.
Option A: Use MiniTool Partition Wizard
You can see if your hard disk is corrupted by running a CHKDSK. The bootable media created by MiniTool Partition Wizard Pro is helpful in this case.
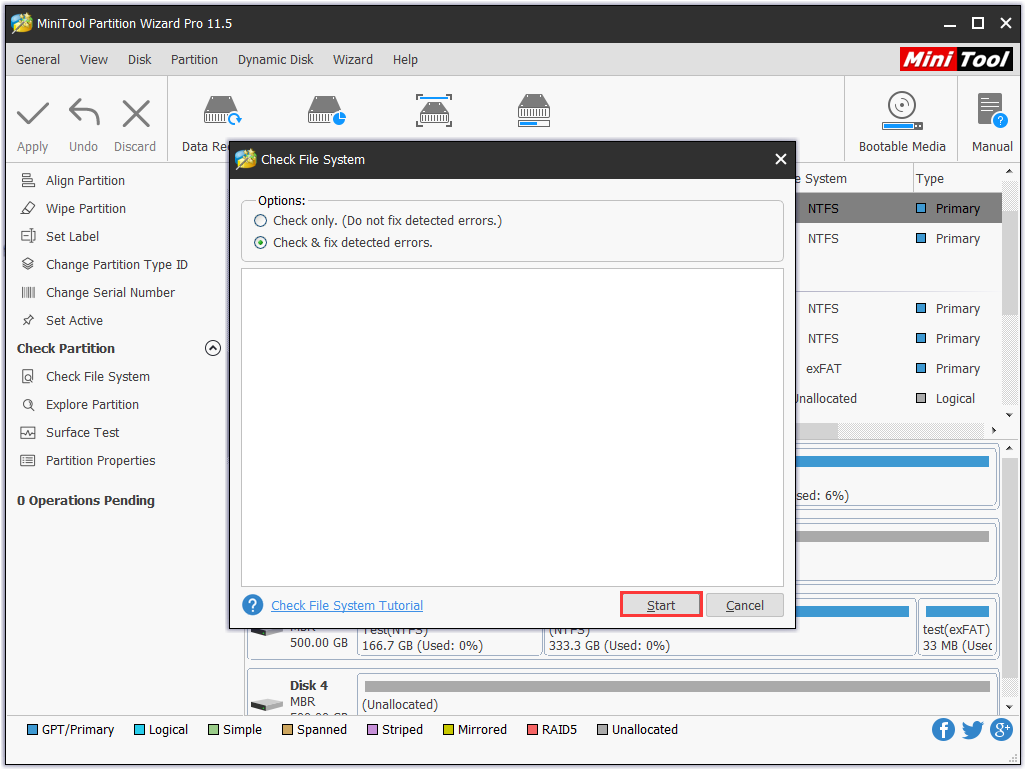
Step 1. Get into the main interface of the bootable MiniTool Partition Wizard, select the system partition and choose Check File System from the left action panel.
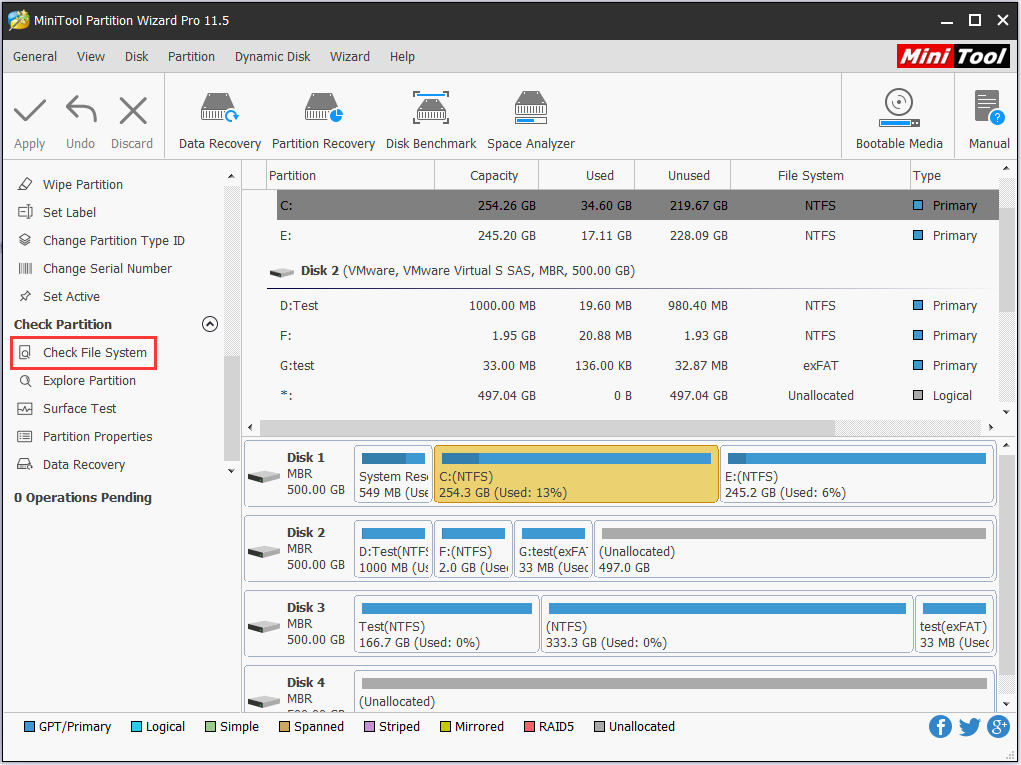
Step 2. In the pop-up window, choose Check & fix detected error and hit the Start button. Please wait until it finishes and then restart your OS from the system disk.
Option B: Use CHKDSK Utility
The CHKDSK utility can check if there are certain issues with the hard drive. And this fix can also be found in MiniTool Partition Wizard bootable media.
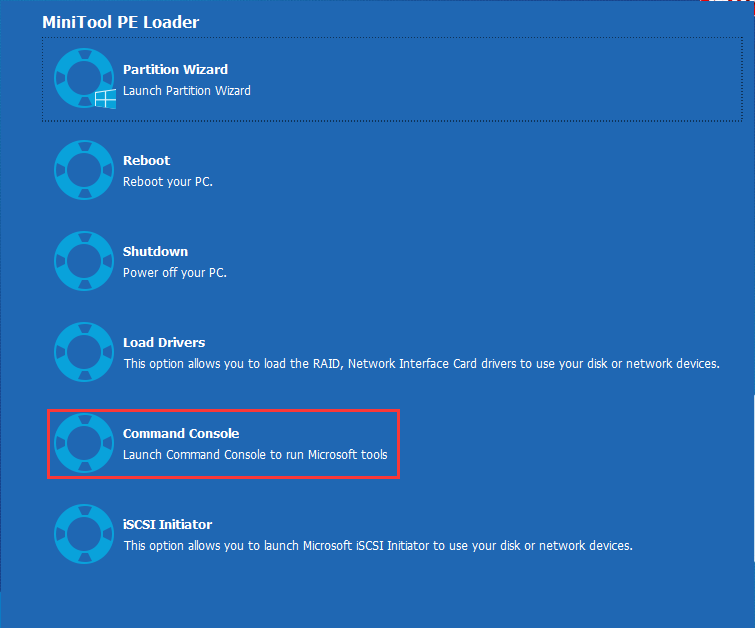
Step 1. Boot your computer from MiniTool bootable media and select Command Console from the menu.
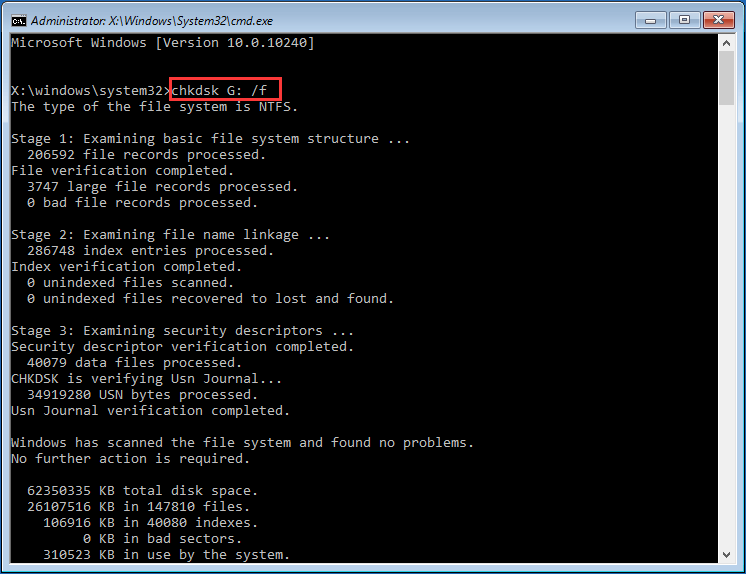
Step 2. Type the following commands and press Enter after either to submit.
chkdsk C: /f (replace C: with the real drive letter of the system partition shown in MiniTool Partition Wizard Bootable.)
Step 3. Exit MiniTool Partition Wizard bootable media and restart your PC.
Fix #5: Fix Corrupted MBR
If MBR (Master Boot Record) is damaged, the entire boot process will interrupt and Windows cannot boot, giving your errors like “disk boot failure insert disk and press enter” or “non system disk or disk error“.
Try to fix MBR with the tutorials below:
Option A: Use MiniTool Partition Wizard
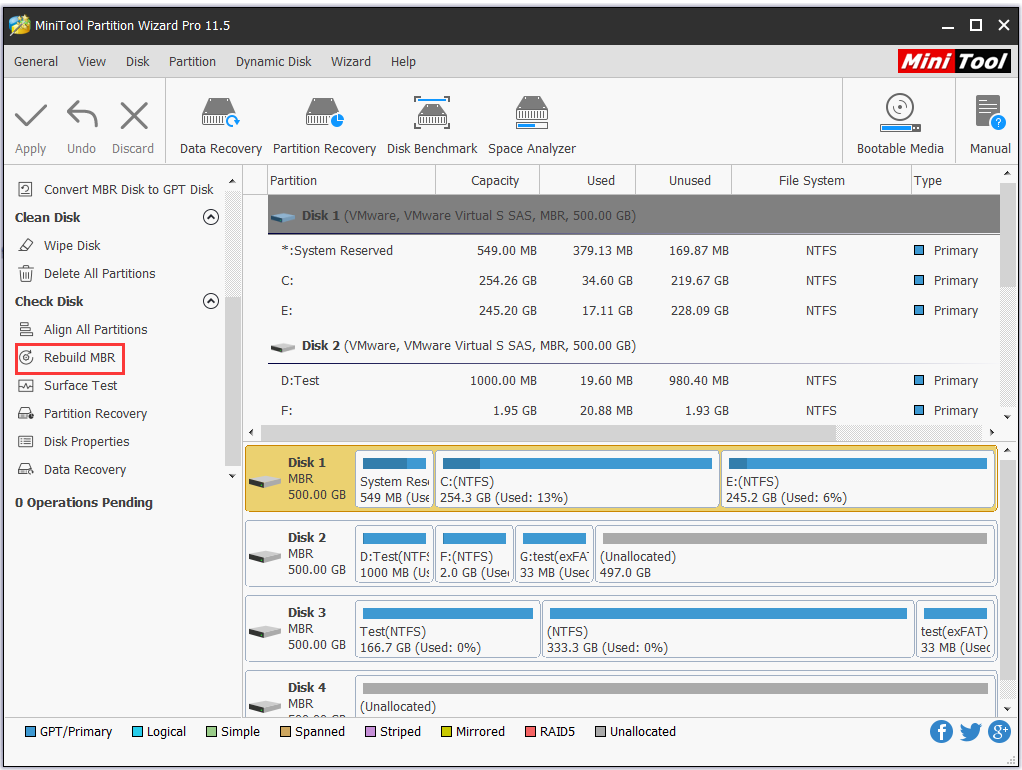
Step 1. Boot your computer with the bootable media created by MiniTool Partition Wizard Pro.
Step 2. When you are in the main interface, select the system disk and choose Rebuild MBR feature from the action panel.
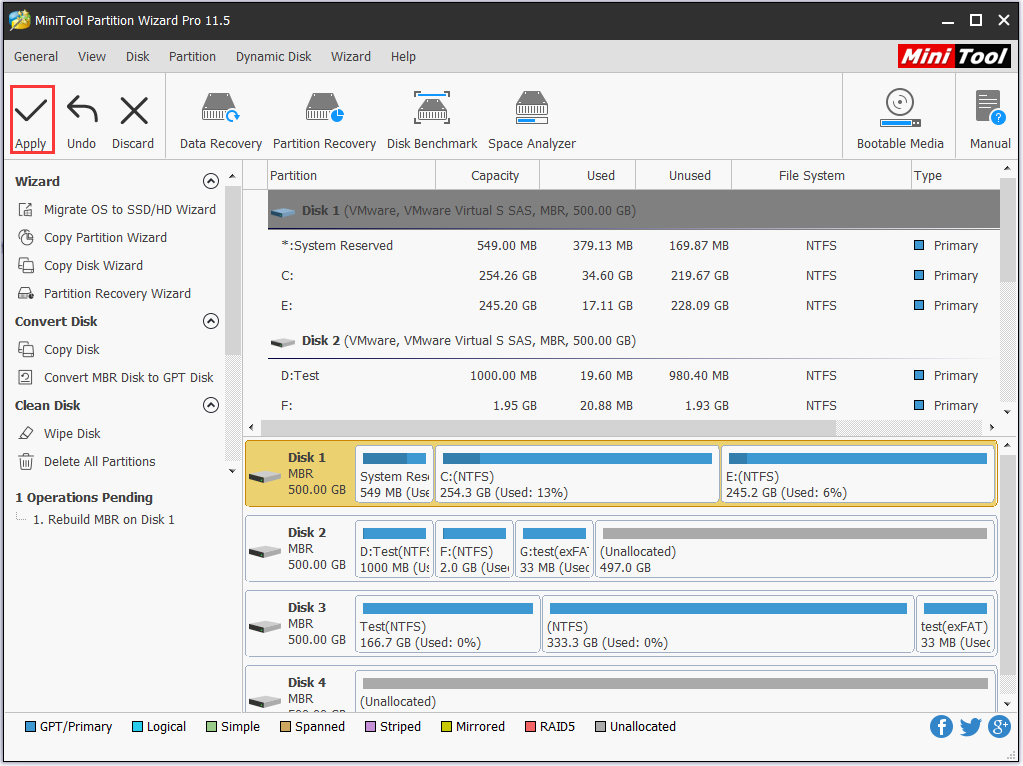
Step 3. Click Apply on the toolbar.
Option B: Use CMD in Windows Installation Media
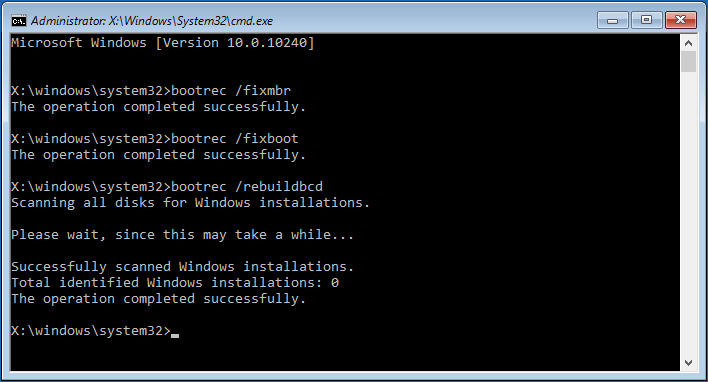
You can also do this with the command prompt in MiniTool Partition Wizard bootable media. After you have entered the Command Console, run these commands:
- bootrec /fixmbr
- bootrec /fixboot
- bootrec /rebuildbcd
RECOMMENDED: Detailed Steps to Fix Windows 10 Endless Reboot Loop (2018)
Fix #6: Reinstall OS
If all the attempts fail, you have to reinstall Windows operating system. This is not difficult, but would take you much time for you not only have to reinstall the OS but also reinstall many applications you need one by one and finally try to get the missing files from the backup copy made at the beginning of this post.
Here is how you can do these:
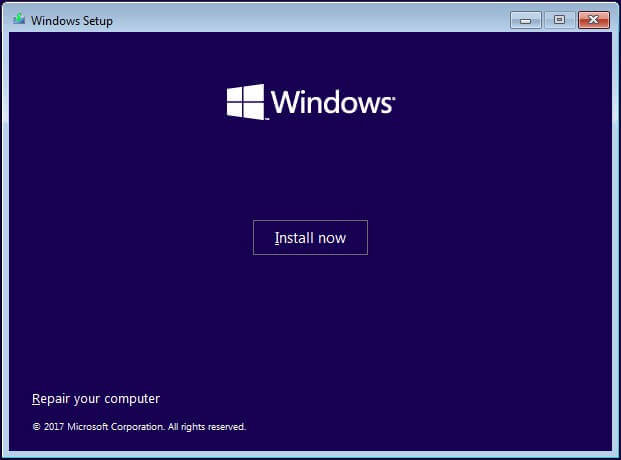
Step 1. Boot your computer from Windows installation media and then go through the options for Language, Time format and Input method, click Install Now.
Step 2. Input the license key or skip this step to continue.
Step 3. Choose Custom: Install Windows only (advanced).
Step 4. Delete the drives that save the current operating system to make unallocated space. Then select that unallocated space to install Windows.
Step 5. Please stay here and wait until Windows install application to finish. You will be asked to make some settings during this process.
Step 6. Install the applications that get lost or become invalid due to the reinstall.
Step 7. Connect the external hard drive you used to clone the system disk to your PC, and then copy the files you need to the current system drive.
Further Reading: Back up and Restore Windows OS
Now what? Either after fixing “disk boot failure insert system disk and press enter” or reinstalling Windows 10, you should keep this in mind: back up Windows periodically. You can use Windows built-in Backup and Restore utility to do this or you can use our backup utility – MiniTool ShadowMaker.
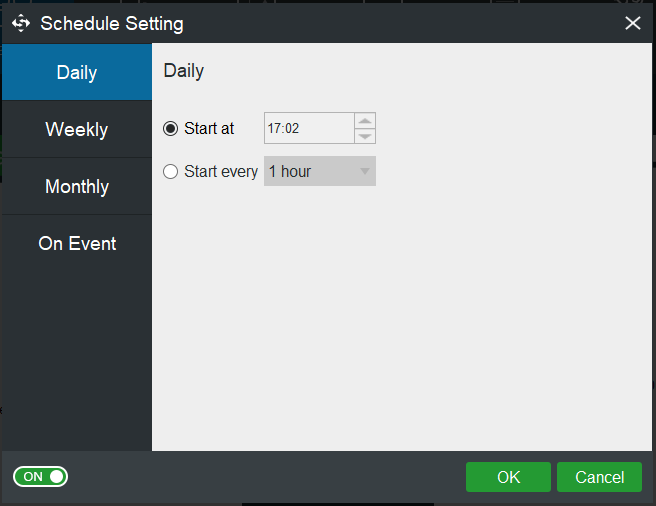
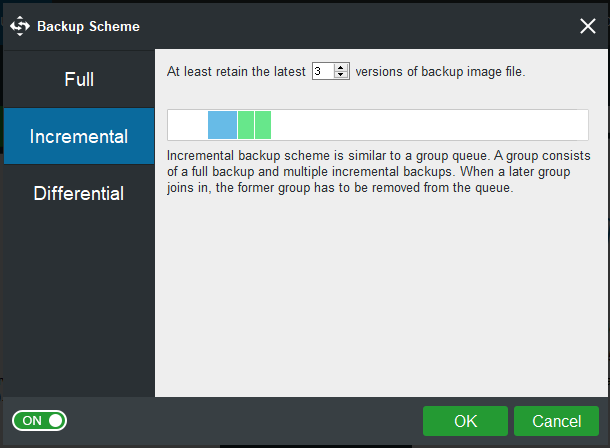
MiniTool ShadowMaker Pro is specially designed to back up operating system, files & folders, disk & partitions. It offers scheduled backup options and the way to manage backup files automatically. For the details, view Schedule Settings and Backup Scheme. Besides, it is capable of performing disk cloning. What’s more, it helps create a bootable rescue media to restore operating system in case of any accidents. Works for Windows 10/8/7.
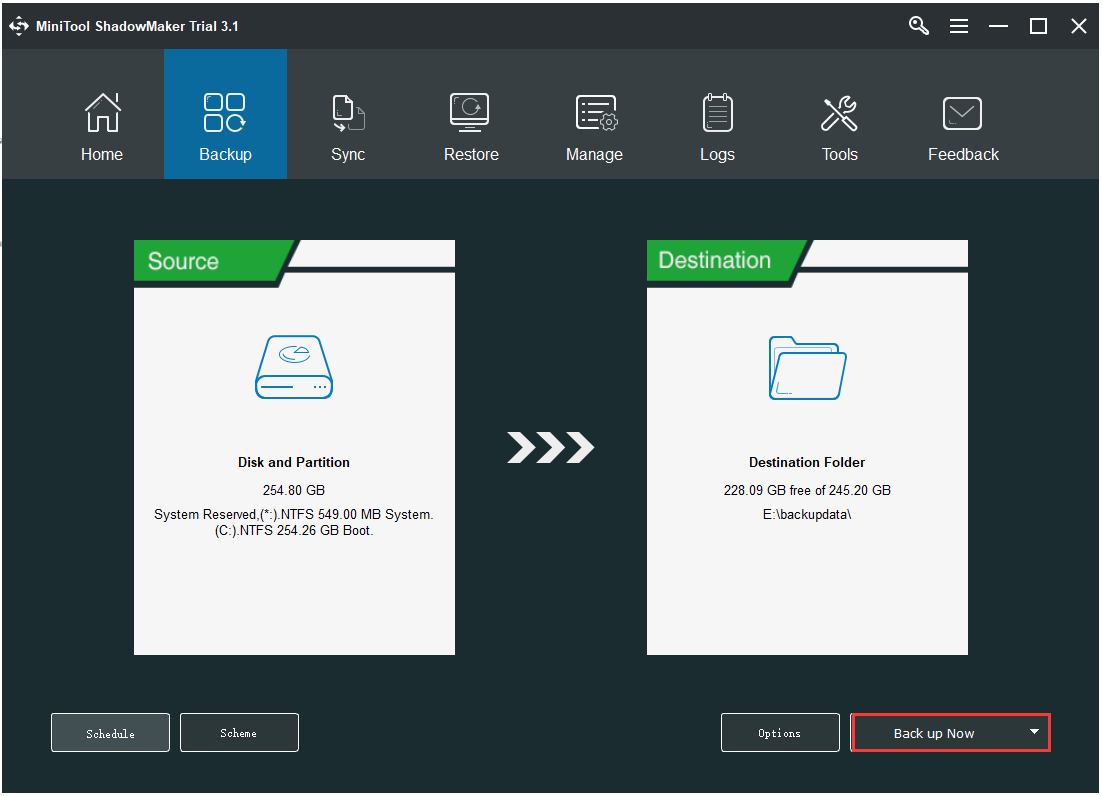
Step 1. Run this backup software, after registering, select This PC to connect and navigate to Backup tab in the main interface. See the system required partitions are selected by default and a destination is also chosen by this Windows backup software.
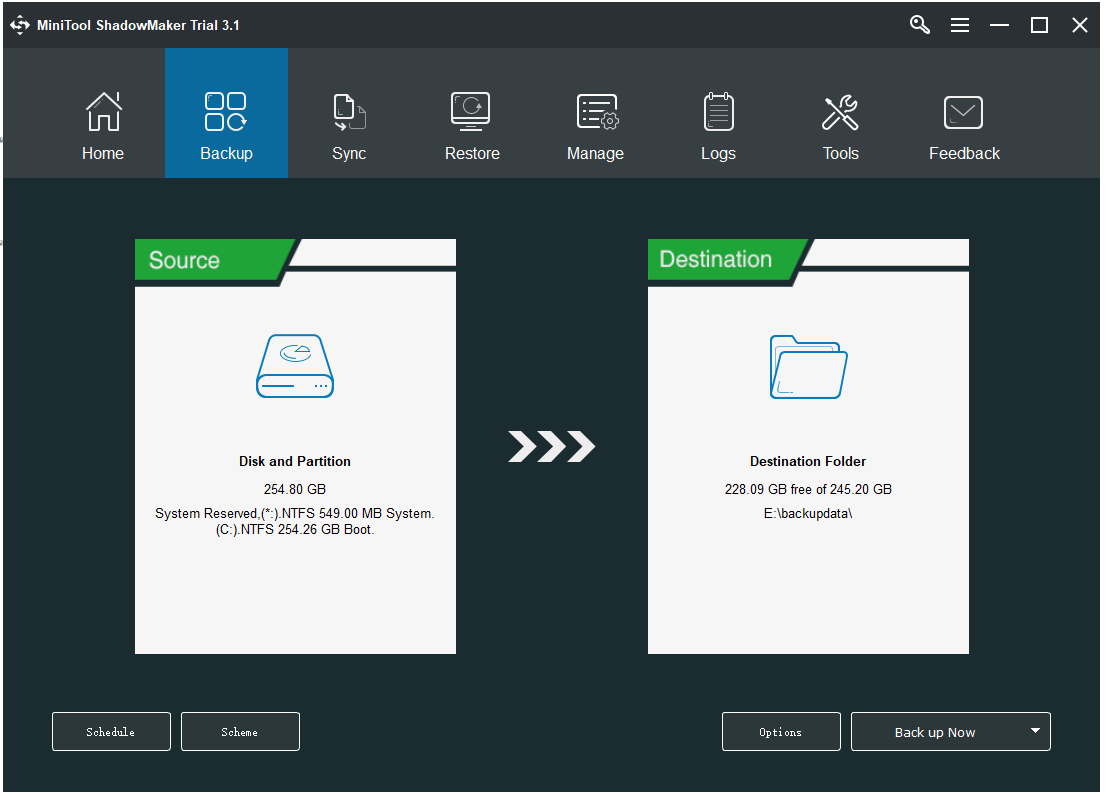
If you prefer another destination location, enter Destination to choose another path. It is recommended to select a partition on an external hard drive to keep image files safe.
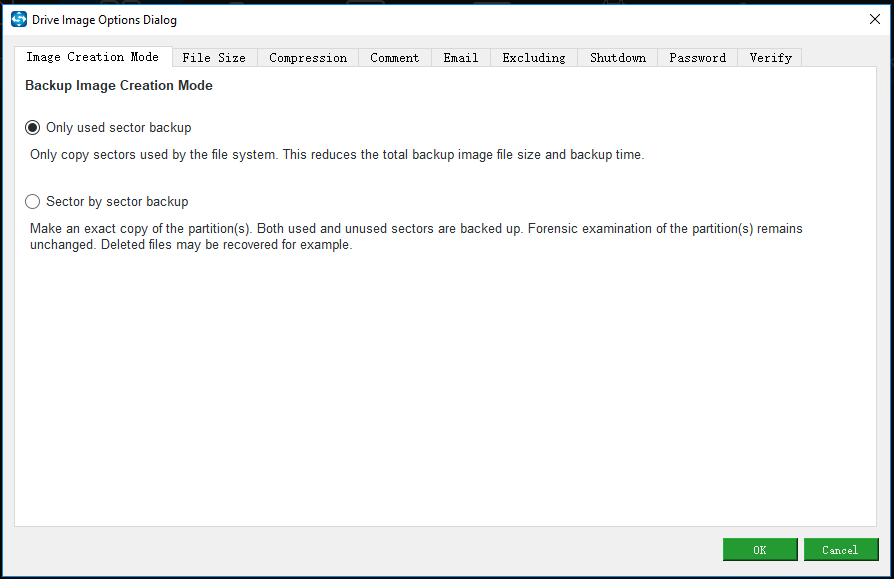
Step 2. To enjoy lifetime safeguard, click Schedule, Scheme, and Options to customize automatic backups.
Step 3. Click Back up Now button.
After you have made the scheduled backup, you have to take one more step further: create a bootable rescue media. This can help you quickly restore system from the backup images even when your computer cannot boot. Please refer to the help tutorials from the official site.
But if you prefer using Windows utility to back up and restore, please refer to this article.
Verdict
We have listed some suggestions in this article to help you overcome “disk boot failure insert system disk and press enter”. Now it’s your turn to have a try on each one and we hope you never come to the last solution.
If you’ve come across other workarounds, list the troubleshooting steps in the comment section below. If you need any help when using MiniTool software, you can contact us via [email protected].
About The Author

Position: Columnist
Rodin is an enthusiastic IT writer focusing on Windows trends, disk partition management and data recovery. She loves to write and share her idea about the useful tips and tricks on personal computers' maintenance. If you are looking for methods to improve your computer performance, manage hard drives and recover data from different devices, Rodin can provide reliable solutions for data management.
User Comments :