For users who like to store important files and data on computer or storage devices, it is likely to lose important data in a flash, which will lead to unnecessary trouble. Luckily, Minitool Partition Wizard can help you recover lost data in hard drives with its Data Recovery Feature. This tutorial will show users how to recover lost data with detailed steps and screenshots.
About Data Recovery
Data Recovery is designed to recover files from the logically damaged partition, formatted partition, and RAW partition as well as to recover files mistakenly deleted from internal or external hard drives.
Besides, many computer users may have encountered partition loss due to some reasons like system update, hard drive failure, OS corruption, etc. And certainly, data in the partition is lost. Lost and deleted partitions will be shown in the main interface of Data Recovery, and users can scan the lost partition to recover lost or deleted files.
How to Recover Lost Data from Hard Drive
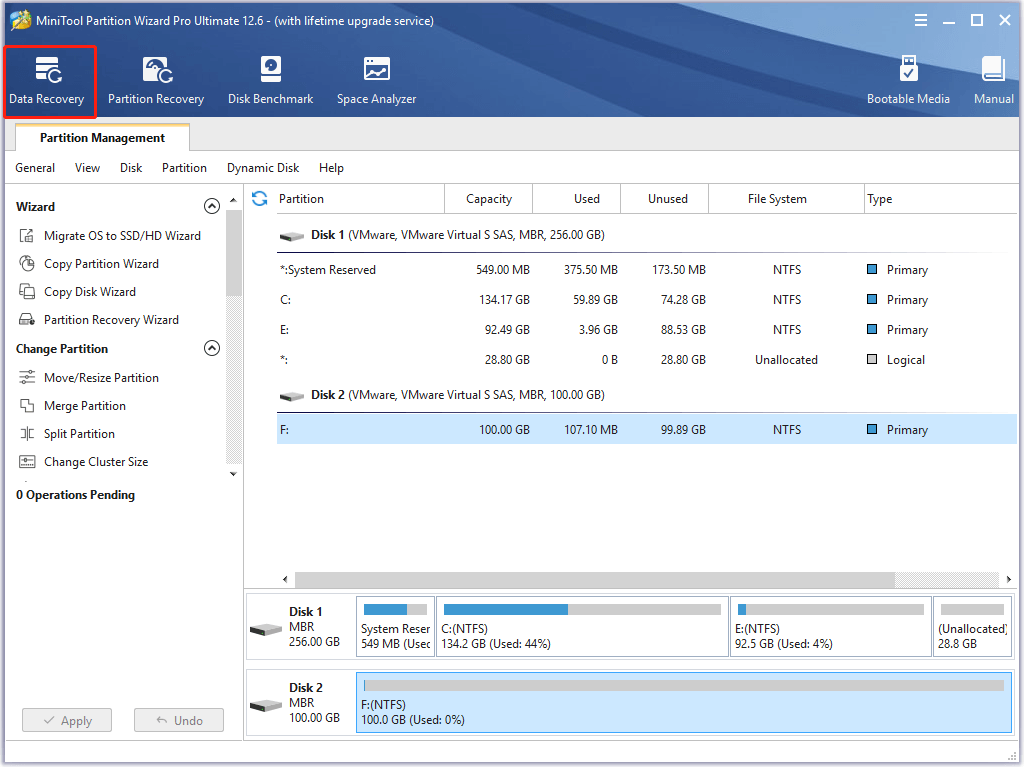
Step 1. Launch MiniTool Partition Wizard to get its main interface.
Step 2. To recover files from the hard drive, click Data Recovery on the top Tool Bar.
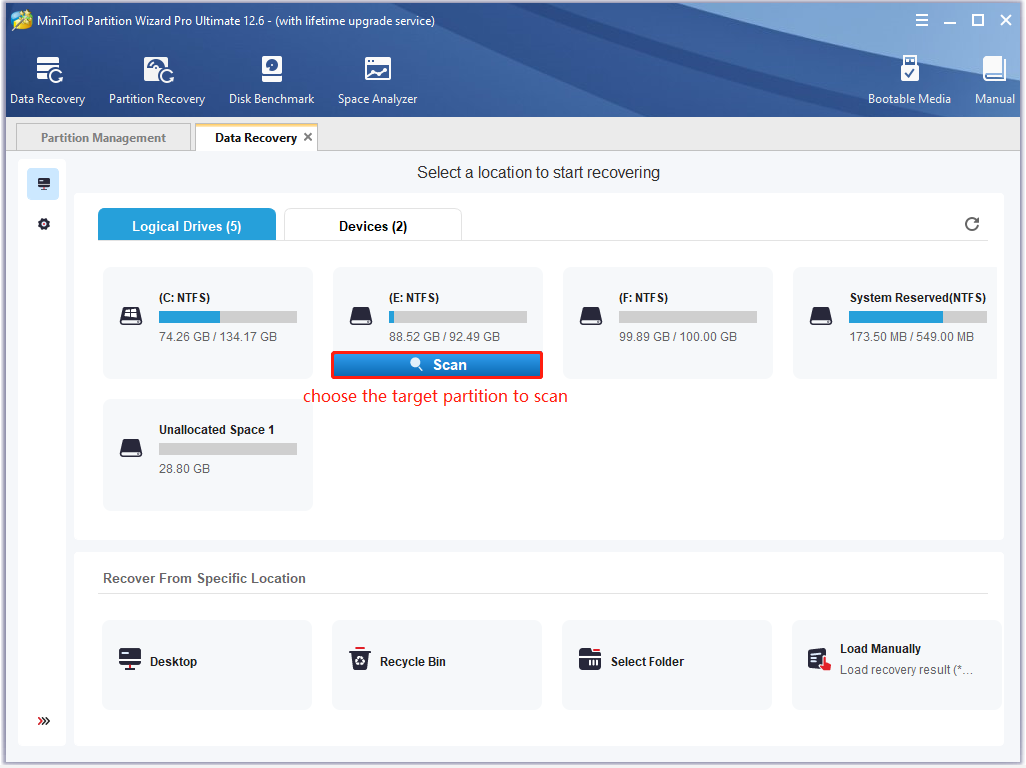
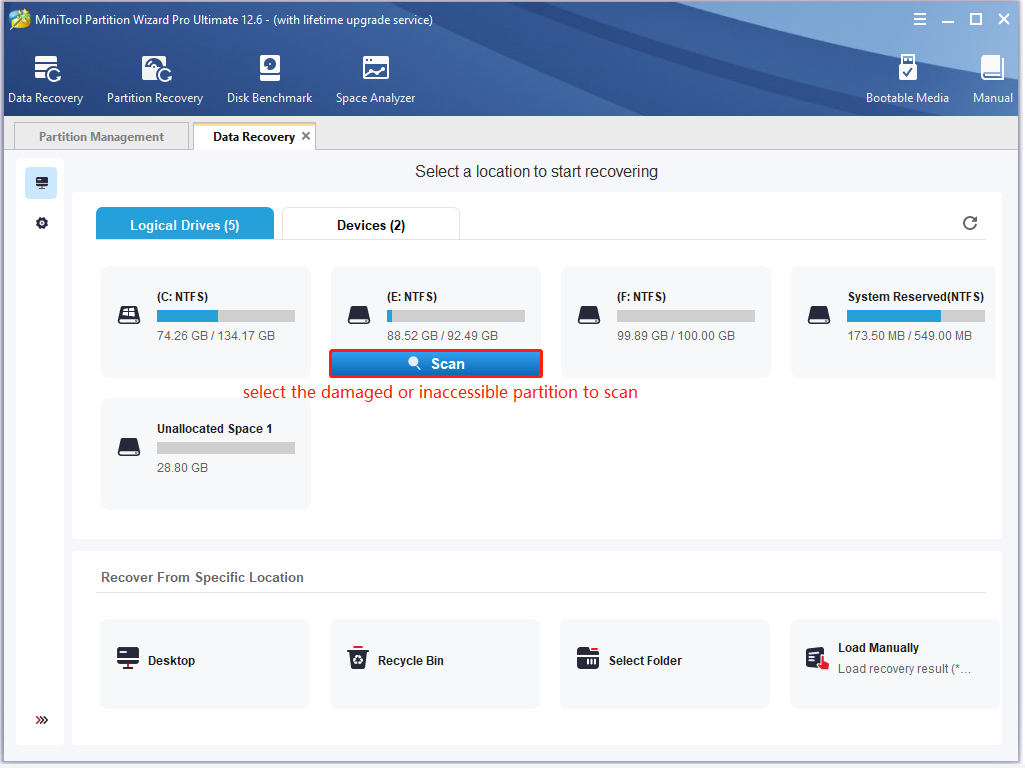
Step 3. After launching the Data Recovery function, users will enter the following interface where all the detected storages devices on the computer and specific locations for data recovery are listed.
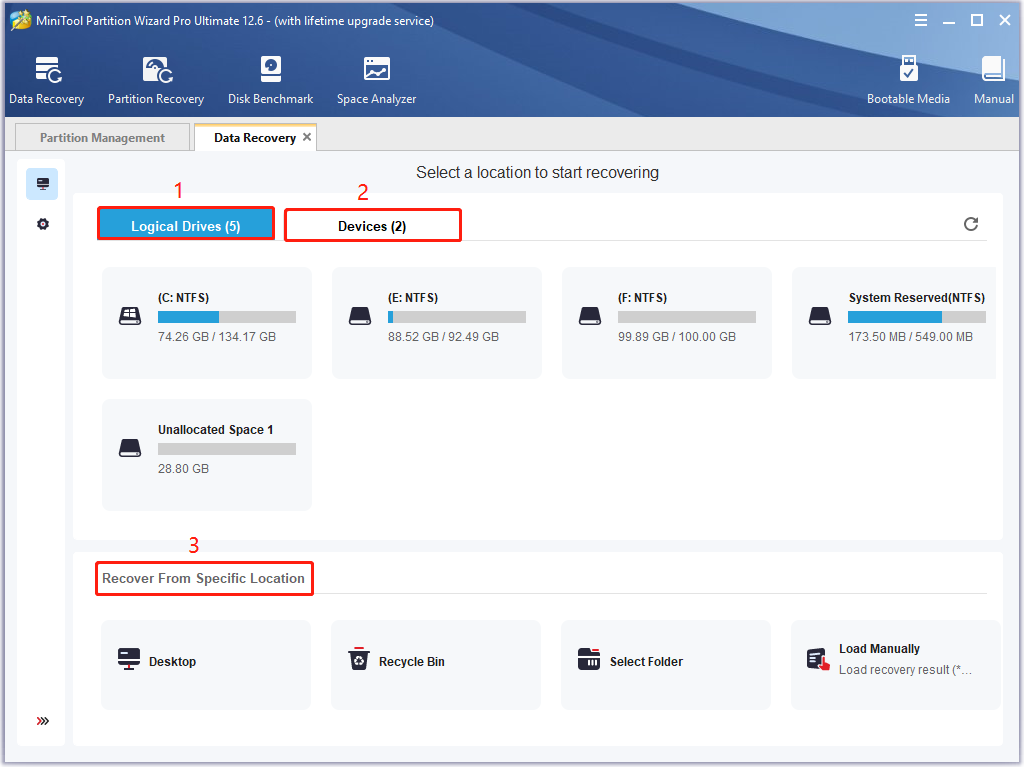
Here Data Recovery will list 3 parts, and every part is different from each other.
- Logical Drives: this section shows lost partitions, unallocated space, and all existing partitions on the PC, including removable devices like USB drives. For partitions without drive letters, lost partitions, and unallocated space, they are arranged at the end of this section.
- Devices: this section lists all hard disks connected to the computer. Users can select a hard disk to scan.
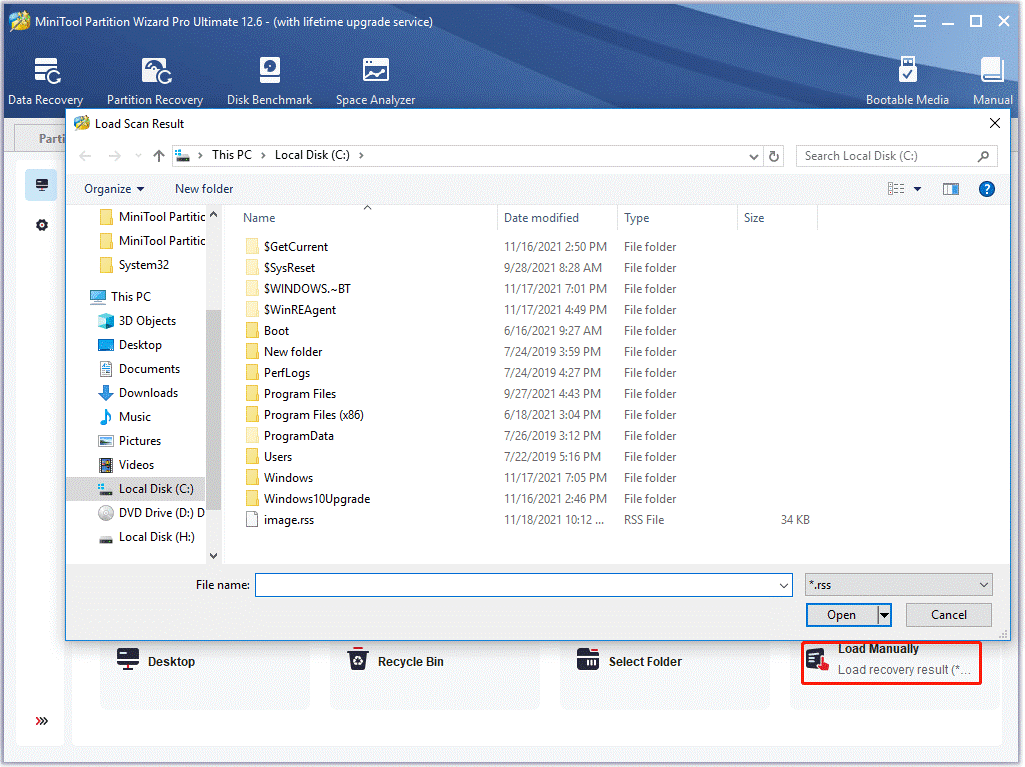
- Recover From Specific Location: this section allows users to scan and recover lost files from three specific locations (Desktop, Recycle Bin, and Folder). The Load Manually option allows users to load the last scanning result (a .rss file) to directly check the recovered files without more scans.
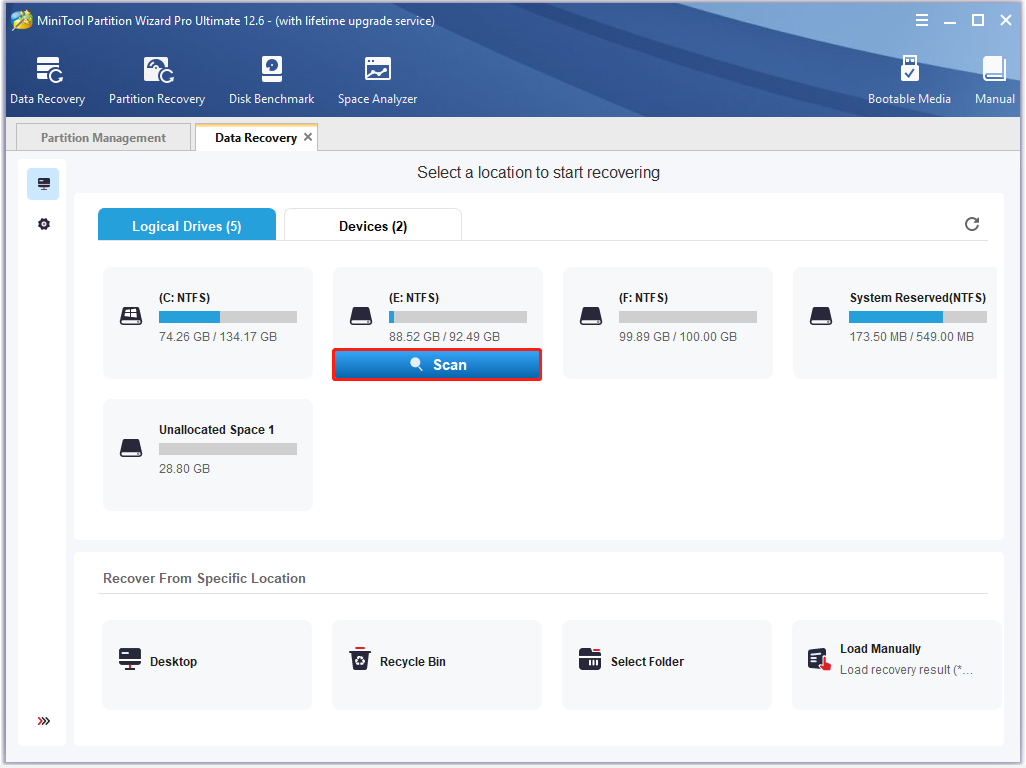
Then, move the cursor to a partition and click Scan. Here, take partition E for example.
Kindly reminder:
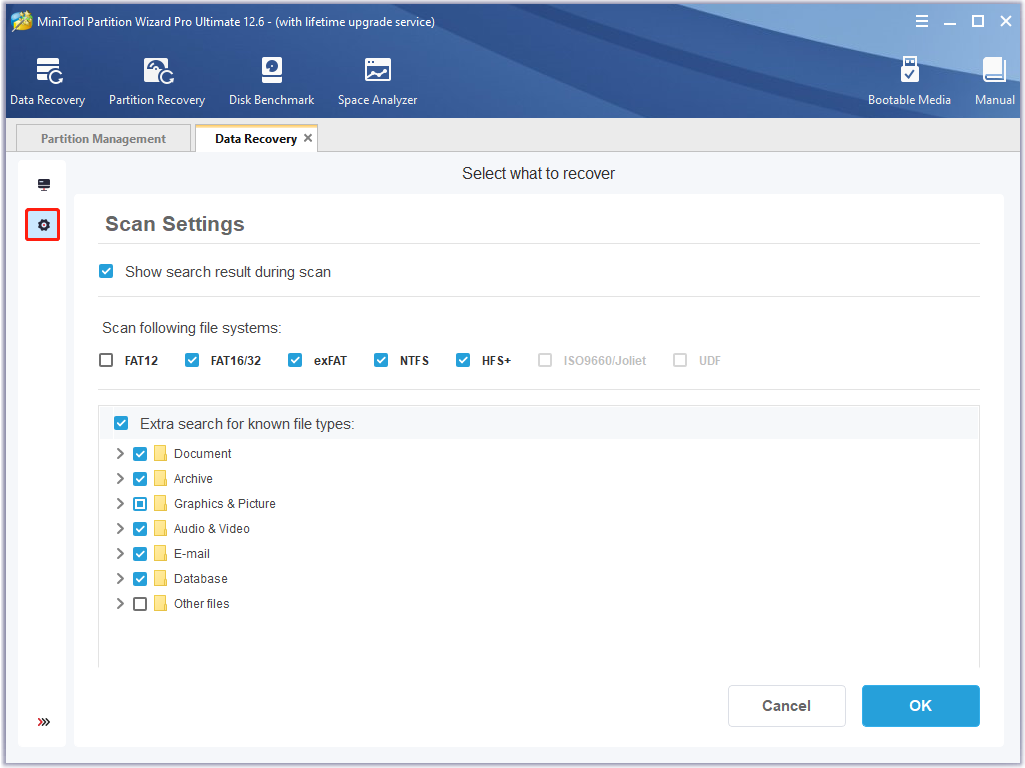
If the target partition is not listed, please click the Refresh icon on the top to refresh this interface. To recover some specified file types on certain partitions, use the Settings option to help.
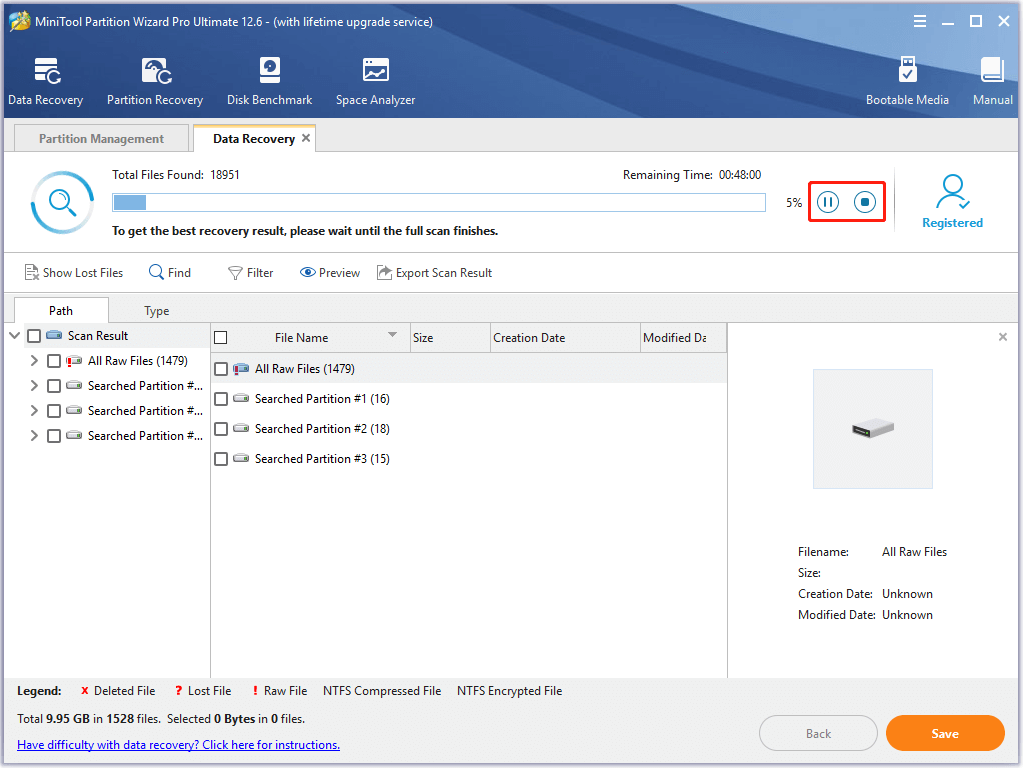
Step 4. See! This software is scanning the selected partition. And it can find the lost or deleted files while scanning. If users have found crucial data, they can click the Pause or Stop icon to get the instant data recovery.
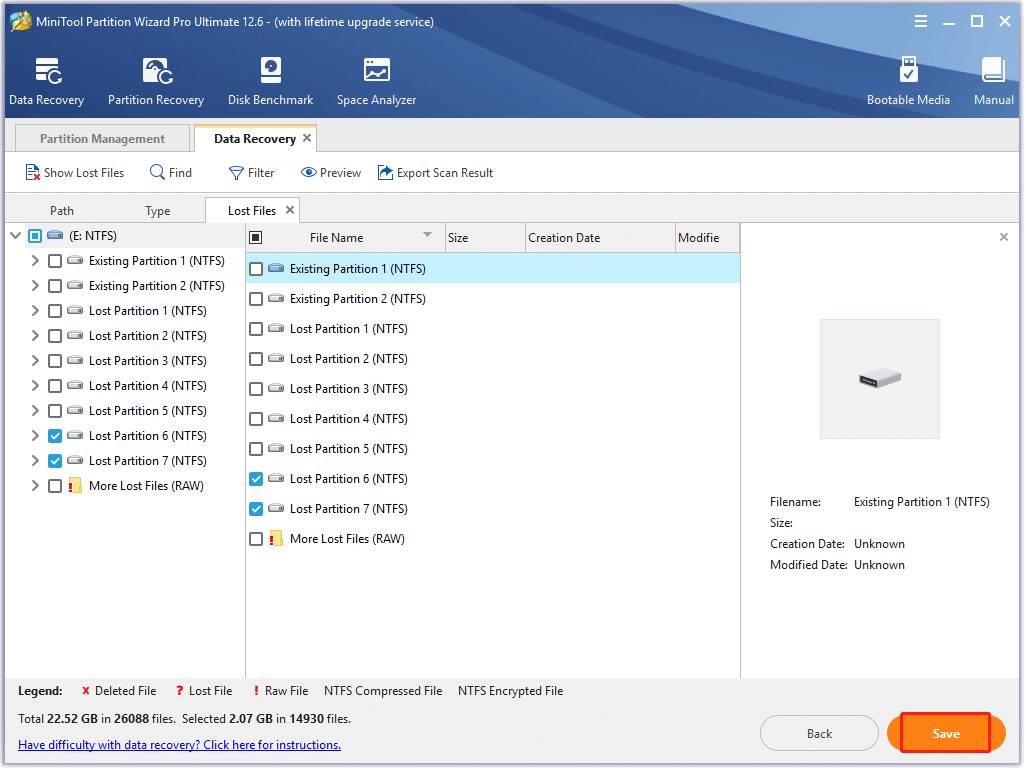
Step 5. After completing the scan, users need to find the files they need. Then, check some items and click the Save button.
Besides, to quickly find needed files, MiniTool Partition Wizard’s Data Recovery offers the following options.
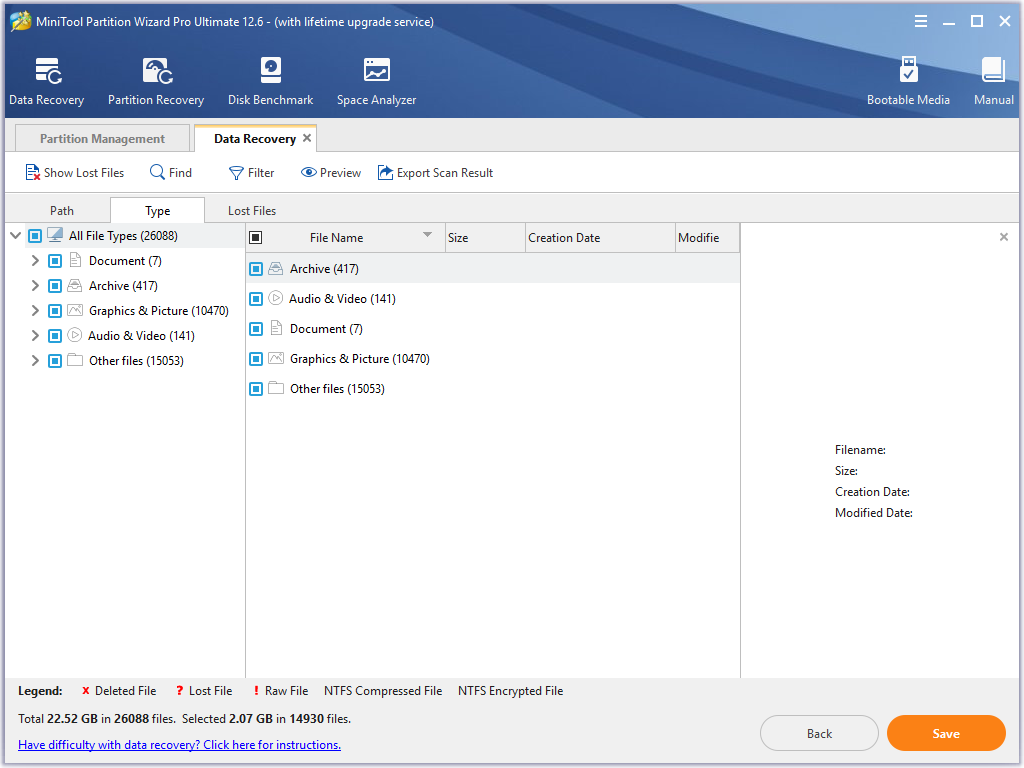
Type
In this section, all the found files will be displayed by file type. Just unfold a file type and choose certain items of this type to recover.
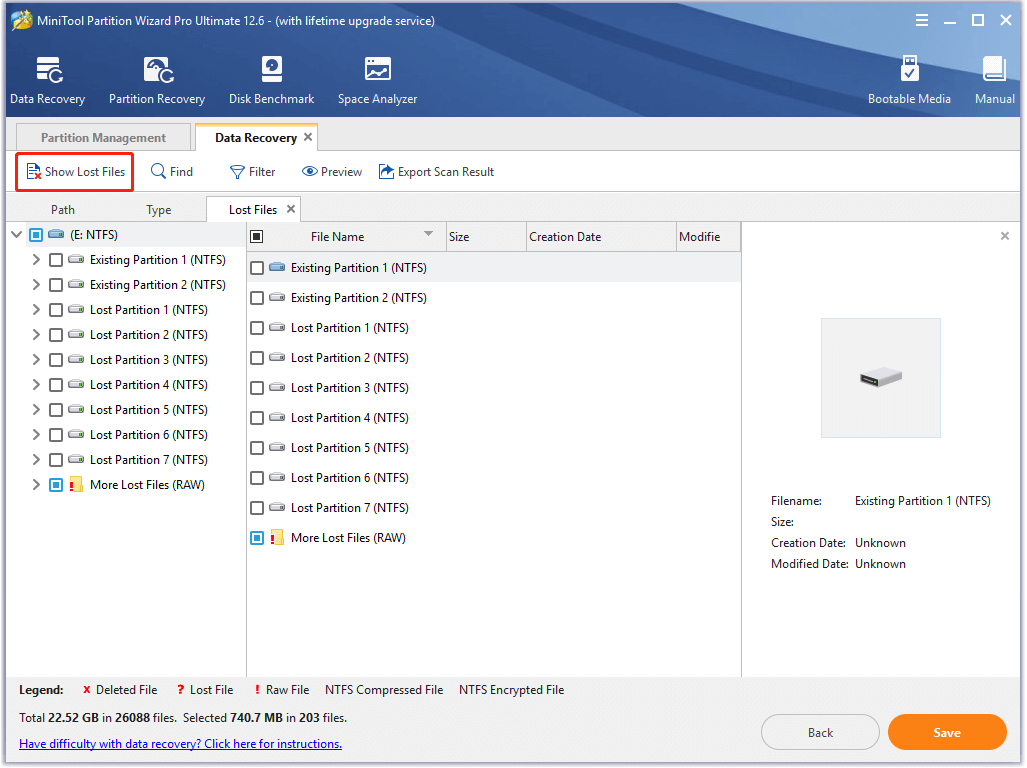
Show Lost Files
This option helps users find the lost files quickly. Just click the Show Lost Files button to make the software only shows the lost files.
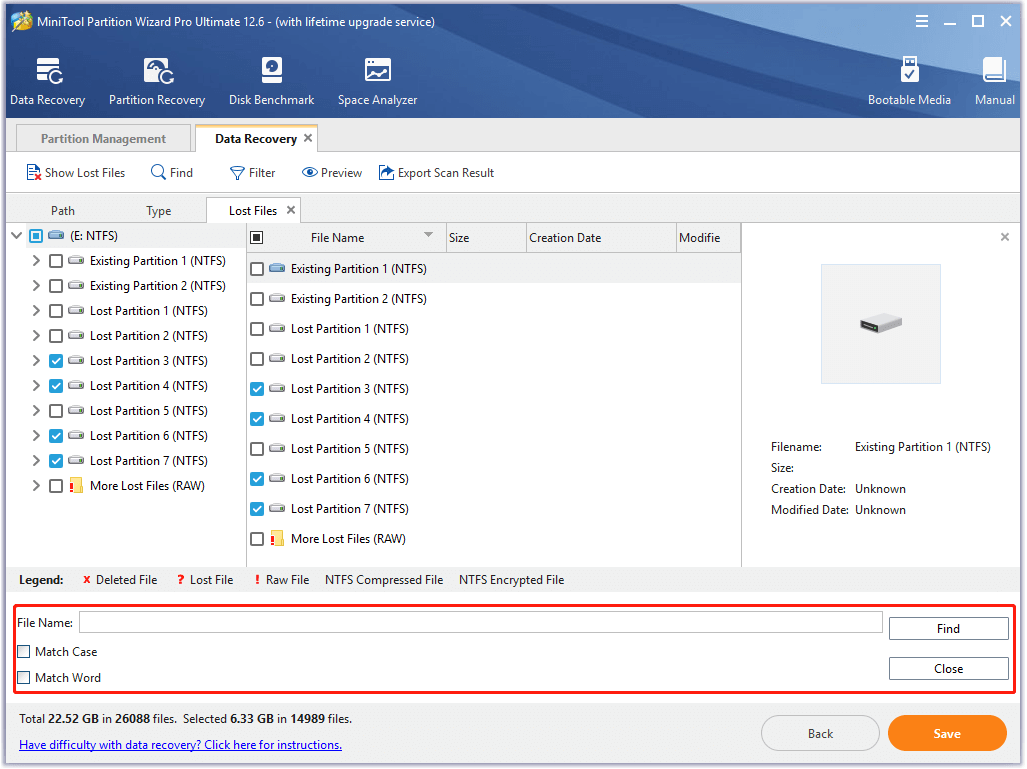
Find
This option allows users to input the specific file name so as to quickly find the needed file. Just click the Find button, type the file name and click Find finally. For an exact search, users can check Match Case or Match Word.
- The Match Case option requires users to pay attention to the capital and small letter of the file name.
- The Match Word option requires users to type the complete file name including the file extension.
- If there is more than one file that matches the searching condition, after clicking the Find button, users can click the Find Next button to check whether it is a needed file.
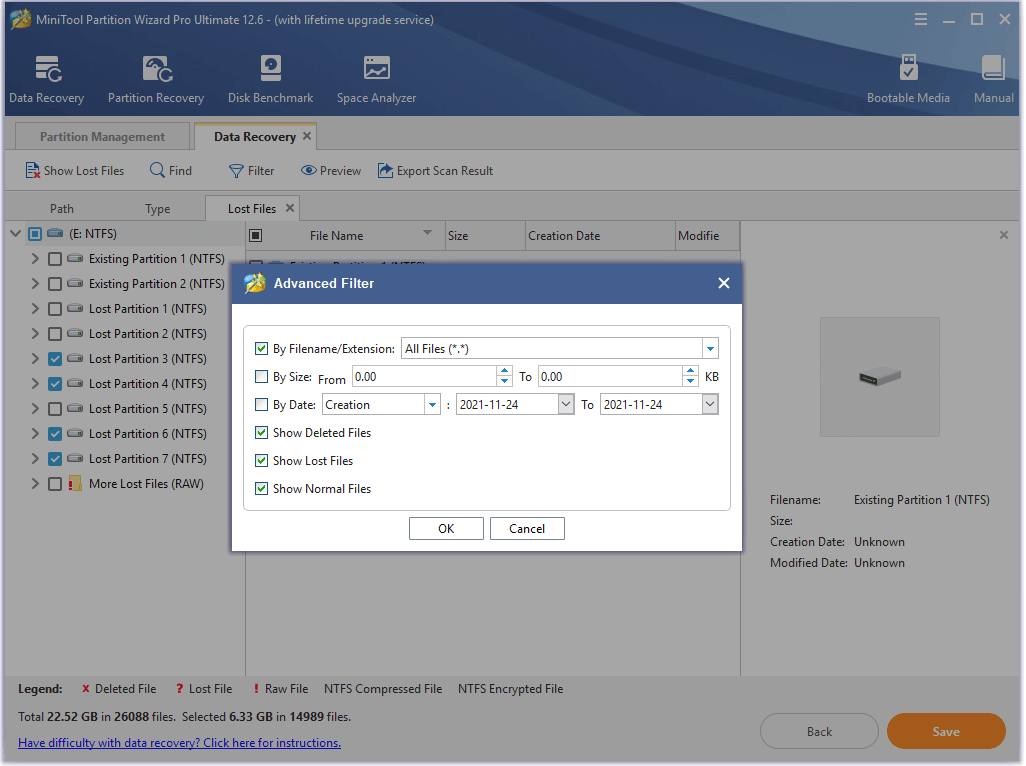
Filter
Click on the Filter tab to bring up the Advanced Filter window. In this window, users can search files by filename/extension, file size, creation, and modification date. Besides, users can also choose to show deleted, lost or normal files according to their needs.
Step 6. Finally, choose a directory to save selected files. It is recommended to save the recovered files on another drive. Otherwise, the lost/deleted data could be overwritten.
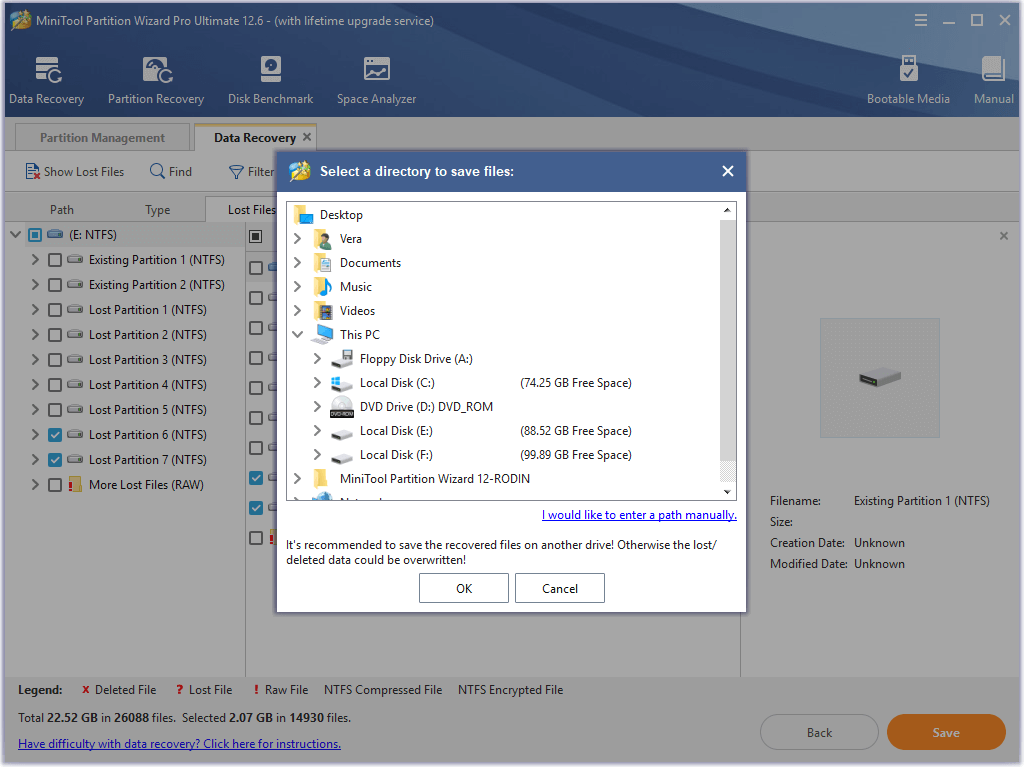
Kindly reminder:
If users don’t want to perform the recovery operation right now or have some problems when using this software, the Export Scan Result option helps them to export the scan result to avoid a new scan. Click this feature, add a file name for the .rss file, and export it to a location.

Next time when users open Data Recovery, just click the Load Manually option on the main interface and select the .rss file to upload the scan result directly so that they don’t need to rescan the drive for recovery.
These instructions could help users quickly find and recover files in Data Recovery under different cases.
• Please do not write any new files to the drive from which users want to retrieve deleted data, for doing this may overwrite the files which have been deleted.
• Please do not save recovered files to the original drive, because this may also overwrite deleted data.
• Overwritten files can’t be recovered anymore.
How to Quickly Find and Recover Deleted Files
Run Data Recovery and choose the partition where the lost data is originally saved to scan. The partition E is selected in this test.
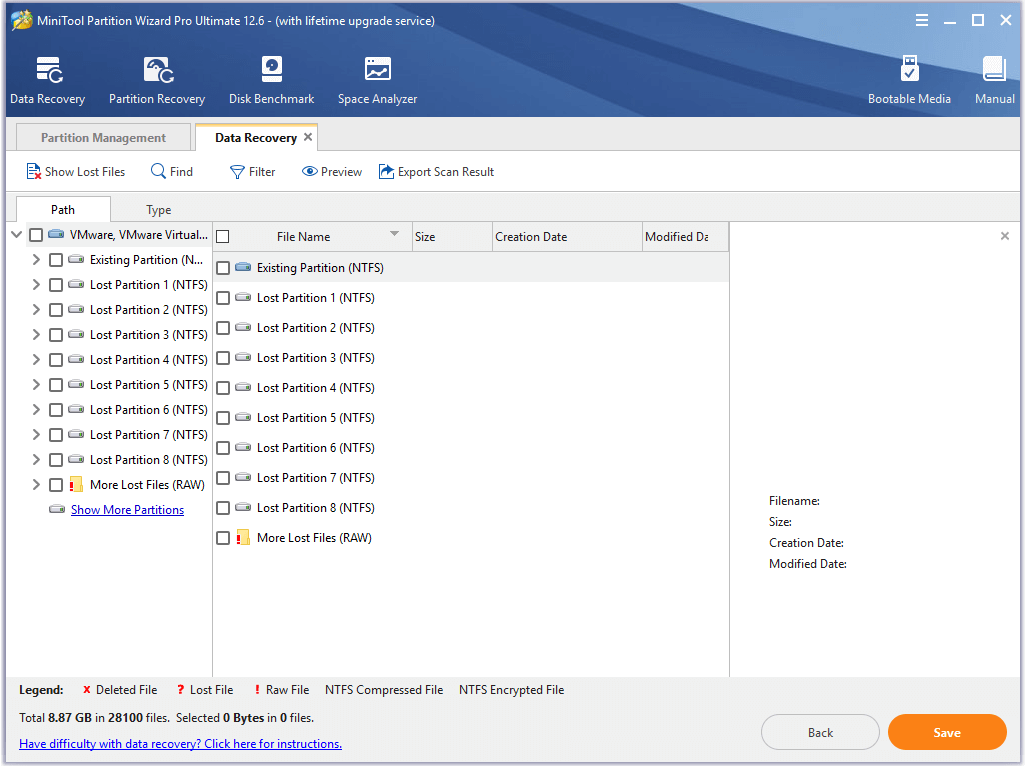
After the scanning is completed, the scanning result interface displays as follows:
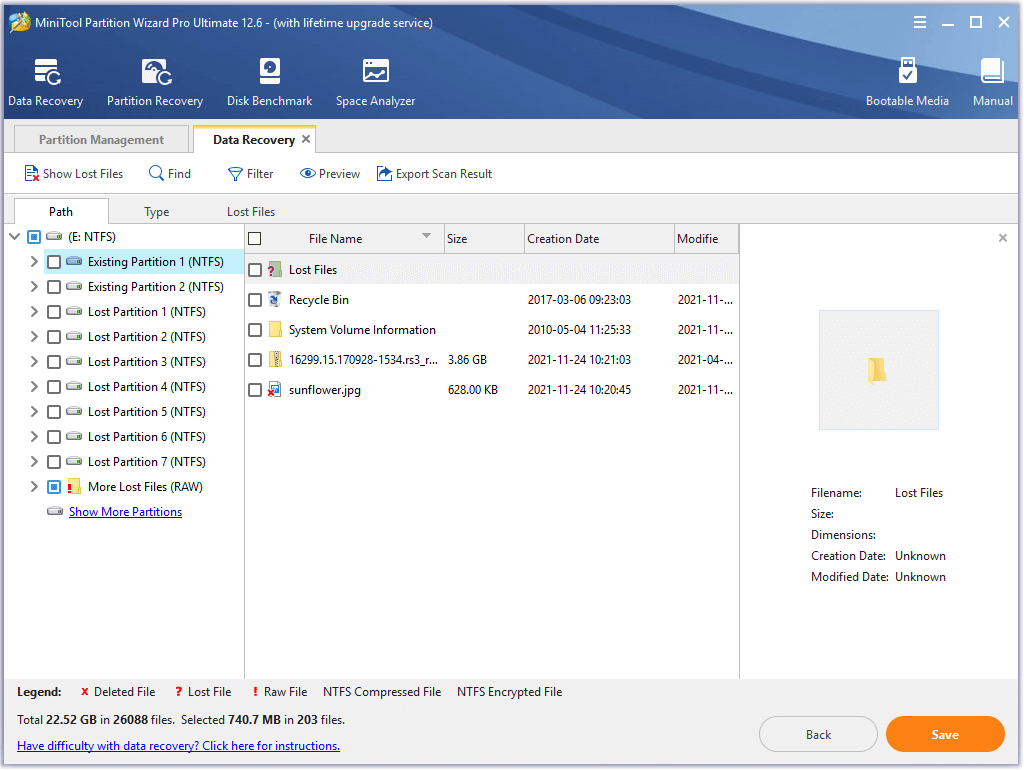
In this window, users can find and save files from one of the following 4 locations:
1. Original Folder Tree
In general, the deleted items can be found from the original path. Please double-click each partition to view contents, and in most cases, users can find needed files from the first partition (Existing Partition). The deleted items are always marked with red “x”. Of course, they can be found from other partitions in addition to the first partition.
2. $Dir Folders in the Lost Files Folder
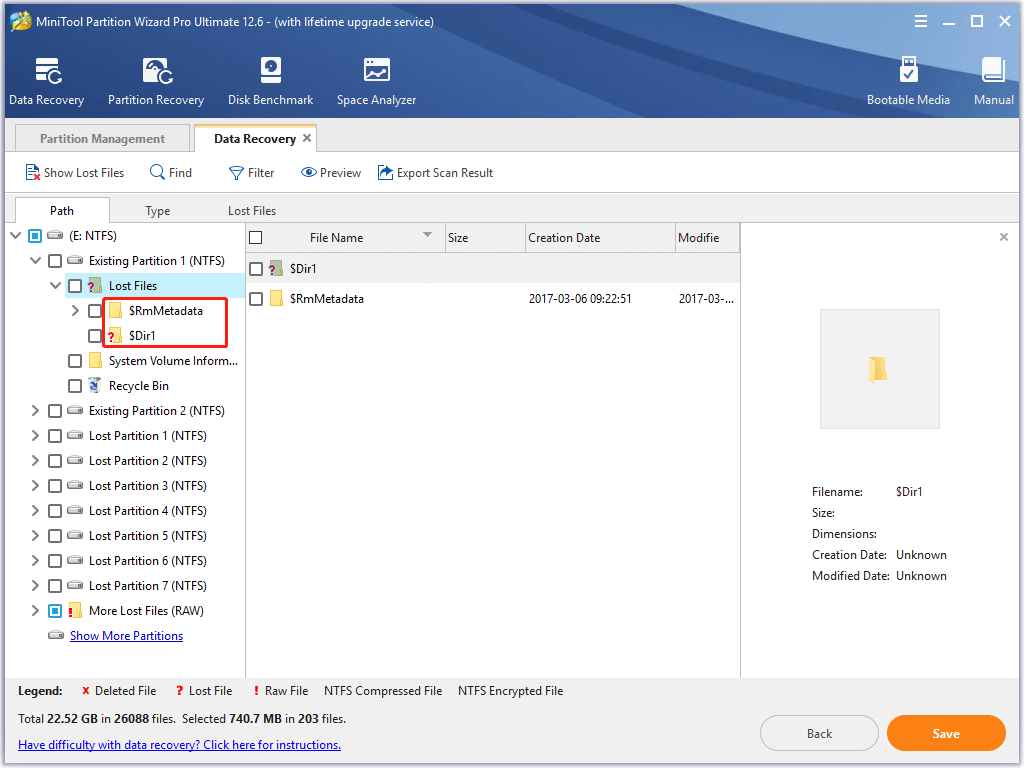
If the needed files can’t be found from the original path, please double click the Lost Files folder in each partition and view files in the $Dir folders. The deleted items are always saved in $Dir folders if they are not in the original path.
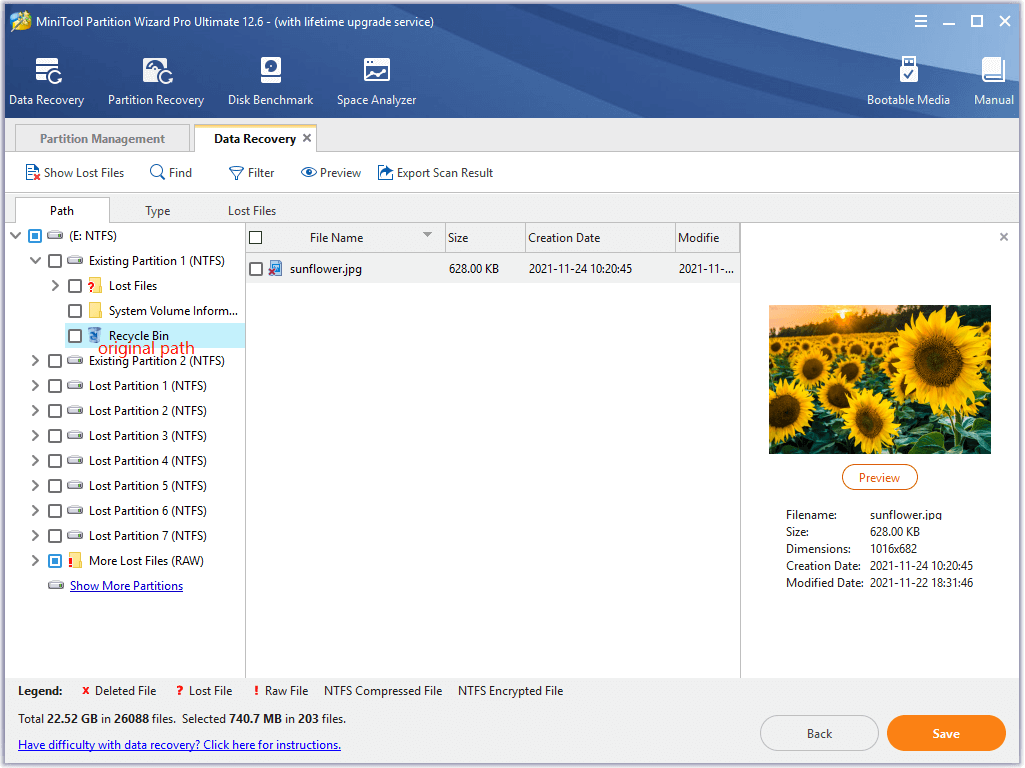
3. Recycle Bin Folder
If lost files were originally saved on HDD, check the Recycle Bin folder, as the following screenshot shows:

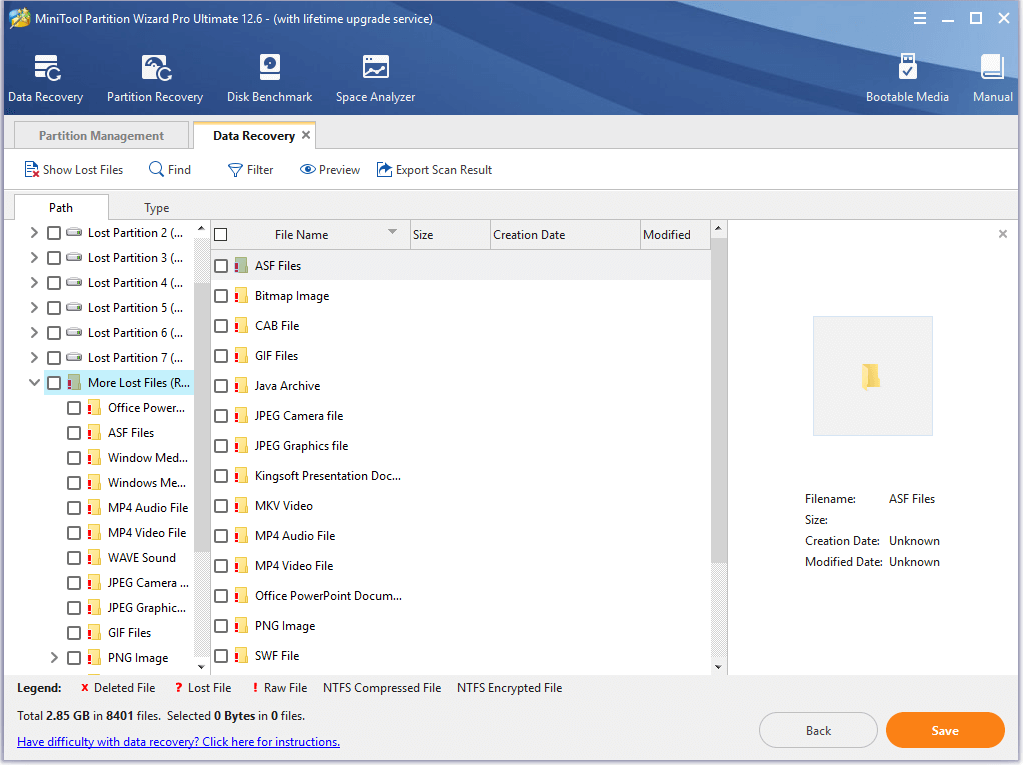
4. More Lost Files Folder
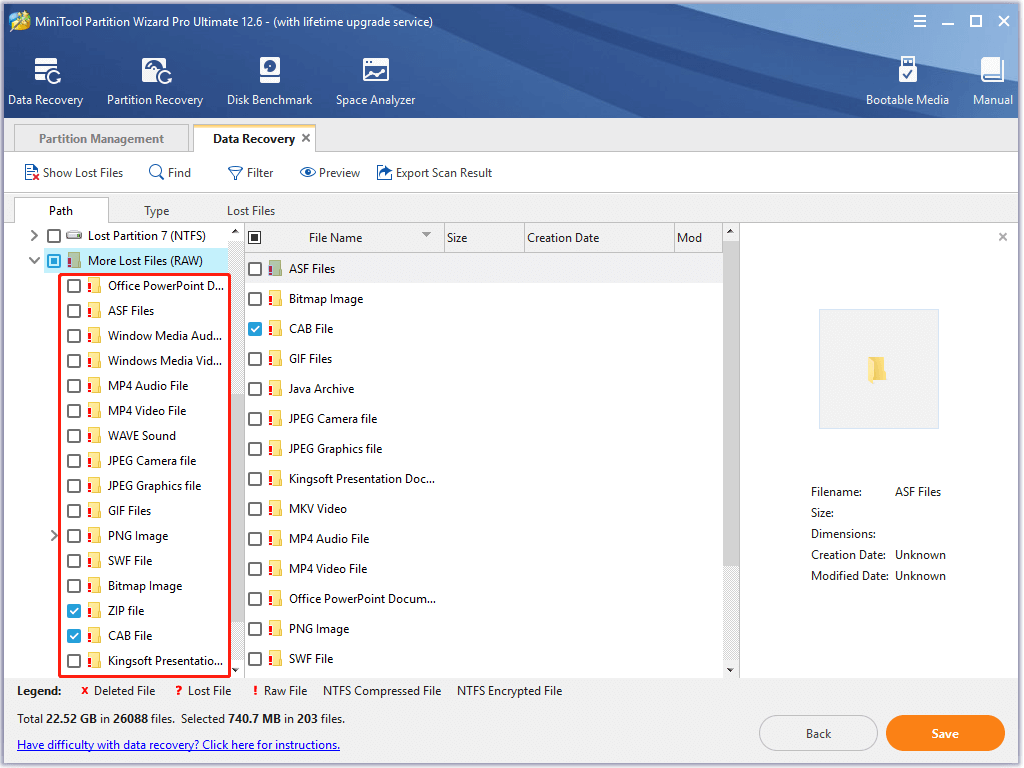
Just double-click the More Lost Files folder and recover specified types of files. Files saved in this folder are found by directly scanning the data area (bypass file system), so they will lose original names. Recover them to a different drive to view the contents.
How to Quickly Find and Recover Files from Formatted Drive
Run Data Recovery and then select the formatted drive to scan. In this test, partition E is selected to scan.

After the scanning is completed, the following interface will appear:
Please double-click each folder to view contents. If users can find files from the Deleted Files folder, just choose the needed files and save them to another drive. If users can’t find the needed files from that folder, open the Lost Files folder to find the lost files. Please double-click the Lost Files folder, and then view files. In the test, desired files are found from $Dir folders:

Recovered files can be found and saved in the More Lost Files folder too.
Please choose specified types of files and save them to another drive.
How to Quickly Find and Recover Files from Damaged/Inaccessible Drive
Firstly, please run Data Recovery and select the damaged or inaccessible drive to scan:
After the scanning is completed, users will get the result.

Please double-click each partition to view contents. If the needed files can be found from the original folder tree, that’s great. Just choose and save needed files to another drive. But in most cases, users have to recover data from the More Lost Files folder.
How to Quickly Find and Recover Files from Lost Drive
Firstly, please run Data Recovery and see whether it can find the lost files by clicking lost partitions.
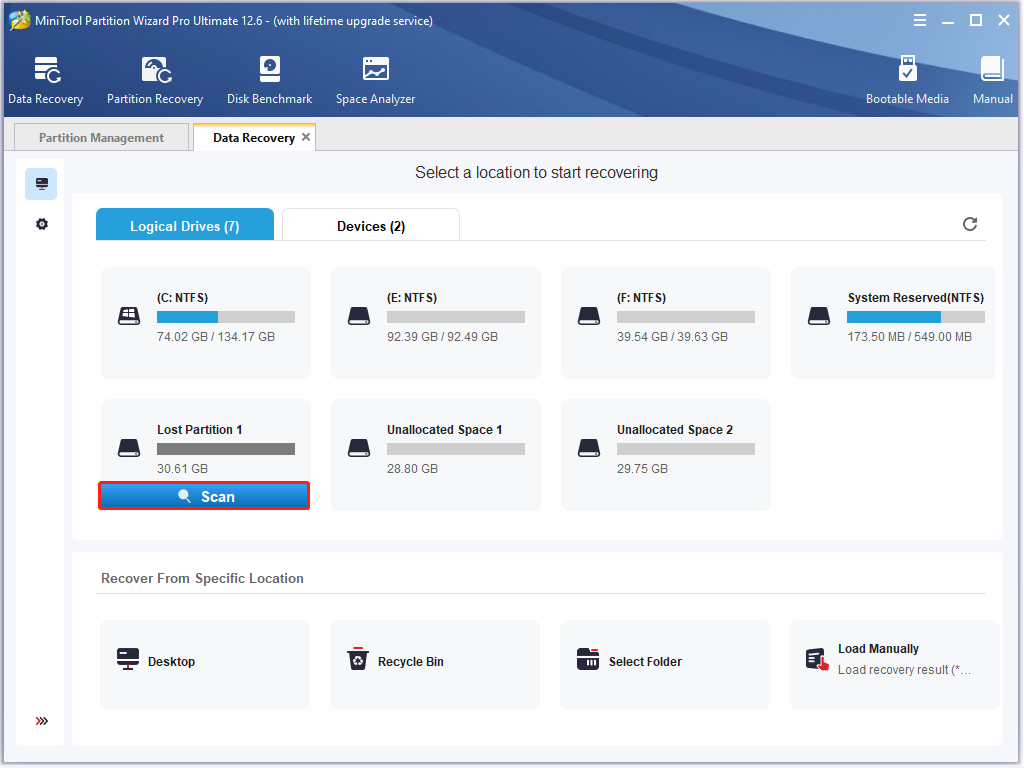
If found, just select the lost drive to scan. If not, please click the Devices tab, and choose the whole hard disk to scan:

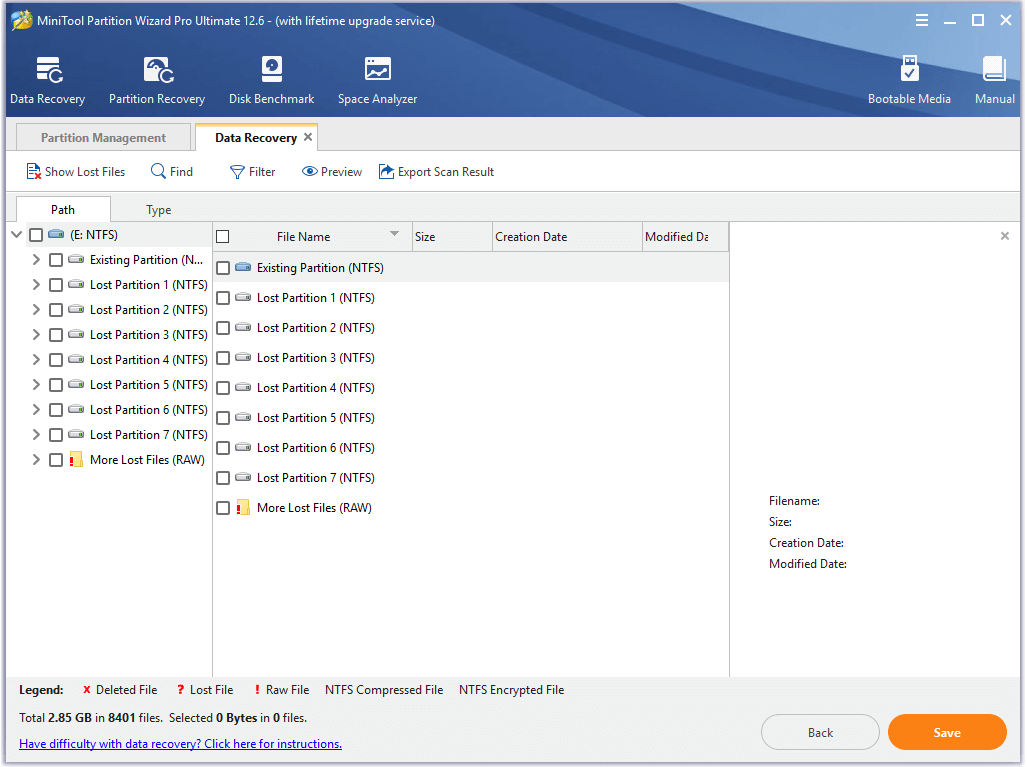
After the scanning is completed, the picture below will show up:
Please double-click each partition to browse contents in either the original path or the Lost Files folder. If users can find desired files from one of those partitions, just save them to another drive. On the contrary, find the needed files from the More Lost Files folder and save them to another drive.
How to Perform RAW Scan
In some cases, users are suggested to do a RAW scan using Data Recovery. This always happens when the program gets stuck in the process of rebuilding the virtual file system. After RAW scan, all files found will be listed in a drive named ALL RAW Files.
To perform a RAW scan, please run Data Recovery, find the existing partition/lost partition/unallocated space to be recovered, and go to Settings. Then uncheck all the file systems before scanning the desired.
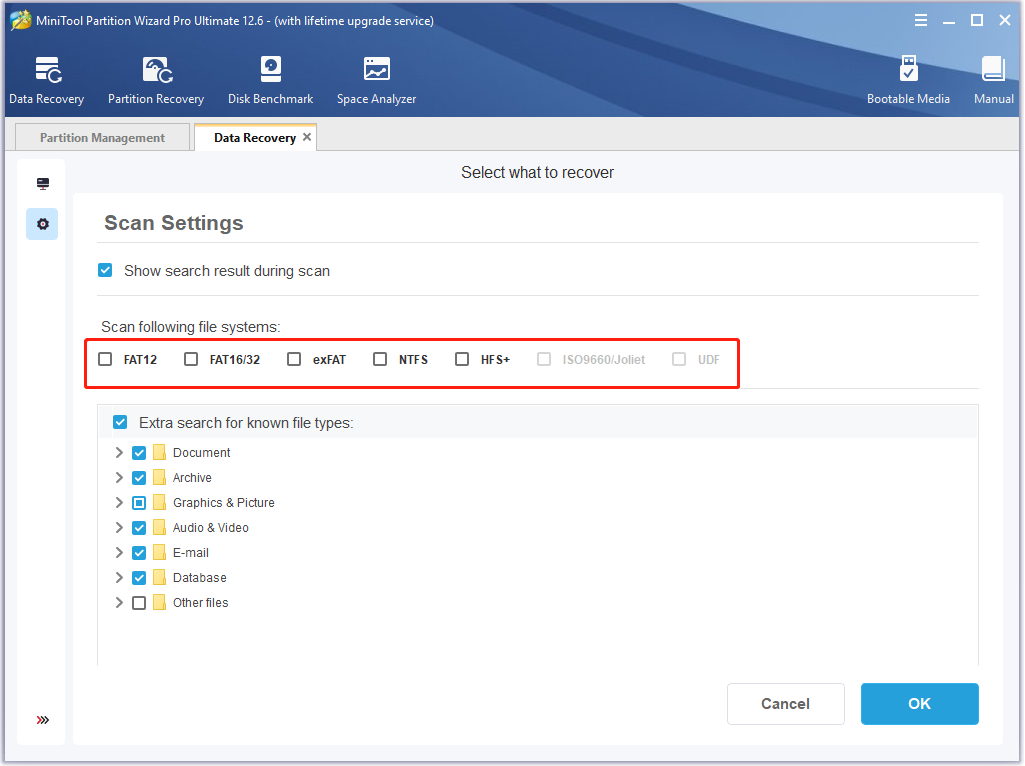
However, if the RAW scan also fails to display useful data, that means there is no data our program can recognize or the disk read failed.
FAQ when Using Data Recovery
1. How to recover files from ESD-USB drive?
ESD-USB drives are usually caused by burning Windows to an external hard drive. And then you get a hard drive with 32GB FAT32 partition followed by unallocated space taking up all the rest disk space. To recover data from ESD-USB drives, please make sure you are select the whole disk drive (in Hard Disk Drive module) instead of selecting the 32GB partition or the unallocated space to have a scan.
2. How to recover data from BitLocker encrypted hard drive?
Data Recovery cannot recover data from BitLocker encrypted hard drive unless you decrypt in advance.
3. How long will it take to complete the scan process?
The time required to scan a drive depends on many factors, such as how many data you saved in this drive and the current status of the drive.
4. Got the error message “failed to find any file system information from the specified device”, and no files are found.
Most probably your device has physical issues. In this case, please take a screenshot to show us your disk layout in Windows Disk Management or use hard drive testing tools like CrystalDiskInfo to see whether your hard drive has physical issues.
5. Why the program found a lot of partitions?
When our program finds a file system track, after scanning it will show it as a partition no matter the file system is intact or not. If it finds 10 file system tracks, it will show 10 partitions. If the file system is intact, all files in this partition will be shown correctly. If file system is incomplete or corrupted, all files will be in the RAW Files folder and lose their original name.
Files in the All RAW Files partition are found over the file system, so they lose original names and date info.
6. What does RAW Files mean?
RAW Files means that all files in it are found over file system, so they lose original names and date info. How does this occur? Well, when our program found files form incomplete or corrupted file systems, all files will be in the RAW Files folder.
7. What does $Dir file mean?
$Dir files are found from NTFS file system and the file record gets corrupted. When our program cannot find the parent directory of a file, that file will be included in a $Dir folder.
8. Why recovered files lost original names and are shown as file1, file2, file3…
In general, there are 2 causes for this issue:
1) Errors occurred during the process of scanning. In this case, please rescan the drive.
2) File system is damaged. In this case, the original folder structure can’t be restored.
9. The program said it saved files successfully, but I just found an empty folder.
In general, there are 4 causes for this issue:
1) There is not enough free space on the drive to save the file. Please double-check the unused space of the drive.
2) There are errors in the path selected for recovered files. In this case, please right-click an individual file and recover it to the root directory of a drive to see whether it is there. If you have already closed the program, you can relaunch, choose the function you used to scan the drive and load previous scanning results.
3) Errors occurred during scan. In this case, please rescan the drive and then save an individual file to see whether it is there.
4) File system of the drive you used to save recovered files isn’t supported by Windows. Please try saving files to an NTFS or FAT32 partition.
10. Recovered files can’t open in any other supported programs.
In general, there are 3 causes for this issue:
1) There are errors in the path selected for recovered files. In this case, please right-click an individual file and recover it to the root directory of a drive to see whether it can open correctly. If you have already closed the program, you can run it again, choose the function you used to scan the drive and load previous scanning results.
2) Errors occurred during scan. In this case, please rescan the drive and save an individual file to see whether it can open.
3) The file got damaged before recovery. Data Recovery can only recover lost/deleted files but can’t repair damaged files.