Some users reported that they received the “The Windows wireless service is not running on this computer” when they tried fixing internet issues with the inbuilt network troubleshooter. What’s the error’s meaning? How to fix get rid of the error? All these are discussed in this post.
Windows Wireless Service Is Not Running
The “Windows wireless service is not running” error is a normal Windows issue and it usually means that Windows cannot initialize the wireless service and tries to connect to broadcasted signals.
When you receive the error, please do not worry and you should check whether your wireless network is turned on. If you have turned on your wireless, please try the following solutions.

Fix 1: Check WLAN AutoConfig Service
WLAN AutoConfig service offers the logic which is required to configure, discover, and connect from a wireless local area network. If the service is turned off, the “Windows wireless service is not running” may happen. So, follow the tutorial below to check the service’s status.
Step 1: Press Windows + R and you will see the Run dialogue box.
Step 2: Type services.msc in the dialogue box and then hit the Enter key.
Step 3: On the Services window, find the WLAN AutoConfig entry and see if the status of the service is set to Running.
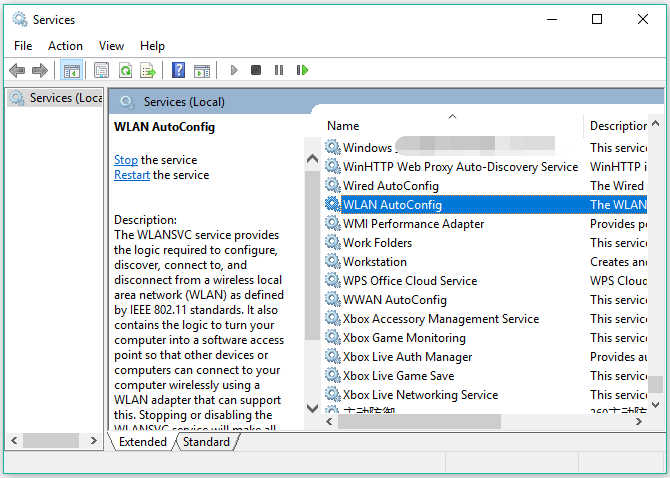
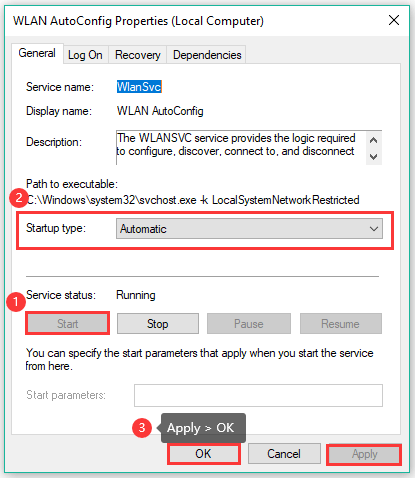
Step 4: If not, double-click the service to make changes to this service:
- Click the Start button to turn on this service.
- Change the Startup type to Automatic.
- Click Apply > OK to save the changes.
Now, you can connect to your wireless network and see if the error persists.
Fix 2: Update Network Drivers
Outdated drivers can trigger the error message “the Windows wireless service is not running on this computer”. So, try updating your network drivers.
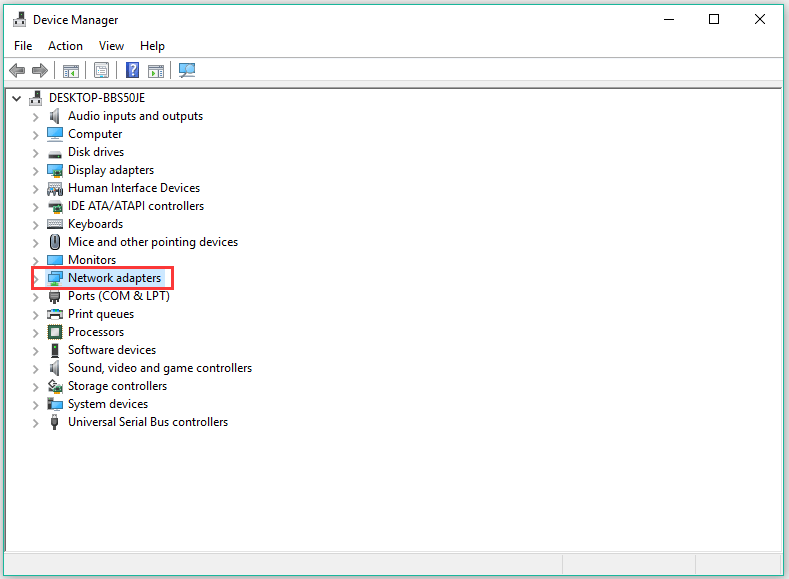
Step 1: Press Windows + X and then choose the Device Manager utility from the Quick Access menu.
Step 2: On the Device Manager window, locate Network adapters and expand it.
Step 3: Right-click the wireless adapter that is responsible for the connection and choose the Update driver option.
Step 4: In the update window, select the Search automatically for updated driver software option.
If there are some updates available, Windows will automatically install them. When the process over, see if the error message still appears.
Recommended article: is driver easy safe
Fix 3: Perform SFC Scan
Performing an SFC scan could be helpful. So, have a try.
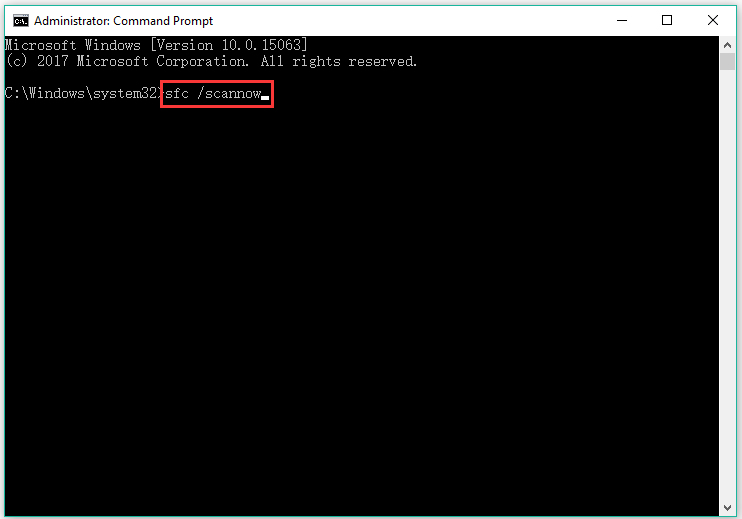
Step 1: Type cmd in the Windows search bar and then right-click it to choose the Run as administrator option.
Step 2: On the Command Prompt window, type sfc /scannow and hit the Enter key to run it.
Step 3: Wait for the command to finish its task and then restart your computer.
Once your computer boots, check if the “Windows wireless service is not running Windows 10” error gets removed.
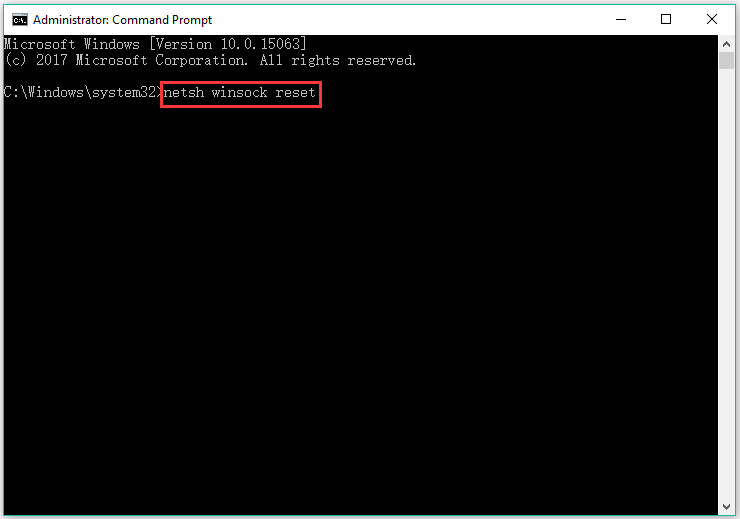
Fix 4: Reset Network Configurations
The “Windows wireless service is not running” error may appear when Network settings get disrupted or corrupt. In this case, you can try resetting network configurations to troubleshoot the issue.
Step 1: Run Command Prompt as administrator.
Step 2: Type netsh winsock reset and hit the Enter key to run it.
Step 3: Follow the on-screen instructions to complete this resetting.
Fix 5: Perform a System Restore
Does the error message appear after you install a Windows update? If yes, there is a chance that the installed Windows update broke the wireless mechanism. In this case, you can perform a system restore.
Step 1: Type restore in the Windows search bar and then click the Create a restore point option.
Step 2: Under the System Protection tab, click the System Restore button.
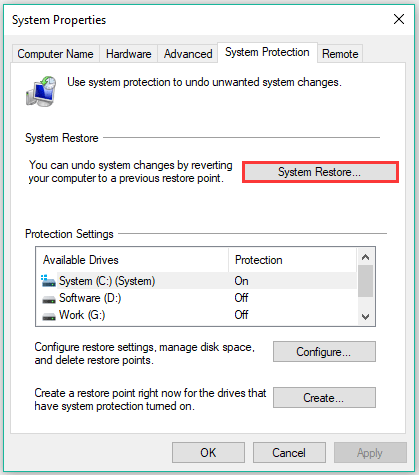
Step 3: Follow the on-screen instructions to roll back to the last version.
Have you gotten rid of “The Windows wireless service is not running on this computer”? If not, the last resort is to install a clean version of Windows on your computer after backing up important files.
User Comments :