Windows 11 is a new operating system released in 2021. Unfortunately, some users reported the Windows 11 not printing in color issue. To fix the issue, this post from the MiniTool Partition Wizard website introduces some solutions.
Windows 11, a new operating system, is designed as the successor to Windows 10. It was officially released on October 5, 2021.
Windows 10 users can upgrade to Windows 11 for free. However, some users reported that they couldn’t print in color after upgrading to Windows 11. It could be annoying for people who usually use colorful spreadsheets or Word files.
If you are bothered by this issue, too, don’t worry. You can try the following fixes.
Fix 1: Make Sure You Have Enabled “Print in Color”
If you don’t enable the “Print in color” feature in your printing settings, you can’t print in color after upgrading to Windows 11. You can follow the steps below to change the settings.
Step 1: Click the Search tool on the taskbar and search for Control Panel. Then open it.
Step 2: Select view by Category. Then click View devices and printers under the Hardware and Sound category.
Step 3: In the Devices and Printers window, scroll down to find Printers. Then right-click your printer and select Printing preferences.
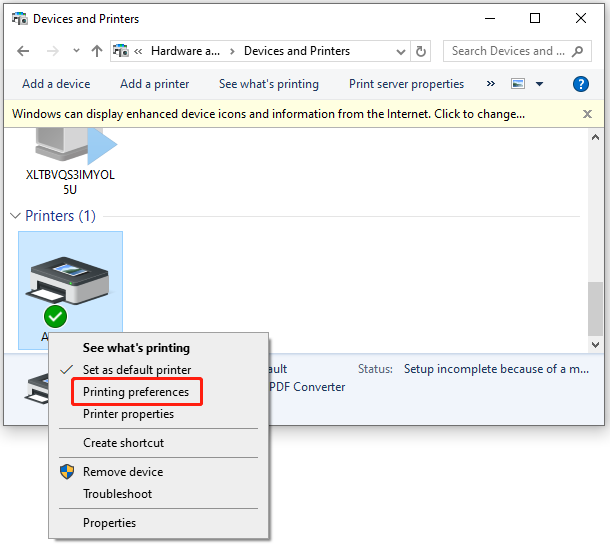
Step 4: In the pop-up window, find color settings and select the Color or Print in color option instead of Print in greyscale or Black & White.
Step 5: Click Apply and OK to save the changed settings.
If the problem of Windows 11 not printing in color still exists, you should move on to the next solution.
Fix 2: Update the Printer Driver for Your Printer
Windows 11 not printing in color might happen if your printer driver is outdated or corrupted. In this case, you need to install the latest printer driver.
There are three ways and you can choose the one you prefer to have a try:
- Update your printer driver via Device Manager
- Check for printer driver update in Windows Update
- Download the latest driver from the official website of your printer’s manufacturer.
For the detailed steps, you can refer to our previous post: How to Download, Install, and Update Windows 11 Printer Driver.
Fix 3: Reinstall the Whole Printer
Removing and then re-adding the printer is also a good way to solve Windows 11 not printing in color. Many users reported it helps and you can also have a try. You just need to open Control Panel and go to Devices and Printers. Then right-click your Printer and select Remove device to uninstall the printer. After that, add your printer to Windows 11 again.
Now, you can try printing something and hope your printer works properly on Windows 11 this time.
Fix 4: Run Printer Troubleshooter
Windows 11 is designed with some built-in troubleshooters that can help you solve certain hardware issues. When you can’t print in color in Windows 11, you can run the printer troubleshooter to check and fix the problem.
Step 1: Press the Windows key along with the I key on your keyboard to open Windows Settings.
Step 2: In the left pane, select System. In the right pane, select Troubleshoot.
Step 3: Click Other troubleshooters to view more troubleshooters. Then click the Run button next to Printer to run the printer troubleshooter.
After that, you can follow the on-screen instructions to finish the troubleshooting process.
If you have more ideas, you can share them with us in the following comment zone.
User Comments :