Nvidia graphics pays more attention to 3D performance and speed in design and its advantages are good compatibility and strong performance. The higher the graphics card performance, the smoother the gameplay and the clearer video watching. The Nvidia GPU can be also used to handle all the heavy graphics work.
The Nvidia is useful for you, so please keep reading to know how to switch from Intel graphics to Nvidia Windows 10 laptop.
Set Nvidia Graphics Card as Default on Windows 10
The Settings on Windows 10 allow you to set your preferred GPU to Nvidia. Here we will show you the detailed steps to set Nvidia Graphics card as default on Windows 10.
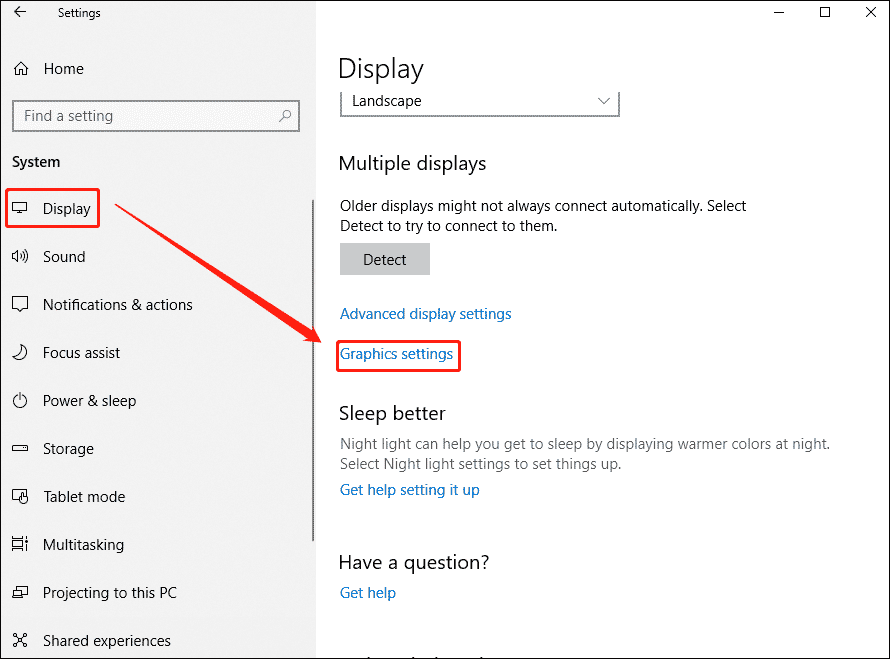
Step 1: Open the Settings by pressing the keyboard shortcut Win + I.
Step 2: In the Settings, navigate to the System > Display option. On the right panel, scroll down and click the Graphics settings option.
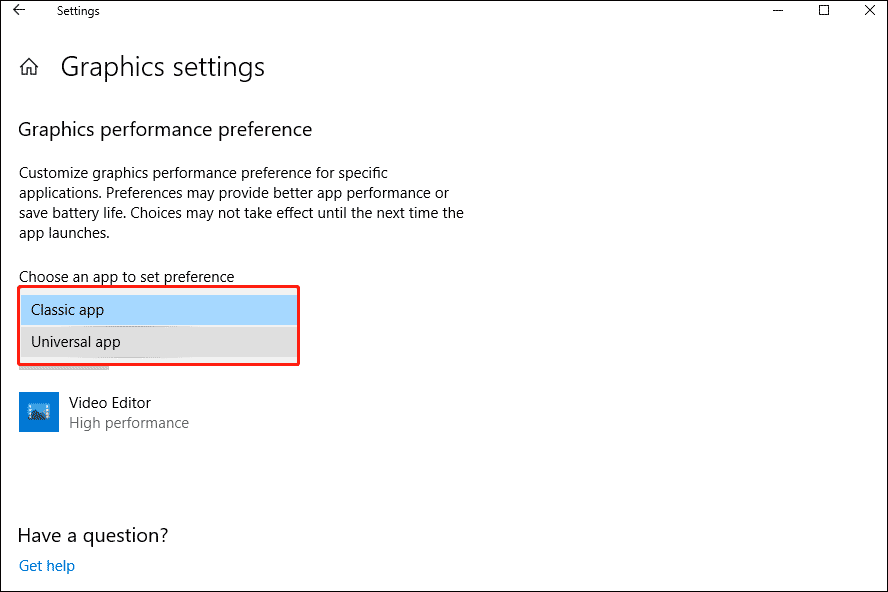
Step 3: Select the app type from the drop-down menu to set preferences. If you want to set the preferred GPU for the regular Win32 desktop programs, select the Classic App option. If the app was downloaded from the Microsoft Store, please select the Universal App option.
Step 4: After selecting the app type, click the Browse option to find the target app. And then click the Add option.
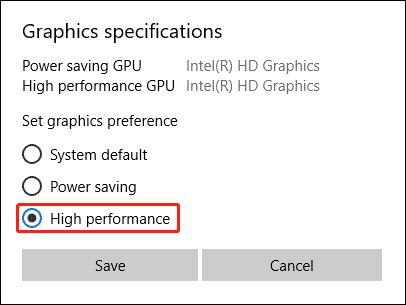
Step 5: Click the Options button.

Step 6: From the pop-up window, select the High performance option and click the Save option.
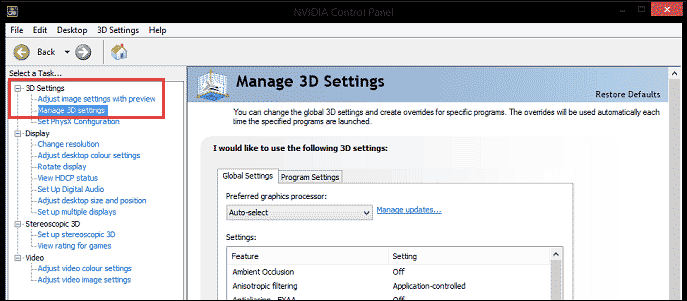
Switch to the Nvidia Control Panel
The Nvidia Control Panel makes it very easy to set the preferred GPU on Windows 10. It offers more tools, allowing you to fine-tune the Nvidia graphics settings. Here is the guide on how to switch to the Nvidia Control Panel:
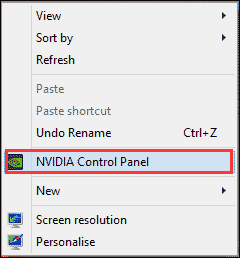
Step 1: Open the Nvidia Control panel by right-clicking on your desktop, and then select the Nvidia Control Panel.
Step 2: Expand the 3D Settings category at the left pane and click on Manage 3D Settings.
Step 3: Open the Program Settings tab and select the target program from the first drop-down menu. And then choose the preferred GPU from the second drop-down menu.
Step 4: Finally, click the Apply button to save changes.
In this way, you have finished switching from Intel graphics to Nvidia on Windows 10.
Bottom Line
As you can see, a complete guide on how to switch from Intel graphics to Nvidia Windows 10 is illustrated in the post. Do you have any questions about this content? If you have any questions, please leave them in the comment zone and we will try to answer them as soon as possible.
About The Author

Position: Columnist
Vega enjoys helping people with computer problems, including disk management, data recovery, data backup, and more. She is constantly expanding her knowledge in related fields. And she will continue to bring more easy-to-understand professional articles to help people solve various problems on the PC.
User Comments :