Do you process a large number of images on Windows 11 PC every day? And do you want to resize multiple images at once in Windows 11? Well, this article from MiniTool Partition Wizard tells you how to do that.
Windows 11 only allows you to adjust the size of a photo at a time through the photo application or drawing. However, Microsoft also provides a free small utility called PowerToys that allows you to resize multiple images at once in Windows 11. The following shows you how to resize multiple images at once in Windows 11 using this utility.
How to Resize Multiple Images at Once in Windows 11?
If you need to resize a large number of images, instead of resizing them one by one, you can use PowerToys to resize images or photos in batches. Here are some steps to help you resize multiple images.
Install PowerToys
Step 1: Download the PowerToys app from the Microsoft Site. Then run the installer to install the software.
Step 2: Open the PowerToys app and click the Image Resizer option on the left side. Then make sure that the Enable Image Resizer option is turned on.

After enabling the Image Resizer function in PowerToys, when you right-click one or more images in Windows, a Resize Picture option will appear in the context menu.
Resize Multiple Images at Once
Let’s see how to resize multiple images at once in Windows 11 using PowerToys.
Step 1: Open File Explorer and go to your image location.
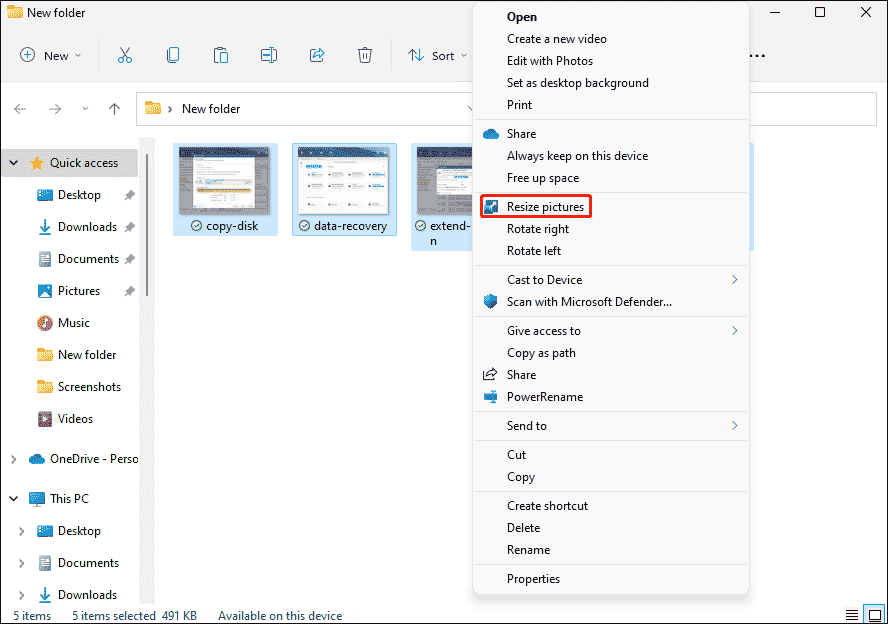
Step 2: Select the image/images you want to resize. Right click the image(s) and click Show More Options.
Step 3: Click the Resize pictures option.
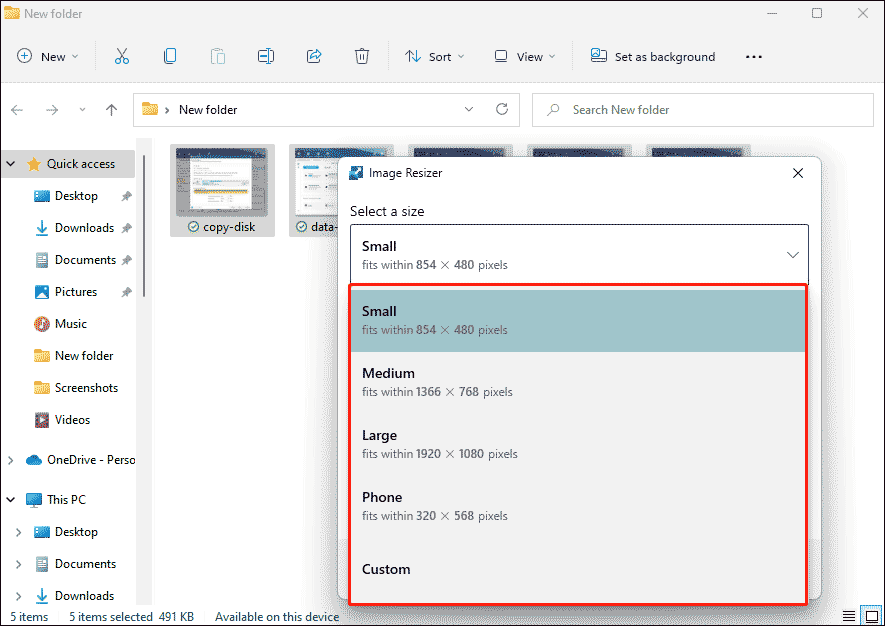
Step 4: Choose the size according to your needs. The available fixed sizes are Small, Medium, Large, and Phone. You can choose Custom to manually enter a specific width and height to adjust the image size.
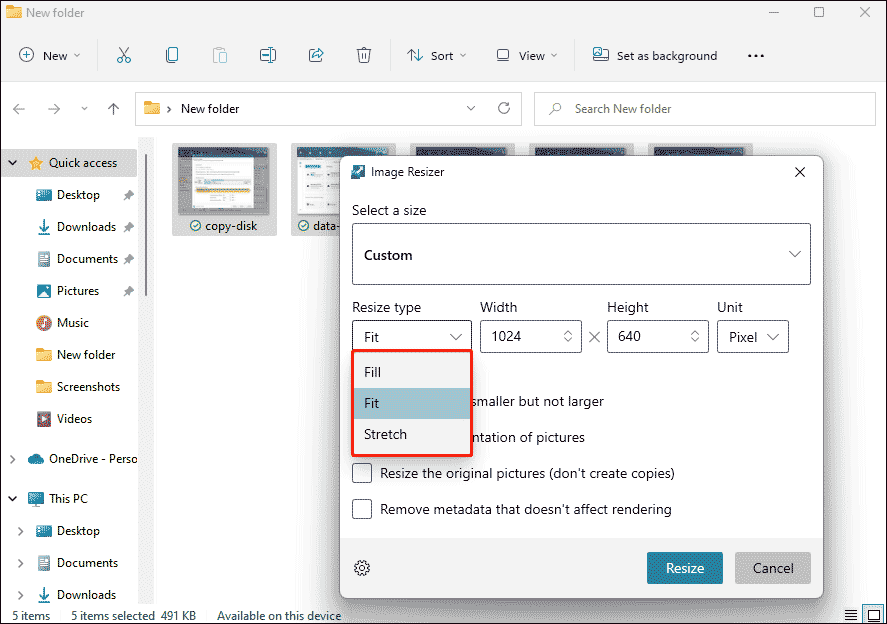
If you choose custom size, you need to select the resize type:
- Fill will increase or decrease the width of the photo to make it fit the screen.
- Fit will increase or decrease the height of the photo so that it fills the screen.
- Stretch will force the picture to fit the entire screen, so it may cause picture distortion.
Step 5: Click on the Resize option. When finished, a copy of the original image will be created in the same folder.
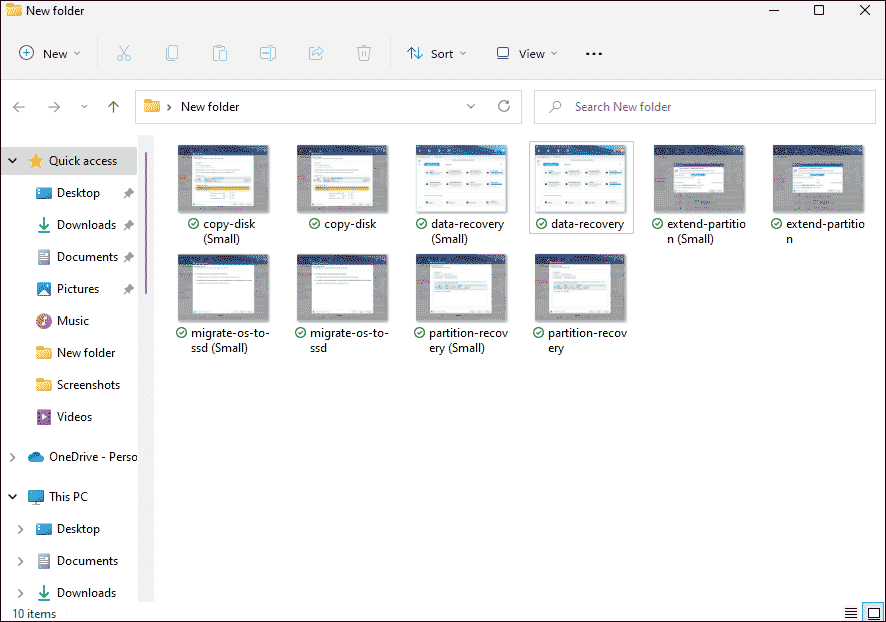
In this way, you can see that each image you have previously selected is now resized.
Add a Preset Size for Image Resizer
To add a preset size so that you don’t have to manually enter a custom size every time you resize the image. The steps are as follows.
Step 1: Open the PowerToys Settings and navigate to the Image sizes zone.
Step 2: Under the Image sizes, click Add a size next to Presets.
Step 3: Click the edit button next to the new size. Select the suitable type and enter the custom width and height.
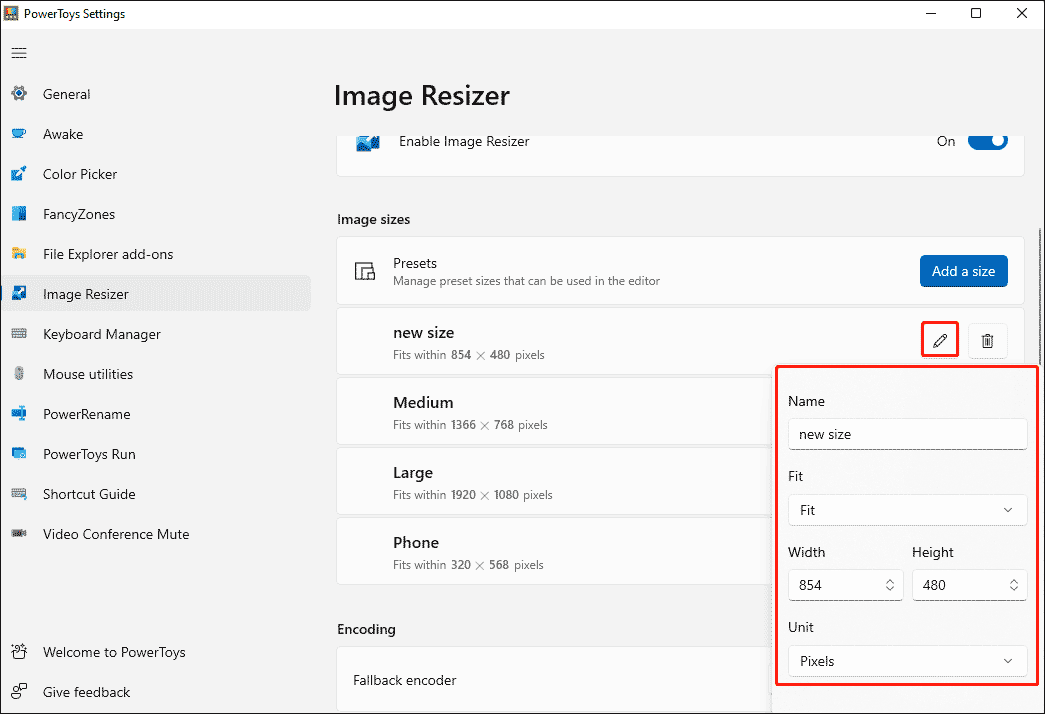
After that, when you choose to resize the picture, the added size will be available as an option in the image adjuster window.
![How to Create a System Image Windows 11 [2 Ways]](https://images.minitool.com/partitionwizard.com/images/uploads/2021/09/system-image-windows-11-thumbnail.jpg)
Bottom Line
As you can see, a complete guide on how to resize multiple images at once in Windows 11 is illustrated in the post. If you know other methods, please share them with us.
About The Author

Position: Columnist
Vega enjoys helping people with computer problems, including disk management, data recovery, data backup, and more. She is constantly expanding her knowledge in related fields. And she will continue to bring more easy-to-understand professional articles to help people solve various problems on the PC.
User Comments :