The NVIDIA Overlay is a useful feature provided by GeForce Experience. However, many users have reported that this tool doesn’t work for them. If you are experiencing the NVIDIA Overlay not working issue on your Windows PC, don’t worry. MiniTool Partition Wizard puts together some feasible solutions and you can have a try.
Nvidia GeForce Experience offers many useful tools for users and the NVIDIA Overlay is one of them. The NVIDIA Overlay enables users to access GPU-accelerated video recording, screen-shot capture, and cooperative gameplay capabilities, which gives users a better gaming experience.
However, some users complain that they cannot open NVIDIA Overlay or the feature is not working. This is a quite frustrating problem for those who rely only on the Overlay provided by NVIDIA. If you come across this issue unfortunately, take it easy. Here are some feasible solutions based on the possible reasons, and they are listed by complexity. You can work your way down the list until you fix the issue.
Without further ado, let’s check out the detailed instructions.
Method 1: Open GeForce Experience as Administrator
Sometimes, GeForce Experience requires administrator permissions to access all the needed files for proper functioning. So, you can try opening the program as an administrator. Here’s what you need to do.
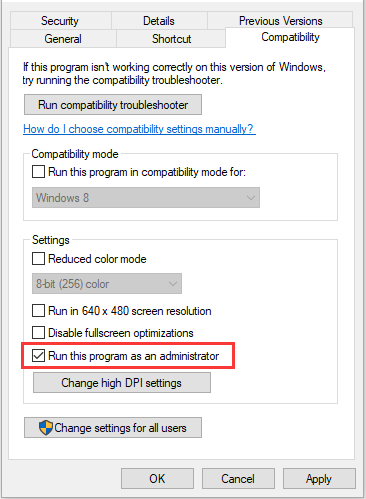
Step 1: Right-click the desktop shortcut or the executable file of NVIDIA GeForce Experience and click Properties.
Step 2: Click the Compatibility tab and check the Run this program as an administrator option.
Step 3: Hit Apply and OK button to save changes.
After that, restart GeForce Experience and check if NVIDIA Overlay can work properly now. If not, continue with the next method.
Method 2: Enable Experimental Features
To resolve NVIDIA Overlay not working issue, you can also go to enable experimental features in GeForce Experience, which allows you to access updated and features that haven’t been released to all users.
You can follow the steps below:
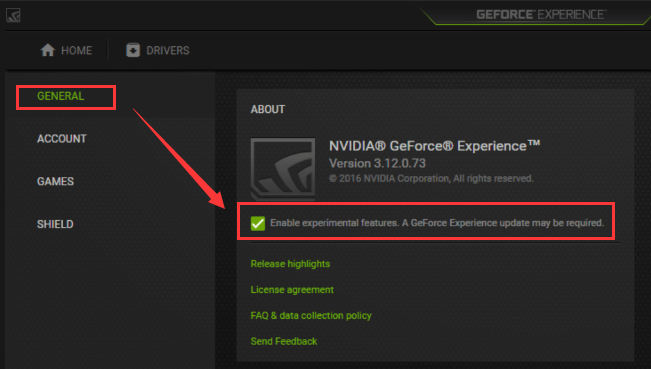
Step 1: Open GeForce Experience and click the Settings icon.
Step 2: Click the GENERAL tab in the left pane.
Step 3: Check the option Enable experimental features under the ABOUT section in the right pane.
After that, a short update will be download and installed automatically. Then, you can go back to check if GeForce Overlay not working problem is fixed.
Method 3: Repair Visual C++ Redistributable Package
The NVIDIA GeForce Experience Overlay not working issue might have something to with Visual C++ Redistributable package in some cases, and you’ll need to repair it. You can make it by following the instructions below.
Step 1: Press Windows + S, input control panel, and click the search result to open it.
Step 2: Navigate to Programs > Programs and Features.
Step 3: Select Microsoft Visual C++ Redistributable in the list and click the Change button.
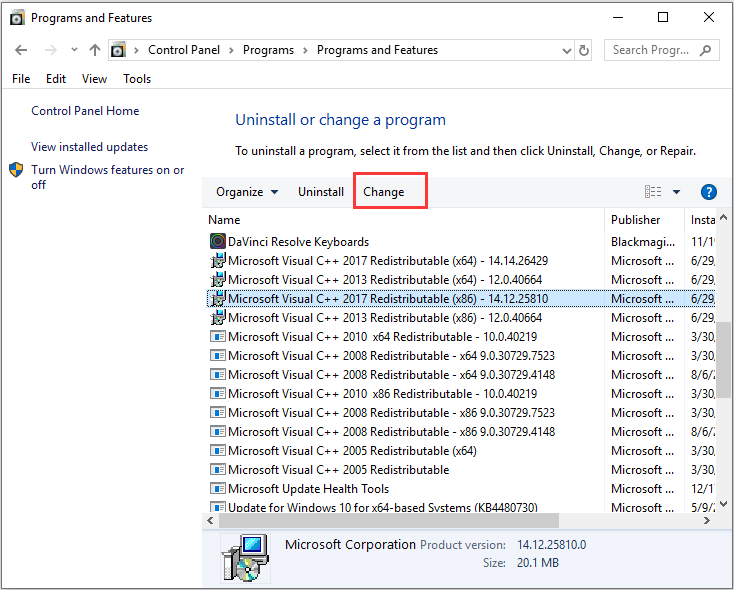
Step 4: In the pop-up window, click the Repair button to continue.
After the repairing process finishes, check if NVIDIA Overlay can work on your Windows computer.
Method 4: Update NVIDIA Drivers
The NVIDIA driver update package may contain some fixes for problems related to Geforce Experience and the Overlay feature. Therefore, you can try fixing NVIDIA Overlay not working issue by updating the related drivers.
You can choose to update drivers in Device Manager. But considering that you might repeat the same operation several times if there are multiple involved drivers, you can also make use of a professional program to update your drivers all at once.
After that, restart your computer and check if the problem is fixed.
Method 5: Clean Boot Your Computer
Certain third-party services and programs could also prevent NVIDIA Overlay from working properly. You can clean boot your computer to figure out the problematic items.
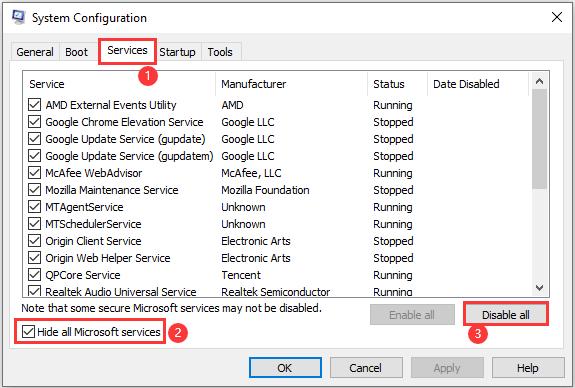
Step 1: Press Windows + R, input msconfig, and click the OK button to open System Configuration.
Step 2: Under the Services tab, check the Hide all Microsoft services and click the Disable all button.
Step 3: Switch to the Startup tab and click Open Task Manager. In the new window, disable all the listed startup programs.
Step 4: When you go back to the previous window, click Apply and OK to save changes.
Once it’s done, restart your device and try using NVIDIA Overlay. If it works properly now, you might need to re-enable the previously disabled services and programs one by one to find the problematic one. Then, keep it disabled or remove it.
If the issue still exists, the problem should have nothing to do with these third-party items and you’ll need to try another method.
Method 6: Reinstall GeForce Experience
If none of the above methods work for you, perhaps you have to reinstall your GeForce Experience application. Just completely uninstall the program from your computer and visit the NVIDIA download page to get the latest version of GeForce Experience. Then, install it properly according to the onscreen instructions.
User Comments :