Is your laptop not connecting to WiFi? If so, you can read this post to get solutions. In this post, MiniTool Partition Wizard introduces 3 cases and tells you how to solve them, and also offers 2 extra solutions to this problem.
3 Cases Where the Laptop Won’t Connect to WiFi
When your laptop won’t connect to WiFi, you may be in one of the following cases:
- You don’t see any network name.
- The network name has a red cross or yellow exclamation.
- When you double click the network name to connect, it asks you for a security key.
If you are in the above cases, please read the following content and you may get solutions.
Case 1. There Is No Network Name
If you don’t see your WiFi’s network name or other people’s WiFi name, you can try the following steps:
- Check whether the laptop has a WIFI button and make sure the WiFi is on.
- Restart the router.
- Restart the laptop.
- Check the settings whether the network name is broadcasted or hide.
- Change the Wireless Network Nameand Channel, save and reboot.
- Try to change different security type to see whether you meet the same problem.

Case 2. The Network Name Has a Red Cross or Yellow Exclamation
In this case, you can try removing the wireless profile on the laptop through the following steps:
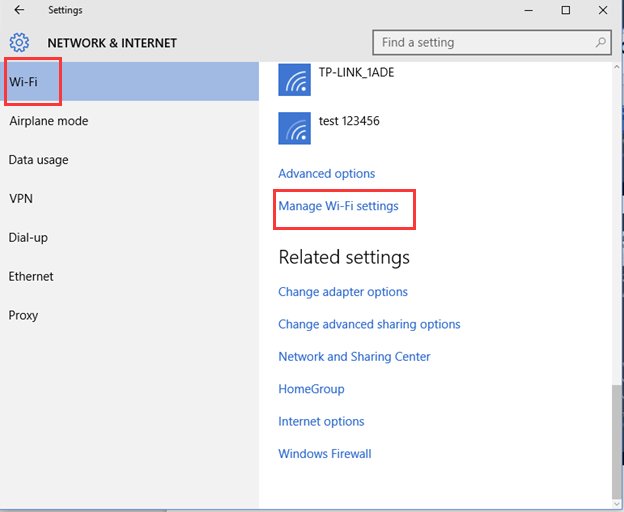
- Click the Wi-Fi icon at the lower right corner in the task tray, and click “Network settings”.
- Click on “Wi-Fi” and find “Manage Wi-Fi settings” on the left menu.
- Highlight the wifi and click on “Forget”.
- Click on the “back” icon on the top and choose the wifi that you want to connect.
Case 3. Connecting WiFi Requires a Security Key
If there is no red cross or yellow exclamation beside your network name but you are required to enter a security key when connecting the WiFi, you just need to put in your password and the problem will be solved. If you are not sure, please login the management page to double check.
2 Ways to Fix Laptop Not Connecting to WiFi Issue
If the above ways can’t fix the laptop not connecting to WiFi issue, you can try the following methods to see whether they work.
Method 1. Update or Reinstall WiFi Driver
Updating WiFi driver can improve network connection. Reinstalling the network driver will clear the registry and reset all existing wireless configurations. These methods could help you laptop access the internet over WiFi once more. Here is the tutorial:
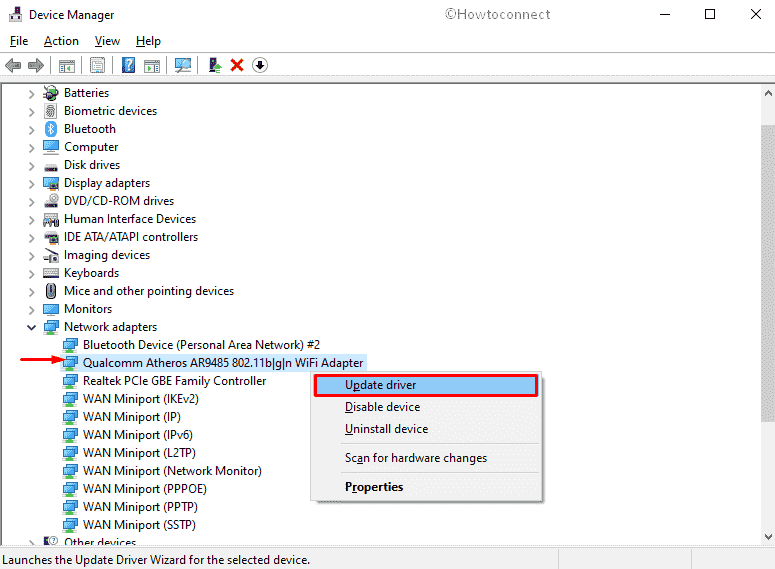
- Click Start and then type Device Manager in the search box.
- Double click on Device Manager to select it.
- Double click on Network Adapters.
- If you have several adapters, a drop-down will appear listing them all. Right click your WiFi Adapter and click Update driver.
- If the above steps don’t work, you can try reinstalling the WiFi driver. You need to download the latest driver from manufacturers’ sites, right-click WiFi Adapter and click Uninstall device, and then install the new driver.
Method 2. Renew the IP Address
Sometimes, IP conflicts may also cause your laptop not to connect to Wi-Fi successfully. If so, you can simply solve it by renewing the IP address on your laptop. Here is the tutorial:
- Press “Windows + R” keys to call out Run dialogue box.
- Type “cmd” into the box and press Enter
- In the command prompt window, type ipconfig /releaseand press Enter.
- Once the command completes, type ipconfig /renewand press Enter.
About The Author

Position: Columnist
Linda has been an editor at MiniTool for seven years. She continuously learns about computers and puts her knowledge into practice. Moreover, she is particularly knowledgeable in disk management, data recovery, system installation, and PDF editing. Her articles typically reference multiple examples or are based on her own experience, providing users with the most suitable solutions.
User Comments :