Apart from how to enable Hyper-V, this post mainly gives you 4 methods to fix Hyper-V Assembly not found error. By the way, MiniTool Partition Wizard can help you resolve partitioning problems and manage hard drive in Windows VM better.
Hyper-V is formerly known as Windows Server Virtualization and helps to create virtual machines on Windows 10. Hyper-V is a virtualization software that, of course, virtualizes software. It can not only virtualize operating systems but also entire hardware.
The Hyper-V is designed to provide a more familiar and cost-effective virtualization infrastructure software for a wide range of users, reducing operational costs, increasing hardware utilization, optimizing infrastructure, and increasing server availability.
However, plenty of Windows users reported that they got Assembly not found error inside Hyper-V. Assembly no found error inside Hyper-V is a common problem among Windows users, and it may occur on a variety of system setups. This problem might be caused by a missing or corrupted file inside the Hyper-V software or Windows 10 operating system.
Actually, this error can be easily settled. Just try the following methods to fix Hyper-V Assembly not found error. But before we start to fix the error, I will introduce you how to enable Hyper-V in Windows 10 first.
Methods to Enable Hyper-V In Windows 10
Some users may still have a problem activating Hyper-V in Windows 10 since this feature is not enabled by default. So, I will briefly introduce 2 ways to enable Hyper-V first.
1. Enable Hyper-V Via PowerShell or CMD
Run Windows PowerShell or CMD as administrator, copy and paste either of the following 2 different commands and press Enter key.
- Enable-WindowsOptionalFeature -Online -FeatureName Microsoft-Hyper-V -All (this command functions only in PowerShell)
- DISM /Online /Enable-Feature /All /FeatureName:Microsoft-Hyper-V (this command is supported by both PowerShell and CMD)
When you receive “the operation completed successfully”, type Y to restart your computer.
2. Enable Hyper-V from Control Panel
Open Control Panel and navigate to Programs > Programs and Features > Turn Windows features on or off. In the pop-up window, find and check Hyper-V folder, then click OK.
Finally, restart computer when the installation has completed.
Now, it’s time to fix the Assembly not found error. 4 effective methods are provided below.
Error Fix 1: Perform SFC Scan
To fix Hyper-V Assembly not found error, you can perform SFC (System File Checker) to repair file or system image corruptions on Windows 10 PC. This command will scan all protected system files, and replace corrupted files with a cached copy saved in a compressed folder at %WinDir%System32dllcache.
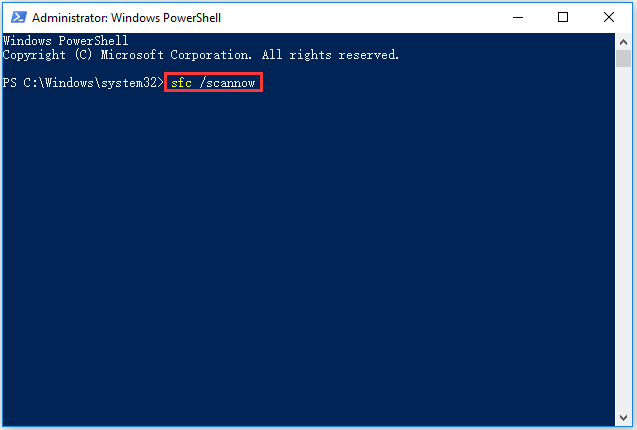
Step 1: First, you need to open Windows PowerShell. To do that, just right-click Windows icon on the taskbar and select Windows PowerShell (Admin) from the menu to run PowerShell as administrator.

Step 2: After entering the PowerShell window, type the command: sfc /scannow and press Enter key.
Step 3: After the process is finished, please restart your computer to see whether the error has been fixed. If not, then try the next method.
Error Fix 2: Run DISM Command
DISM command can be useful if the SFC scan is not working. You should know that running DISM command may require internet access, which is different from SFC scan.
To run DISM command, you need to run Windows PowerShell as administrator as well. Then, do as the following steps show:
- Type the command: DISM.exe /Online /Cleanup-image /Scanhealth, and press Enter.
- Wait until the process of last command completes, then type another command: DISM.exe /Online /Cleanup-image /Restorehealth and press Enter.
This operation will fix any system image corruption from a Windows Update source. If you want to check whether it works, you can run SFC scan again. This can fix potential system file corruption from the newly-repaired component store and verify whether DISM has effectively repaired the error.
Error Fix 3: Uninstall Any Extra Language Packs
Uninstalling the extra language packs from your Windows 10 is also a feasible way to fix Hyper-V Assembly not found error.
Step 1: Open Windows PowerShell as administrator.
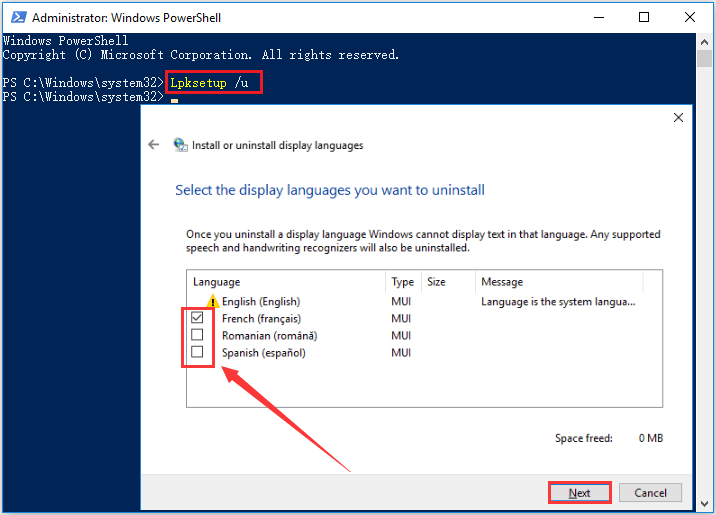
Step 2: Type the command: Lpksetup /u and press Enter key to open Install or uninstall display languages panel.
Step 3: You will get a pop-up window as the following picture. You need to select the checkbox next to the extra languages. Then, click Next button.
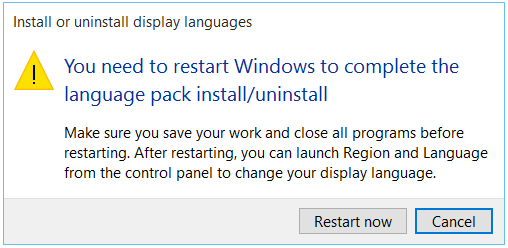
Step 4: After the system loads the uninstaller, you will get the following message prompting to restart Windows. Here you need to click Restart now to complete the process of uninstalling language pack.
Error Fix 4: Repair Windows 10 Using ISO File
If the methods mentioned above do not work, you can try to repair Windows 10 using ISO file.
Step 1: Download a Windows 10 ISO file and mount the ISO file to your computer.
Step 2: Open the partition, find the setup.exe file and run it to start the Windows 10 setup.
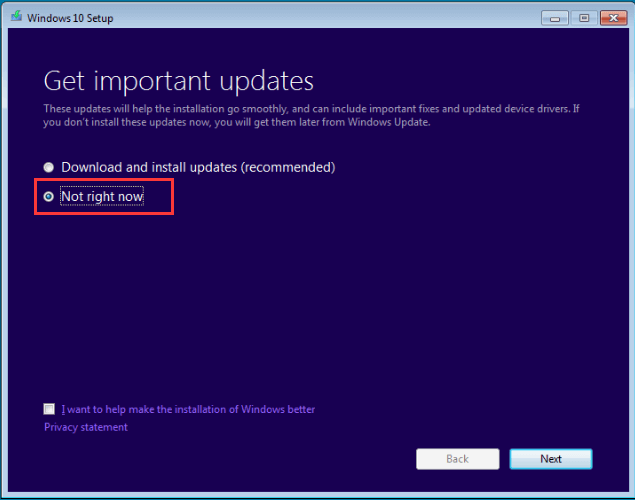
Step 3: During the preparation of installation, you will get the following interface, please click on Change how Windows Setup downloads updates link.

Step 4: Select Not right now and click Next when you get the following window.
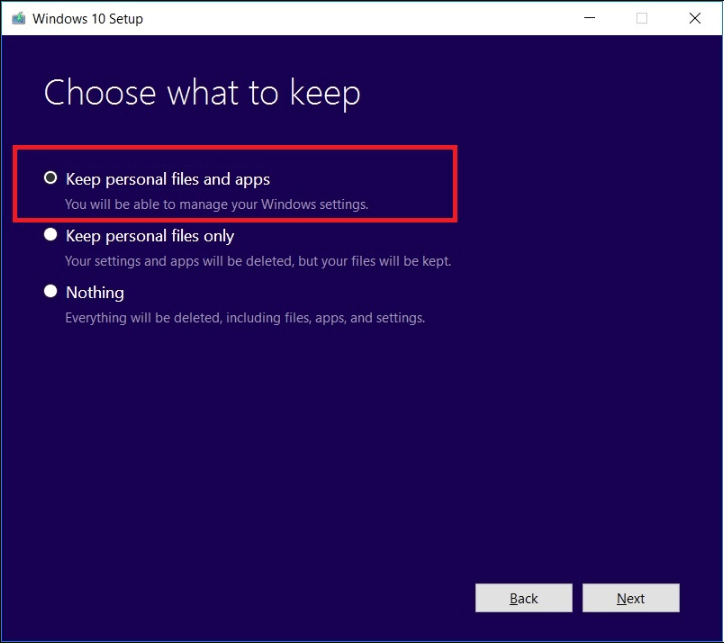
Step 5: You will be required to choose what to keep. Just select the Keep personal files and apps option and click Next.
Then, you just need to wait patiently until the process of repairing Windows completes. The Hyper-V Assembly not found error should be resolved in this way.
User Comments :