Nowadays, more and more laptops have weed out optical drive bay. In this case, people have to install Windows 7 from USB. In this post, MiniTool Partition Wizard will show you how to install Windows 7 from USB with a Microsoft official tool.
If you want to install Windows 7 from USB, there are many tools for you. Apart from various third-party tools, Microsoft offers Windows USB/DVD Download Tool for users to install Windows 7 from USB.
Preparatory Work
To install Windows 7 from USB with Windows USB/DVD Download Tool, you should first prepare the following stuffs:
- A Windows product key: This allows you to download an official Windows ISO file.
- A PC with Internet connection.
- A USB with sufficient data storage. This tool can not only create Windows 7 installation media, but also can create Windows 8 and 10 installation media. For Windows 7 and Windows 8, the USB storage should be larger than 4GB, while for Windows 10, the USB storage should be larger than 8GB.
After getting those items ready, you can then download the media creation tool installer from its official website.
How to Install Windows 7 from USB
Step 1: Connect the USB drive to computer. Then, download Windows 7 image file and Windows7 USB DVD Download Tool Installer.
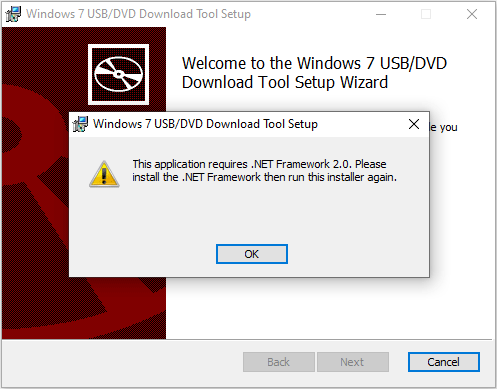
Step 2: Double-click Windows7 USB DVD Download Tool Installer and follow the wizard to install this tool. Please note that this tool requires Microsoft .NET Framework 2.0. If your PC doesn’t contain this file, please download here and install it.
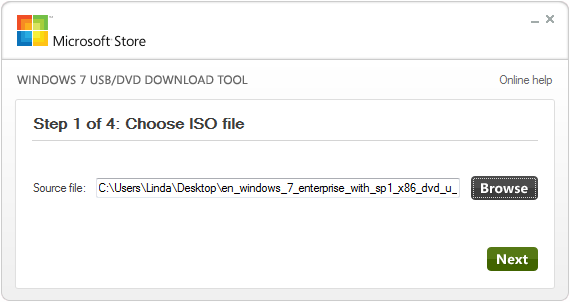
Step 3: After Windows 7 USB DVD Download Tool is installed, double-click this tool to launch it. Click Browse to find the Windows 7 image file and then click Next button.
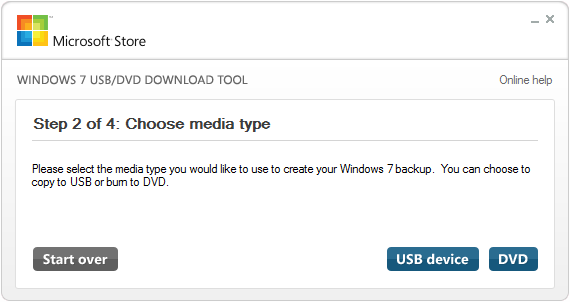
Step 4: Click USB device. This option allows you to burn the ISO file on a USB flash drive.
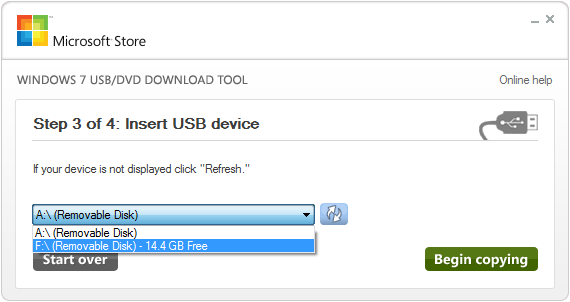
Step 5: Select a removable disk in the drop-down list and click Begin copying.
Step 6: A pop-up window warns that the selected removable disk must be erased. Click Erase USB Device to continue if there is no important file in the removable disk. Otherwise, click Cancel and back up data in advance.
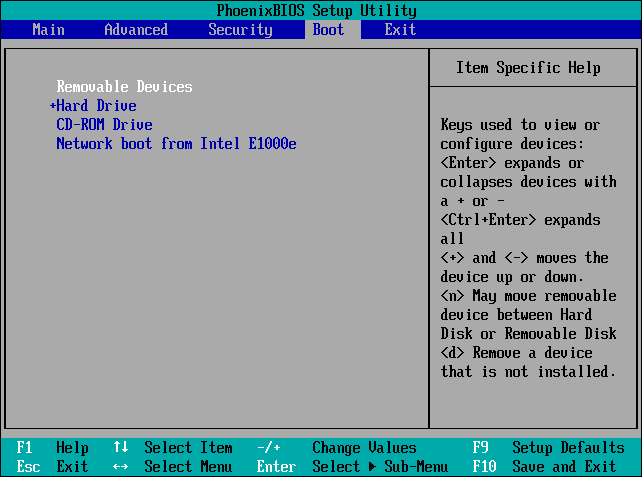
Step 7: After the Windows installation media is completed and connected to your computer that needs installing Windows 7, please boot into the Firmware to make the computer boot from the Windows installation media.
- Power on the computer and press the BIOS key that appears on the screen so that you can enter BIOS interface.
- Navigate to Boot tab and set Removable Devices as the first boot device.
- Save changes and exit BIOS to boot the computer from the USB installation media.
How To Change Boot Order Safely On Windows Device
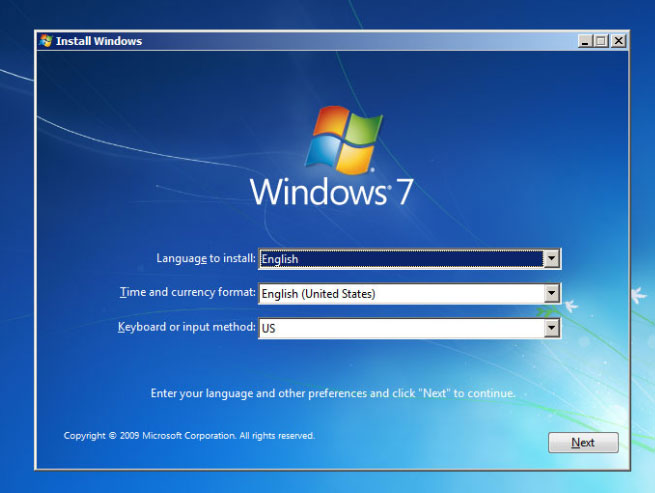
Step 8: You will enter WinPE shown like the following picture. Then, follow the on-screen wizard to install Windows 7.
![How to Delete Everything on Windows 7 and Start Over [Work Fast]](https://images.minitool.com/partitionwizard.com/images/uploads/2019/07/how-to-delete-everything-on-windows-7-thumbnail.jpg)
About The Author

Position: Columnist
Linda has been an editor at MiniTool for seven years. She continuously learns about computers and puts her knowledge into practice. Moreover, she is particularly knowledgeable in disk management, data recovery, system installation, and PDF editing. Her articles typically reference multiple examples or are based on her own experience, providing users with the most suitable solutions.
User Comments :