Microsoft added a new feature called Voice access to the latest version of Windows 11. Using this feature, users can use voice commands to control their computers and expand the capabilities of the speech recognition platform. Well, how to enable Voice access in Windows 11? This article from MiniTool Partition Wizard tells you how to do that.
What Is Voice Access in Windows 11?
Voice access is a new Windows 11 accessibility feature that makes it easier to control your Windows 11 PC using just your voice.
Voice access was developed with people with reduced mobility in mind. You can use Voice access to navigate to the UI, open applications, type text, and perform other supported actions. Also, the feature works offline, so you don’t need to be connected to the Internet.
As of now, the feature is only available on the development channel but will be added to the stable version soon.
How to Enable Voice Access Using Settings in Windows 11?
The new features make it easy to access computers via voice commands and expand the capabilities of the voice recognition platform. To enable Voice access in Windows 11, use the following tutorials:
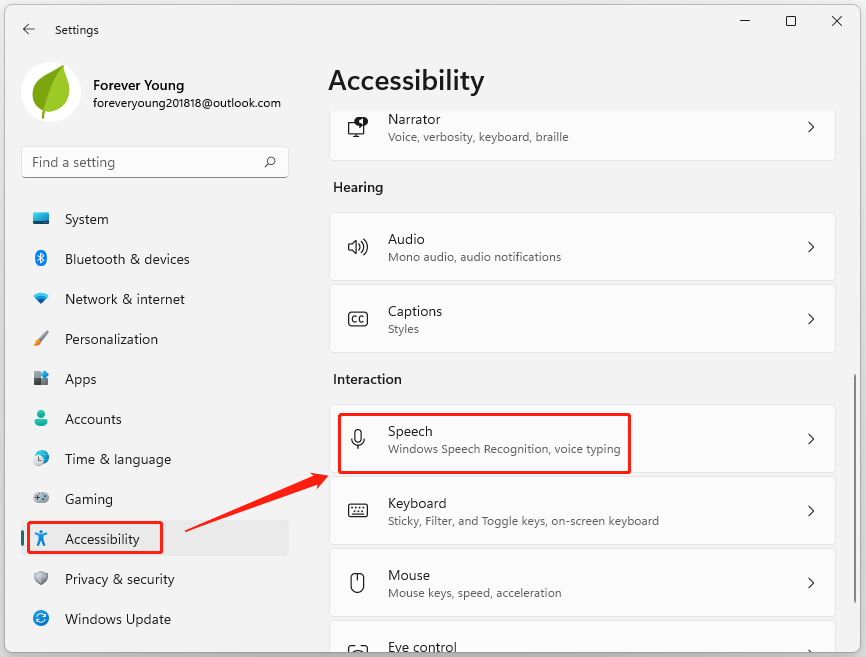
Step 1: Press the Win + I key to open Settings, and then switch to the Accessibility section from the left sidebar.
Step 2: Under the Interaction section, click Speech to open the Voice access settings screen.
Step 3: Next to the Voice access option, turn on the toggle button. You can also choose to enable the Start voice access after you sign in to your PC checkbox so that Windows automatically starts listening for voice commands when you turn on the PC.
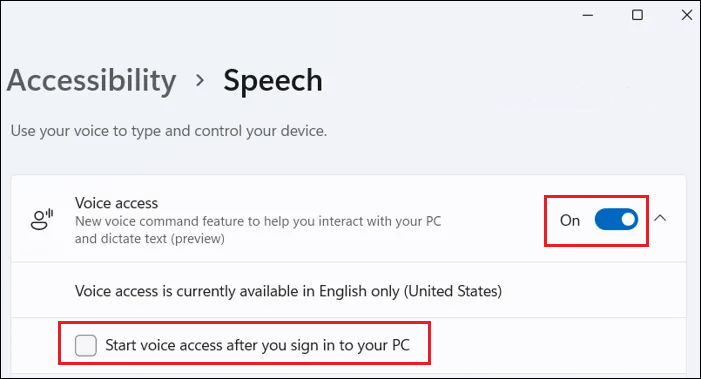
Step 4: Voice access is currently available in English only (United States). If this is your first time using this feature, you must download and install the language pack for voice access. To do so, click the Download button in the top bar.
Alternatively, you can enable or disable Voice access auto-start in the Registry Editor.
How to Enable Voice Access Using Registry Editor in Windows 11?
To enable Voice access auto-start, follow the steps below.
Step 1: Press the Win + R key and type regedit into the Run dialog to open Registry Editor.
Step 2: Navigate to the following key: HKEY_CURRENT_USERSoftwareMicrosoftWindows NTCurrentVersionAccessibility. You can also copy this path into the address bar of the Registry Editor and press Enter.
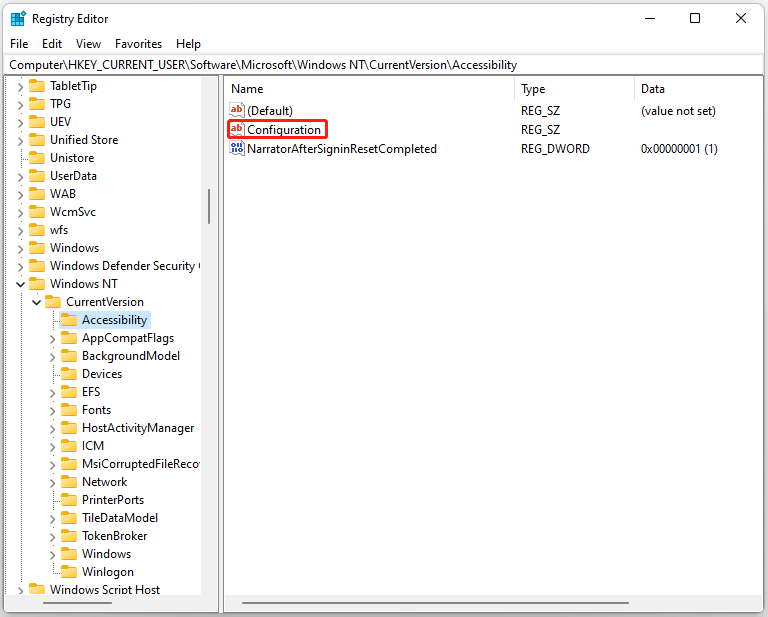
Step 3: Double click the Configuration string on the right side of the window. If the value is missing from the Accessibility key, you may need to create a new string (REG_SZ) value. To do this, right click on a blank screen and select String Value from its context menu. Type a name Configuration in the Name field and press Enter to save.
Step 4: Double click on the newly created Configuration key, set its value data to voiceaccess. Then click OK.

This will enable Voice access auto-start in Windows 11.
How to Enable Voice Access Using Shortcuts in Windows 11?
Besides managing Voice access in Settings and Registry Editor, you can use a couple of keyboard shortcuts.
Alt + Shift + C: Allow Voice access to listen to your commands.
Alt + Shift + B: Prevent Voice access from listening to your commands.
You can disable Voice Access using the Voice access toolbar. Click the gear icon on the Voice Access toolbar at the top of the screen, and select Turn off voice access from the menu.

Bottom Line
After reading this article, you may know what Voice access is and how to enable Voice access in Windows 11. If you have any problems with this article, you can leave us comments in the comment section.
About The Author

Position: Columnist
Vega enjoys helping people with computer problems, including disk management, data recovery, data backup, and more. She is constantly expanding her knowledge in related fields. And she will continue to bring more easy-to-understand professional articles to help people solve various problems on the PC.
User Comments :