Do you want to transmit your files between computers? The FTP server in Windows 10 can help you transfer files. Well, this article from MiniTool Partition Wizard will show you how to set FTP server Windows 10.
There are many advantages to having your own FTP server. First of all, it is private, and you have complete control over who accesses it and what is transmitted.
It is also fast, but the exact speed depends on your Internet connection. In addition, there are no restrictions on the amount and type of data you can store or transfer. Because of these benefits, many people prefer to set up their own FTP servers.
If you want to create your own private cloud so that you can share and transfer large files without restrictions, then please set your own FTP server Windows 10.
How to Install the FTP Server Components on Windows 10?
Although Windows 10 supports setting up an FTP server, you need to manually add the required components. Here is the guide to Windows 10 FTP server setup.
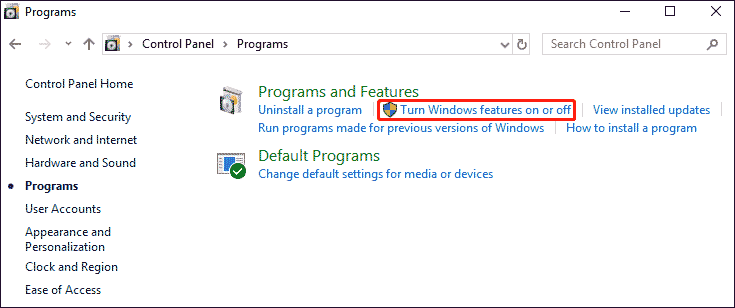
Step 1: Open the Control Panel, and click the Programs. Under Programs and Features, click the Turn Windows features on or off link.
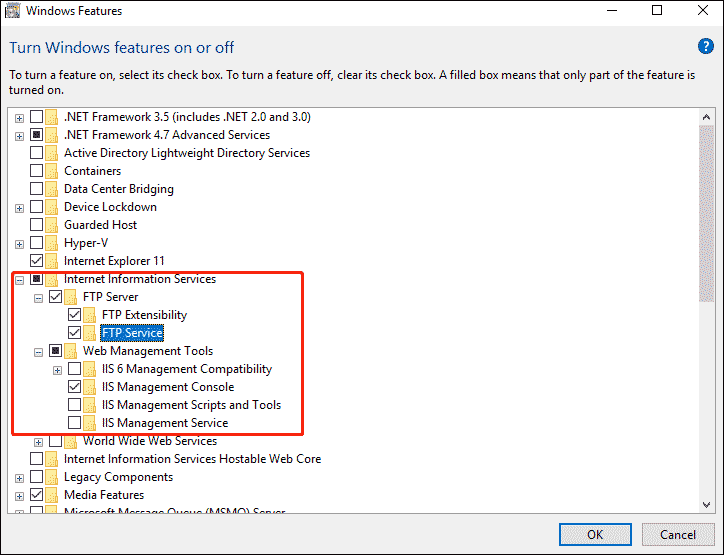
Step 2: Expand the Internet Information Services feature, and then expand the FTP Server option. Check the FTP Extensibility and FTP Service options.
Step 3: Use the default options to check the Web Management Tools option, but make sure that the IIS Management Console option is selected.
Step 4: Click the OK button and then click the Close button.
After completing these steps, the components used to set up the FTP server will be installed on your device. Then you need to set up an FTP server site for Windows 10.
How to Set up an FTP Server Site on Windows 10?
After installing the required components, you can continue to configure the FTP server on your computer.
- Open the Control Panel, navigate to the System and Security > Administrative Tools > Internet Information Services (IIS) Manager.
- On the Connections pane, right click Sites, and select the Add FTP Site
- Type a short name for your server. In the Content Directory section, under the Physical path, click the button on the right to locate the folder you want to use to store your FTP files. And then click the Next
- In this screen, change the SSL setting to No SSL. Leave the other default settings and click the Next
- On the Authentication, check the Basic option and select Specified users from the drop-down menu.
- Type the email address of your Windows 10 account or local account name to allow you to access the FTP server.
- Check the options Read and Write. Finally, click the Finish
With this, you’re done setup the FTP server Windows 10.

Bottom Line
The above content is all about how to set FTP server Windows 10. Do you have any questions about this content? If you have any questions, please leave them in the comment zone and we will try to answer them as soon as possible.
About The Author

Position: Columnist
Vega enjoys helping people with computer problems, including disk management, data recovery, data backup, and more. She is constantly expanding her knowledge in related fields. And she will continue to bring more easy-to-understand professional articles to help people solve various problems on the PC.
User Comments :