Usually, a computer has single audio ports located either at the sides or at the front. The Front audio jack stands for the front headphones or microphone ports on a personal computer. Sometimes, you may encounter the Front audio jack not working Windows 10 like many users.
The main reason for Front audio jack not working is related to the bad connection between the motherboard and the jack. In addition, improper audio device settings and outdated drivers are responsible for the problem.
![How to Reduce Background Noise on Mic [Ultimate Guide]](https://images.minitool.com/partitionwizard.com/images/uploads/2021/05/how-to-reduce-background-noise-on-mic-thumbnail.jpg)
Fix 1. Enable Front Panel Jack Detection
Sometimes the Front headphone jack not working issue can occur if the detection was disabled for the front panel of your computer. Once disabled, the Front audio device won’t be recognized by the computer. Here you can follow the steps below to enable the detection.
Step 1. Click here to download the required Realtek HD Audio Manager and install it on your computer. If you have installed this manager, you can skip the step.
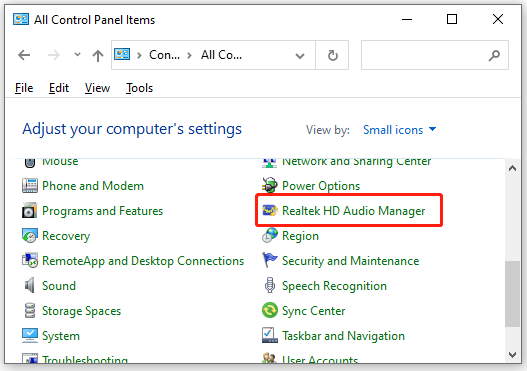
Step 2. Type control in the search box and select the Control Panel app from the best match. Then change the View by type to Small icons and click on Realtek HD Audio Manager.
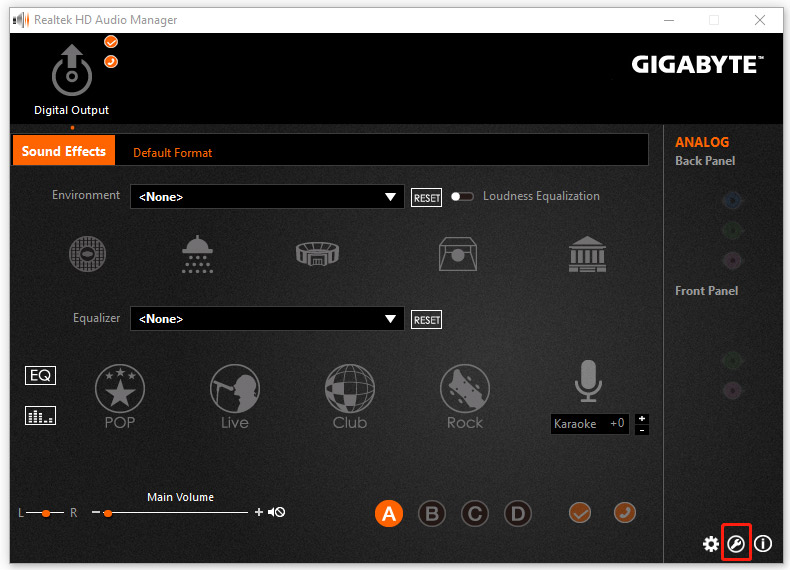
Step 3. Click on the Connector Settings icon at the bottom right corner in the pop-up window.
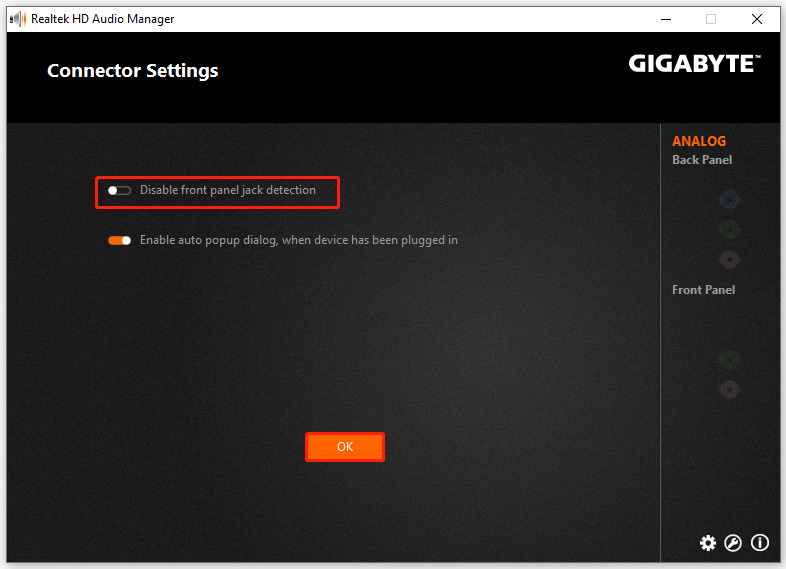
Step 4. Toggle on the switch of Disable front panel jack detection and click on OK to save the change. If it is enabled, you can disable first and re-enable.
Now, you can restart computer and see if the Front headphone jack not working Windows 10 issue is fixed.
Fix 2. Set the Required Audio Device as Default
If the required audio device to the Front audio jack is not set as default, you may encounter Windows 10 headphone jack not working. To fix it, you can change the audio device settings via the steps below:
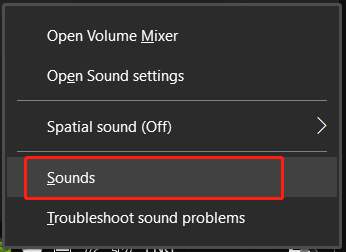
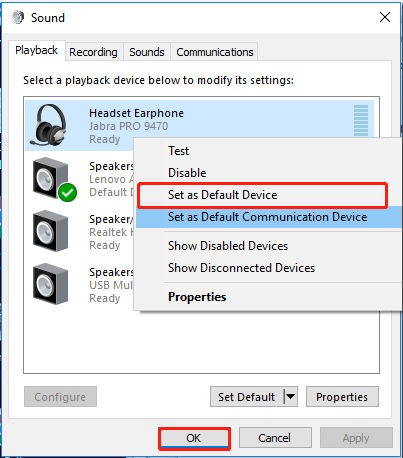
Step 1. Right-click the Volume icon from the taskbar and select Sounds.
Step 2. Go to the Playback tab if you are connecting a headphone or speaker to the front audio jack, and then right-click the audio device and select Set as Default Device. After that, click on OK. If you connect to a microphone, then navigate to the Recording tab.
Now check if the Front panel headphone jack not working problem is resolved.
Fix 3. Update or Reinstall Your Audio Device Driver
As mentioned above, the Front audio jack not working Windows 10 can be caused by outdated or corrupted audio device drivers. To fix the issue, you can try updating the audio device driver to the latest version.
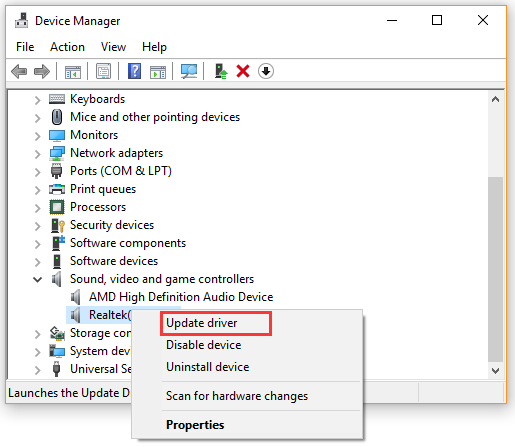
Step 1. Press Win + R keys to open the Run dialog box, and then type devmgmt.msc in the box and hit Enter to open this program.
Step 2. In the Device Manager window, expand the Sound, video and game controllers category, and then right-click on the Realtek audio driver and select Update driver.
Step 3. Select the Search automatically for updated driver software option and follow the on-screen prompts to install any available updated audio drivers.
After that, you can check if the Front audio jack not working Windows 10 problem is gone. If not, you can select Uninstall from the Device Manager. Once uninstalled, you can restart your computer and the default audio driver will be automatically installed.
![Easily Fix Windows 10 Lowers Volume Automatically [Full Guide]](https://images.minitool.com/partitionwizard.com/images/uploads/2021/04/win10-lowers-volume-automatically-thumbnail.jpg)
Fix 4. Connect the Audio Jack to the Back of Your Computer
A computer usually has front audio jacks that are connected to your motherboard. Once the connection is loose or bad, you may encounter Windows 10 headphone jack not working. So, we recommend you check if there are any issues with the front jack only.
Here you can connect your audio device to the back jack of your computer. If the audio device can work properly, then it indicates that the issue is on your front audio jack. At this time, you may need to contact your computer’s manufacturer for help or bring it to a professional service provider.
User Comments :