Is your HP PC stuck on black screen with flashing boot block error? This issue usually occurs after updates and prevents the PC from booting up. In this post, MiniTool Partition Wizard offers you 4 ways to fix it.
HP Flashing Boot Block Issue
Many people report that they have encounter flashing boot block issue on HP laptops. This issue may occur after performing updates from HP software or Windows. If you have performed BIOS update, this issue may also occur.
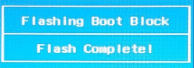
This issue will display a black screen with a blue box saying “Flashing Boot Block – *%”. If the flashing process is complete, the blue box will say “Flashing Boot Block – Flash Complete!” But neither of the two situations will allow you boot into Windows.
What is Boot Block? Boot Block is a specific area in the BIOS memory that contains the minimum instruction set for booting. Normal BIOS upgrade operations cannot eliminate this information.
Boot Block only supports booting floppy drive and ISA display card. If the BIOS update fails and becomes unusable, Boot Block allows you to use the floppy drive to restore the BIOS.
How to Update BIOS Windows 10 | How to Check BIOS Version
How to Solve the Flashing Boot Block Issue
The flashing boot block HP laptop issue is related to BIOS. To solve this issue, you can try recovering the BIOS. When an issue occurs when updating the BIOS, an automatic BIOS recovery is attempted. But if the automatic BIOS restoration does not work, you can use the following methods to restore the BIOS.
Fix 1. Use a Key Press Combination
- Turn off the computer, and then connect the power cord.
- Press and hold the Windows key + B key (some laptops may support Windows key + V key) at the same time, and then press and hold the Power button for 2 to 3 seconds.
- Release the Power button but continue pressing the Windows + B keys (or the Windows key + V key). You might hear a series of beeps. Then, the BIOS Update utility opens to perform a BIOS recovery.
But if the HP BIOS Update screen does not display, you may be in the following situations:
- Your PC might not support the feature or there is a hard drive issue. Then, you can try the next method.
- The Power button was held too long.
If this recovery method fails, please continue to try other solutions.
Fix 2. Use a USB Recovery Drive
Step 1: Create a BIOS recovery USB flash drive.
- On a working PC, download a correct BIOS version from HP Support according to the PC model number.
- Insert a blank USB flash drive to the PC.
- Run the BIOS file to create a BIOS recovery USB flash drive.
Step 2: Recover the BIOS using the USB flash drive.
- Turn off the notebook that requires the BIOS recovery, and then wait 5 to 10 seconds.
- Make sure the power cord is connected to the notebook. Keep it connected during the recovery process.
- Insert the USB flash drive with the BIOS file into an available USB port on the notebook.
- Press and hold the Windows key + B key (or the Windows key + V key) at the same time, and then press and hold the Power button for 2 to 3 seconds.
- Release the Power button but continue pressing the Windows + B keys (or the Windows key + V key).

Fix 3. Reset the CMOS
- Press and hold the Windows key + V key at the same time, and then press and hold the Power button for 2 to 3 seconds.
- Release the Power button but continue pressing the Windows key + V key until the CMOS Reset screen displays or you hear beeping sounds.
- At the completion of a successful CMOS Reset, press Enter to restart the computer.
Fix 4. Use a Floppy Recovery Drive
- Prepare a 1.44MB floppy disk formatted in DOS mode.
- Put the following files into the floppy drive: exe, platform.bin, biosname.ful, and autoexec.bat. In the autoexec.bat, you should add command line phlash.exe /mode=3 biosname.ful. The biosname should be replaced accordingly.
- Activate the BootBlock by toggling the 10 switch on the system board switch group from top to bottom.
- Insert the pre-prepared bootable floppy disk into the floppy disk drive correctly.
- Turn on the PC.
- 40 to 50 short beeps indicate that the recovery process is in progress.
- The BootBlock process ends with a long beep.
- Turn off the PC within two seconds, otherwise the recovery process will start again.
- Turn the switch 10 on the motherboard back to the upper position to disable the Bootblock feature.
- Power on the PC after removing the startup disk.
About The Author

Position: Columnist
Linda has been an editor at MiniTool for seven years. She continuously learns about computers and puts her knowledge into practice. Moreover, she is particularly knowledgeable in disk management, data recovery, system installation, and PDF editing. Her articles typically reference multiple examples or are based on her own experience, providing users with the most suitable solutions.
User Comments :