In this article, MiniTool Partition Wizard gives a detailed introduction on Diagnostic Policy Service and provides 4 commonly used methods to enable and disable Diagnostic Policy Service.
What Is Diagnostic Policy Service
Diagnostic Policy Service (DPS) is an essential service installed by default in your Windows. This service aims to detect and troubleshoot the potential problems for the components of your Windows. It will initiate automatic corrective action or log the appropriate diagnostic information for the cause analysis of the problems, and then notify the user of the potential problem.
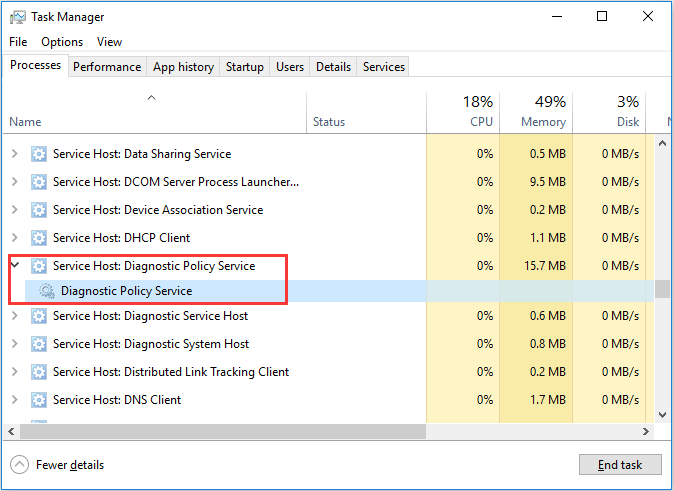
Commonly, this service runs automatically with your system in the shared process of svchost.exe (Service Host) to keep finding issues for the components. If Diagnostic Policy Service is not running, you will be unable to know the causes of issues in your system.
How to Enable or Disable Diagnostic Policy Service
Although Diagnostic Policy Service starts automatically, it might be disabled due to various reasons including manual misoperation, virus infections, and etc. So, you might wonder how to enable Diagnostic Policy Service.
Here are 4 methods to enable the service in Windows 10, and you can also use these methods to disable it when needed.
Option 1: Via Services App
The easiest way to enable Diagnostic Policy Service and disable it is to manage it in Services app. The detailed steps are listed below.
Step 1: Press Windows + R to open Run window.
Step 2: Input services.msc and click OK to open Services app.
Step 3: Find Diagnostic Policy Service and double-click it to open its Properties.
Step 4: Choose Automatic or Manual from the drop-down list of Startup type. Then, click Start button in Service status section to enable the service, or click Stop button to disable it.
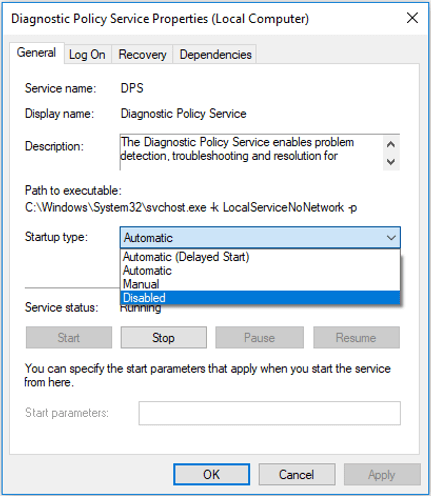
Step 5: Click Apply and OK to save changes.
Option 2: Via System Configuration
You can also enable or disable Diagnostic Policy Service in System Configuration. It is very easy to operation. Just follow the instructions below:
Step 1: Invoke Run dialog, type msconfig and click OK to open System Configuration.
Step 2: Switch to Services tab and locate Diagnostic Policy Service. Then, check the service (or uncheck it if you want to disable it) and click Apply and OK button.
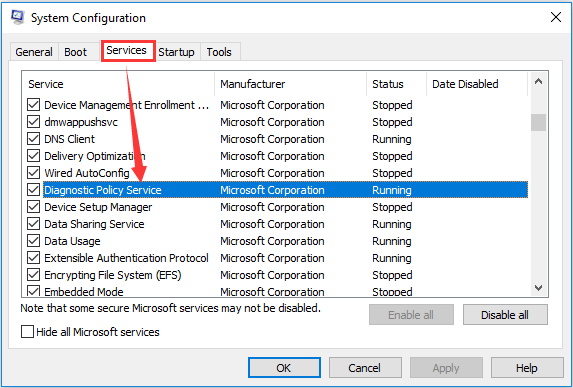
Step 3: A notification window will pop up, requiring a restart for the changes to take effect. Just save your tasks and click Restart button to restart your system.
Option 3: Via Registry Editor
If you are familiar with Registry Editor, you can also choose to enable or disable Diagnostic Policy Service by modifying Windows registry. You are recommended to back up registry in advance before you make any changes. Here’s how to do enable or disable the service in this way.
Step 1: Input regedit in the Run window and click OK to open Registry Editor.
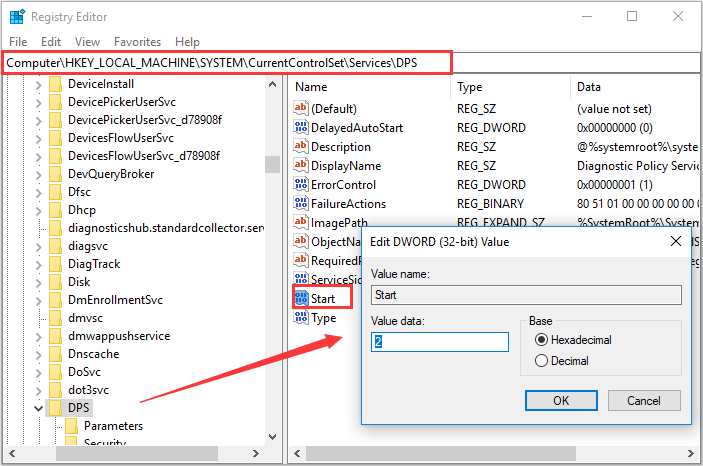
Step 2: Copy and paste the following path to the address bar and press Enter to locate the registry key of DPS: Computer\HKEY_LOCAL_MACHINE\SYSTEM\CurrentControlSet\Services\DPS
Step 3: In the right pane, double-click Start to edit the DWORD. Input your preferred value in the box under Value date and Click OK button to save changes. The startup types of the service and the corresponding value data are listed below:
- Automatic: 2
- Automatic (Delayed Start): 2
- Manual: 3
- Disabled: 4
Option 4: Via Command Prompt
Alternatively, you can also execute certain commands to manage the Diagnostic Policy Service. To enable the service in Command Prompt, you can refer to the steps displayed below.
Step 1: Open Run window, input cmd and press Ctrl + Shift + Enter to run Command Prompt as administrator.
Step 2: Set the startup type of DPS to Automatic or Manual as your needs. Just type either of the following commands and press Enter:
- Automatic: REG add “HKLM\SYSTEM\CurrentControlSet\services\DPS” /v Start /t REG_DWORD /d 2 /f
- Manual: REG add “HKLM\SYSTEM\CurrentControlSet\services\DPS” /v Start /t REG_DWORD /d 3 /f
Step 3: Now, input the command net start DPS to enable Diagnostic Policy Service.
User Comments :