Have you encountered the cFosSpeed Driver issue when upgrading to Windows 11? The driver will block Windows update because it’s not ready for Windows 11. This post from MiniTool Partition Wizard offers you 2 ways to fix this issue.
Windows 11 Update Error cFosSpeed Driver
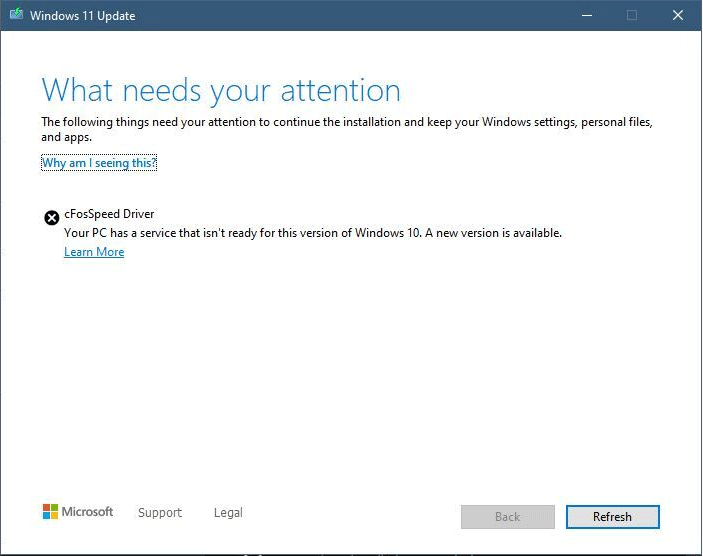
Some people report that they have encountered Windows 11 update error cFosSpeed Driver when they try to upgrade to Windows 11. The error tells you that the cFosSpeed Driver is not ready for Windows 11.
What is cFosSpeed? It is a software solution for managing network traffic on the Windows OS. In a busy network environment, it can effectively improve network latency. This program is attached to the Windows OS in the form of a driver to perform packet monitoring and application layer protocol analysis.
Therefore, many gaming PCs from brands like ASUS, GIGABYTE, ASRock, MSI, etc. will install this program. Then, how to fix the cFosSpeed Driver issue? You can refer to the following methods.
How To Speed Up Internet On Windows 10? 16 Ways Available
Method 1. Update the cFosSpeed Driver
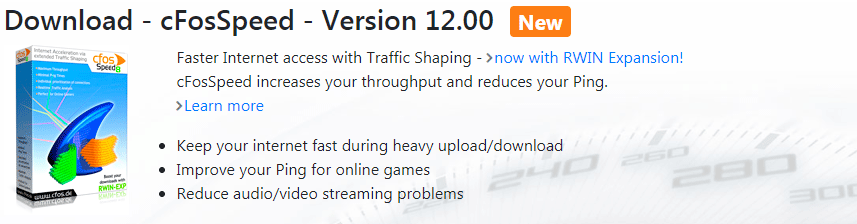
The cFosSpeed Driver is very useful. If possible, I don’t recommend you remove it. Therefore, you can try updating this driver to solve the Windows 11 update error cFosSpeed Driver. Here is the guide.
- Go to the official cFosSpeed driver download page.
- Download the latest cFosSpeed version.
- Install this software and see whether the problem is solved.
Method 2. Uninstall the cFosSpeed Driver
If the above method doesn’t work, you can uninstall the cFosSpeed driver temporarily. After the Windows 11 update is completed, you can then reinstall this software. How to uninstall the driver? Here are 3 ways for you.
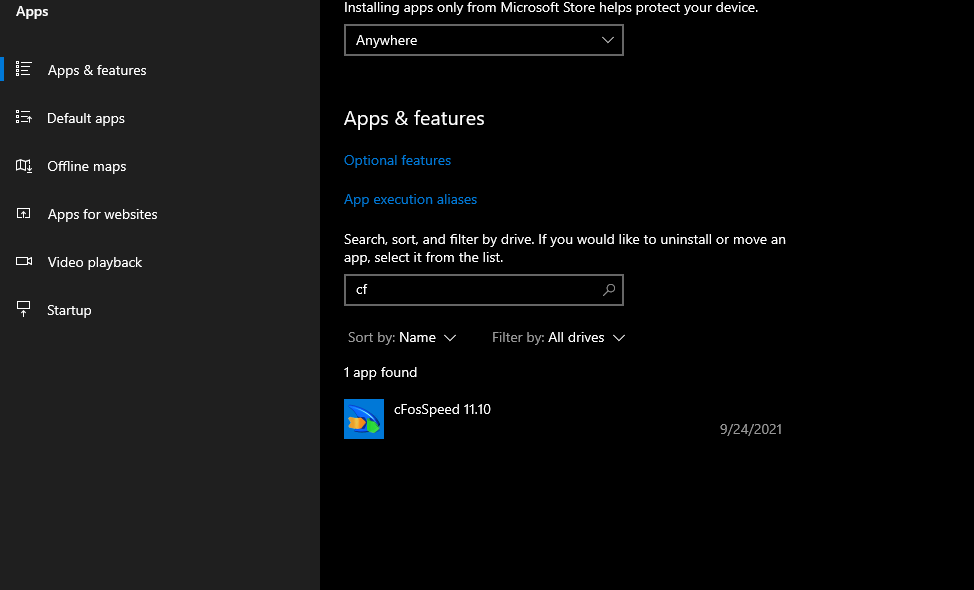
Way 1. Uninstall Through Settings
- Press Windows + I to open Settings.
- Navigate to Apps > Apps & features.
- In the right panel, find the cFosSpeed, click it, and then click Uninstall.
Fix Windows 11 Won’t Update & Update Problems – 8 Tips
Way 2. Uninstall Through Network Properties
- Press Windows + R to open the Run box.
- Type “cpl” in the box, and then press Enter to launch the Network Connections window.
- Right-click on the active network adapter and choose Properties.
- Under the Networking tab, under the “This connection uses the following items” section, highlight cFosSpeed for faster internet connections (NDIS 6) and click the Uninstall button.
- Click Yes to confirm.
Way 3. Uninstall Through Its Own Uninstaller
To use this way, you need to know the install location of this driver. In general, this driver is under a folder named LanManager. In some MSI PCs, the file path of this driver is C:\Program Files (x86)\MSI\Dragon Center\LanManager.
But please note that the specific path may vary depending on different PC models. You need to find the LanManager under both C:\Program Files and C:\Program Files (x86).
After finding the folder, find the unins001.exe file under this folder. This file is the uninstaller of the driver. Run this file to uninstall the driver.
What to do if all the above methods don’t work? Some people recommend you to upgrade to Windows 11 using a USB. This will work around a lot of problems, including the cFosSpeed Driver issue.
About The Author

Position: Columnist
Linda has been an editor at MiniTool for seven years. She continuously learns about computers and puts her knowledge into practice. Moreover, she is particularly knowledgeable in disk management, data recovery, system installation, and PDF editing. Her articles typically reference multiple examples or are based on her own experience, providing users with the most suitable solutions.
User Comments :