Do you know what Windows credential manager is? What features does the credential manager Windows 10 have? How to operate these features? Well, this post of MiniTool will explain it and show you all the details.
What is Windows Credential Manager
Windows credential manager is also called digital locker, which can collect your sign-in information for websites, applications, as well as networks. In addition, it can store your log-in credentials such as usernames, passwords and addresses.
The information can be stored for the use of the local computer, other computer in the LAN, and servers or Internet locations. The credentials can be divided into 4 categories (Windows credentials, certificate-based credentials, generic credentials and web credentials).
What Can Windows Credential Manager Do
The Windows credential manager enables you to view, delete, add, back up and restore log-in information. How to do? Well, you can check the detailed steps in the following section.
Update the Existing Sign-in Information
Step 1: Open Control Panel from the search box.
- Type control in the search box.
- Click on the Control Panel feature from the pop-up menu.
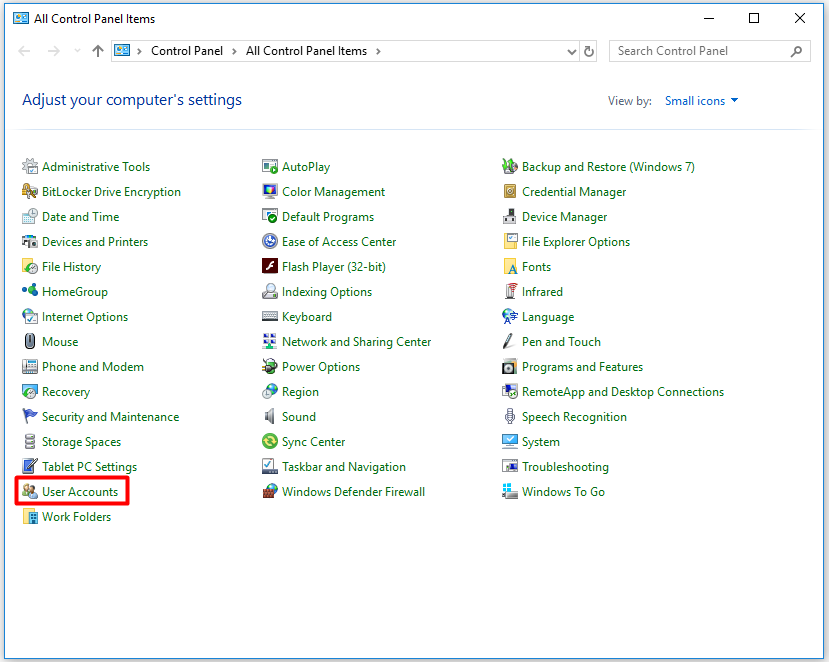
Step 2: In the All Control Panel Items window, click on User Accounts to go on.
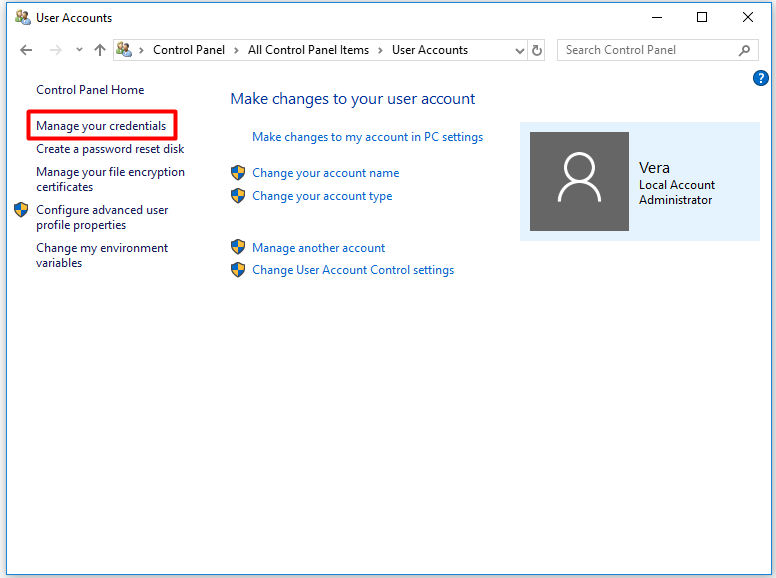
Step 3: In the next window, click the Manage your credentials option in the left pane.
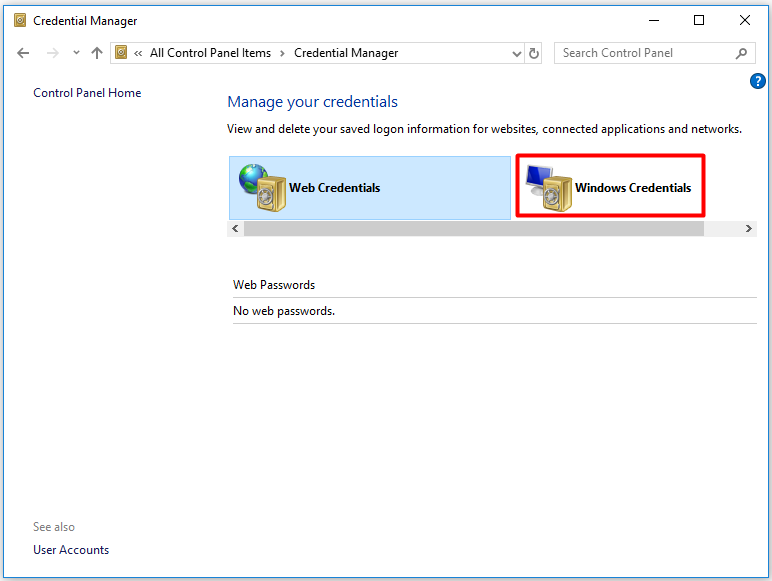
Step 4: Under the Manage your credentials section, choose Windows Credentials.
Step 5: Choose the account that you would like to update and click the Edit button from the elevated prompt.
Step 6: Update the user name and password and then save the changes.
Delete Sign-in Information
To delete or remove Windows 10 network credentials, you should follow steps below.
Step 1: Repeat the Step 1 to Step 4 in the Update the existing sign-in information section to navigate to the Windows Credentials section.
Step 2: Choose the target account and then click on the Remove button.
Step 3: After that, follow the on-screen instruction to finish the operation.
Back up Sign-in Information
While if you want to back up the Windows 10 network credentials, you can refer to this step-by-step guide.
Step 1: Likewise, you need to navigate to the Manage your credentials section by following Step 1 to Step 4 in the update the existing sign-in information part.
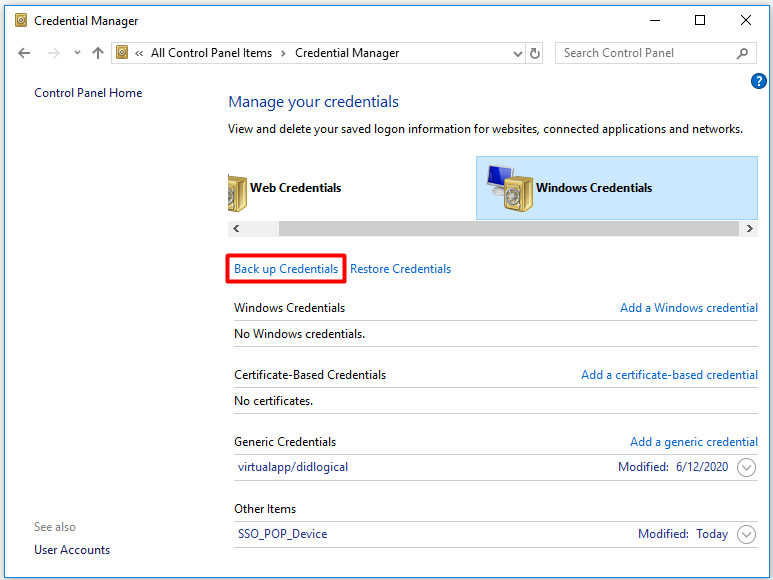
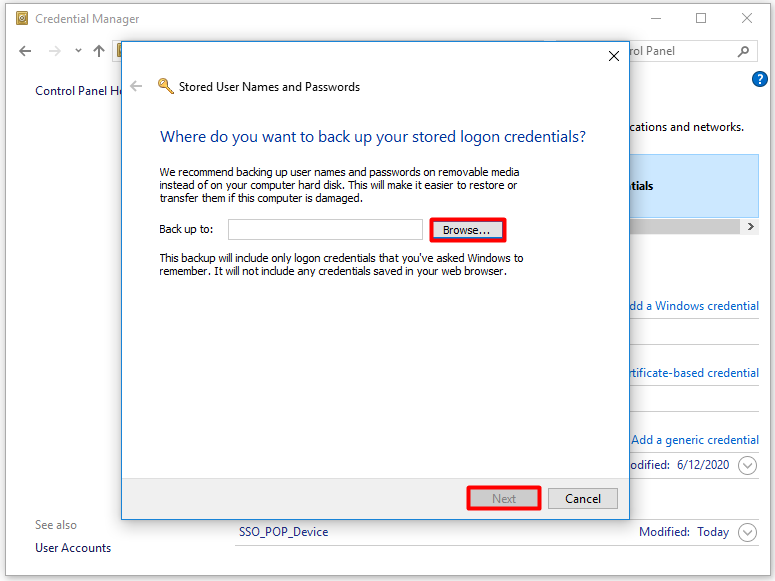
Step 2: Click on the Back up Credentials feature to go on.
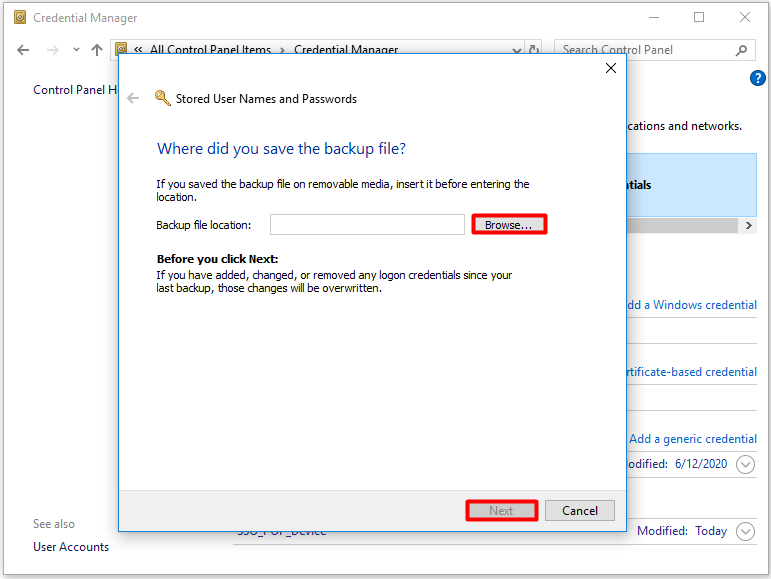
Step 3: In the elevated window, click the Browse button to choose a destination for the copied credentials. Then, click the Next button to continue.
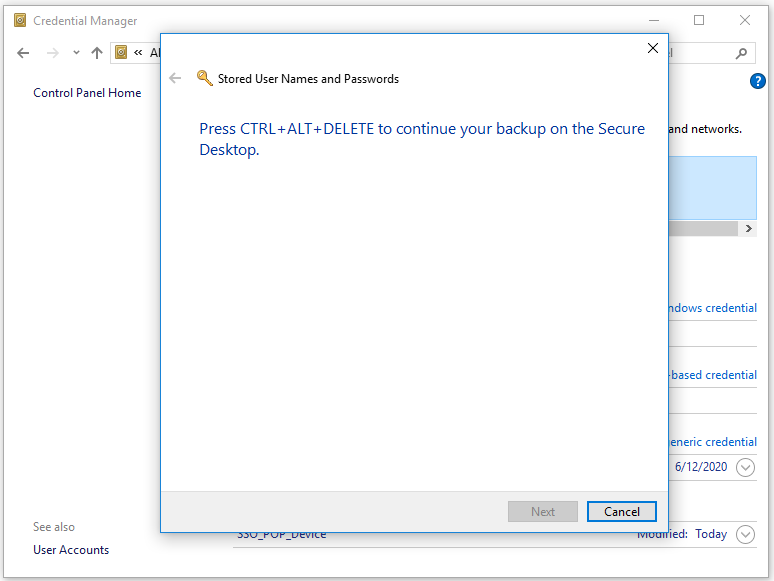
Step 4: Press Ctrl + Alt + Delete keys to go on.
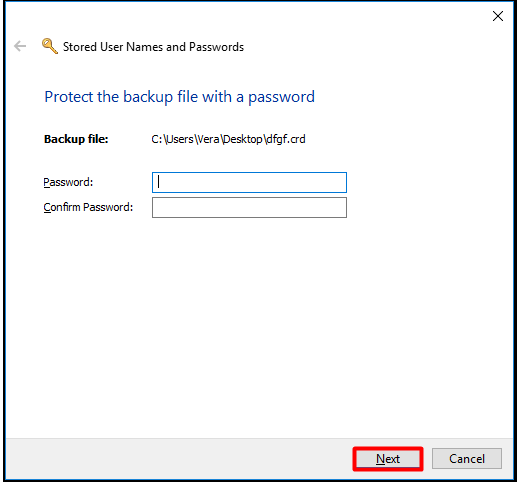
Step 5: Now, configure the password for the credentials and click Next. Then, follow the prompted windows to complete the operation.
Restore Sign-in Information
Step 1: Navigate to the Windows Credentials section.
Step 2: Click on the Restore Credentials option.
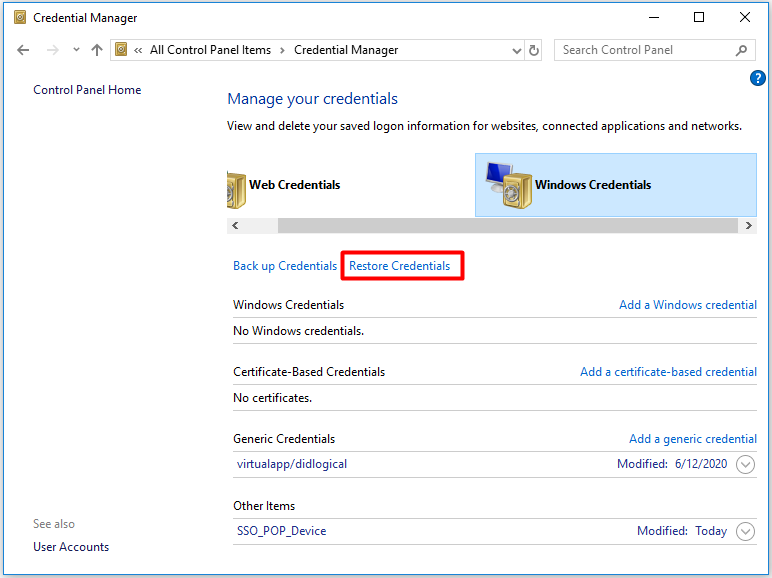
Step 3: In the next window, click the Browse button to find the location of the backup credentials and then click Next. Now, follow the pop-up instruction to finish the process.
Add New Sign-in Information
If you would like to add new sign-in information, you can follow the steps below.
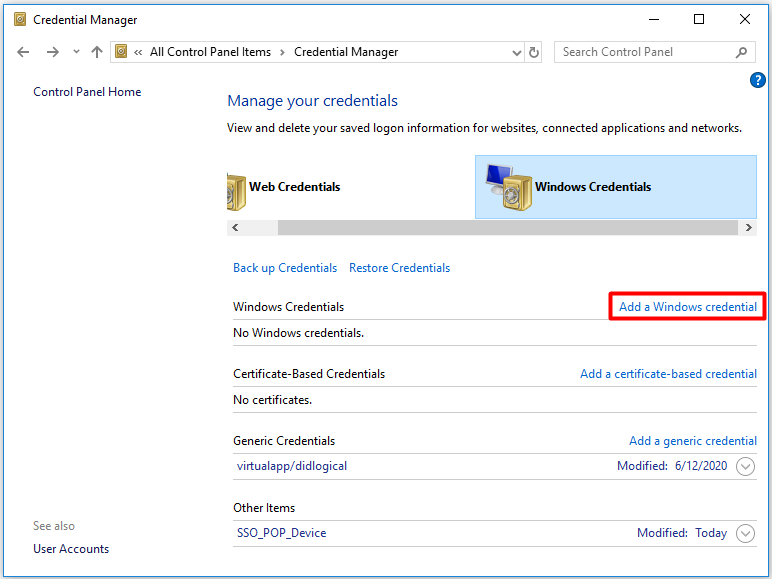
Step 1: Navigate to the Windows Credentials section, and then click the Add a Windows credential option.
Step 2: Then, configure the address of the website or network location and your credentials respectively and click the OK button to save the changes.

In conclusion, this post introduces you what network credentials Windows 10 is and how to use it. With this guide, you can manage your sign-in information well.
User Comments :