Have you come across the Windows 10 time wrong issue? It is not a big problem, but it comes with an inconvenience. In today’s article, MiniTool will explore several troubleshooting methods to fix the Windows 10 clock wrong problem.
Possible Causes for Windows 10 Time Wrong
Windows 10 time wrong is not a satisfying experience for those who love Windows 10. Usually, the time is always a little fast or slow when restarting the PC. According to the reports of users we gather, Windows 10 time wrong may be caused by the following factors.
- Improper Windows Time Service Settings: If the Windows Time Service Settings are improperly configured or not running, you might suffer the Windows 10 clock wrong.
- Incorrect Internet Time Server: Some users reported that they fix the clock wrong on Windows 10 problem by changing the incorrect Internet Time Server.
- Dual-boot of Windows 10: If you are using the dual-boot of Windows 10 and Linux, you might experience the Windows 10 time is wrong issue when you boot your Windows 10.

Solution 1. Check the Windows Time Service Settings
The first step you need to do is to make sure that the Windows Time service is running and is configured properly. You can follow the steps to do.
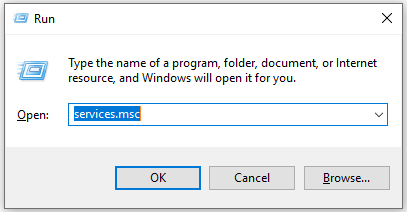
Step 1. Press Win + R keys to open the Run dialog box. Then type services.msc in the box and hit Enter.
Step 2. In the pop-up window, navigate to the Windows Time service and double-click it.
Step 3. Select Automatic from the drop-down menu of the Startup type click OK.

Step 4. Check the Windows Time service status. If the service is running, click Stop and then click Start again. If the service isn’t running, click the Start button to start. Then click Apply and OK.
Then you can check if the Windows 10 clock is wrong problem still persists.
Solution 2. Change Internet Time Server Settings
If the above method fails to fix your problem, you can try this method with the following steps.
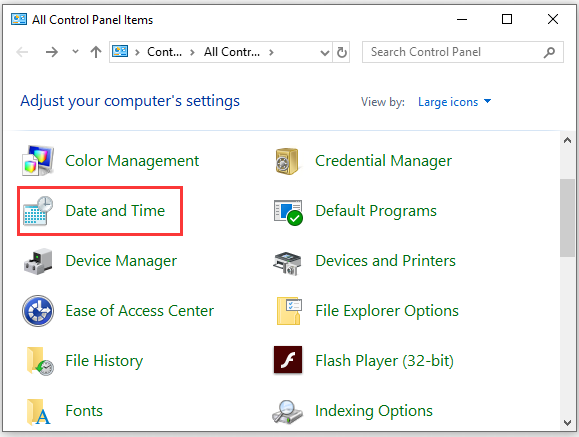
Step 1. Open Control Panel. Then navigate to Data and Time and double click it.
Step 2. Navigate to the Internet Time tab and click on the Change settings button.

Step 3. In the pop-up window, select the time.nist.gov from the drop-down menu and click Update now. Then click on the OK button to save the changes.

Solution 3. Re-registry the Windows Time Service
It is reported that some users solve Windows 10 time wrong by re-registering the Windows Time service. You can follow the simple steps to re-registry Windows Time service.
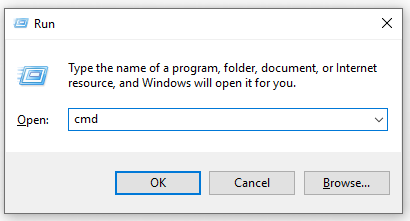
Step 1. Press Win + R keys to open the Run box and type cmd in the box. Then click on the Ctrl + Shift + Enter to open the elevated command prompt that grants you an administration privilege.
Step 2. When the command prompt (admin) opens, type the following commands ended with the Enter key one by one.
- w32tm /unregister
- w32tm /register
- net start w32time
- w32tm /resync
Step 3. Exit the command prompt and restart your computer. Then you can see if the Windows 10 clock wrong is resolved or not.
Solution 4. Add RealTimeIsUniversal DWORD Within Registry Editor
In addition to the above solutions, you can try this method to fix Windows 10 time wrong. If you’re using the dual-boot of Windows 10. In order to complete this solution, you need to run the following commands.
- ntpdate pool.ntp.org
- hwclock –systohc –utc
Then restart your Windows and follow the steps below.
Step 1. Press Win + R keys to open the Run box. Then type regedit in the box and hit Enter.
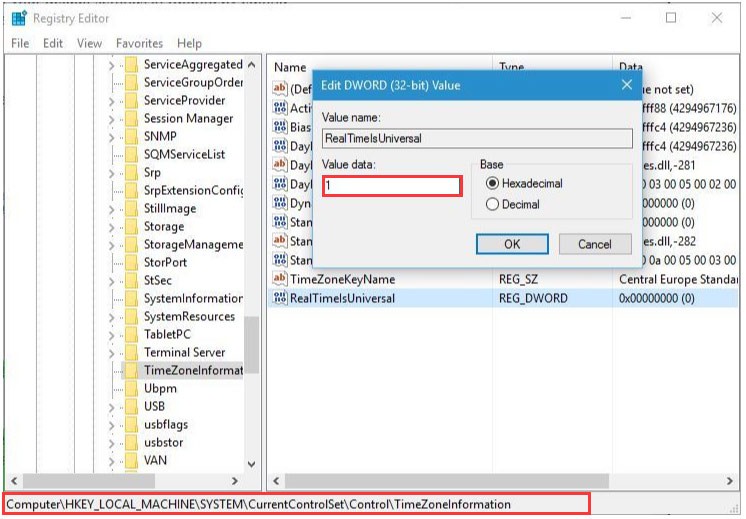
Step 2. Inside the Registry Editor window, navigate to the following path in the left pane.
HKEY_LOCAL_MACHINESYSTEMCurrentControlSetControlTimeZoneInformation
Step 3. Right-click the empty space and select the New > DWORD (32-bit) Value option.
Step 4. Double-click the RealTimeIsUniversal and set its Value data to 1. Then click on the OK button to save changes.
User Comments :