Do you know how to change translucent selection rectangle color? Apart from that, do you know how to hide or show it on Windows 10? If you want to manage translucent selection rectangle from these two aspects, please read the post in which MiniTool shows you detailed tutorials.
When you left-click and hold the mouse button, you will get a translucent selection rectangle. In other words, the translucent selection rectangle represents the selection.
Change Translucent Selection Rectangle Color
You can customize the color of translucent selection rectangle to improve your computer experience. To do that, please follow the tutorial below.
Stage 1: Get the RGB Color Code
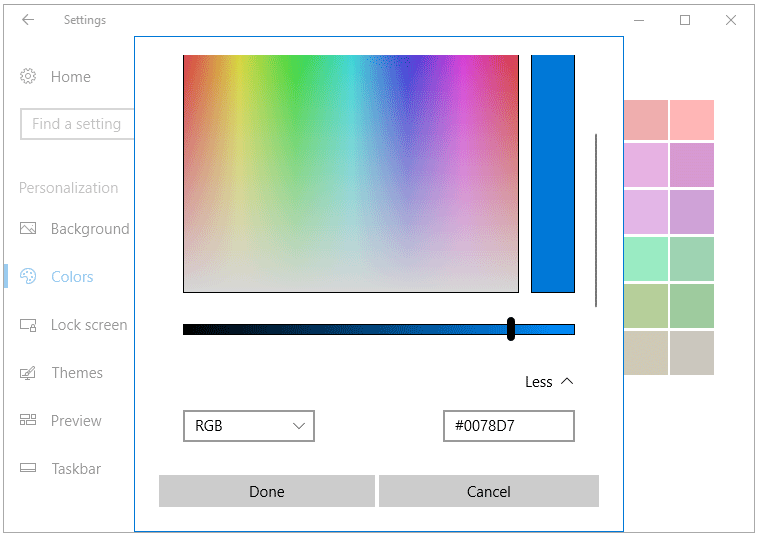
you need an RGB color code. To get the code, please navigate to Settings > Personalization > Colors > Custom Color > More. In the color dialog, select your preferred color and then note the values in Red, Green, and Blue boxes.
Now, you have gotten the RGB color code and you can go to Stage 2.

Stage 2: Make Changes in Registry Editor
Step 1: Open Registry Editor.
It is highly recommended that you back up your computer when you need to make changes with Registry Editor. The reason is that making some improper changes can lead to irreversible damage.
- Press Windows + R to call out the Run
- On the Run window, type regedit and then click OK to launch Registry Editor.
Step 2: On the Registry Editor window, please navigate to the path below:
HKEY_CURRENT_USERControl PanelColors
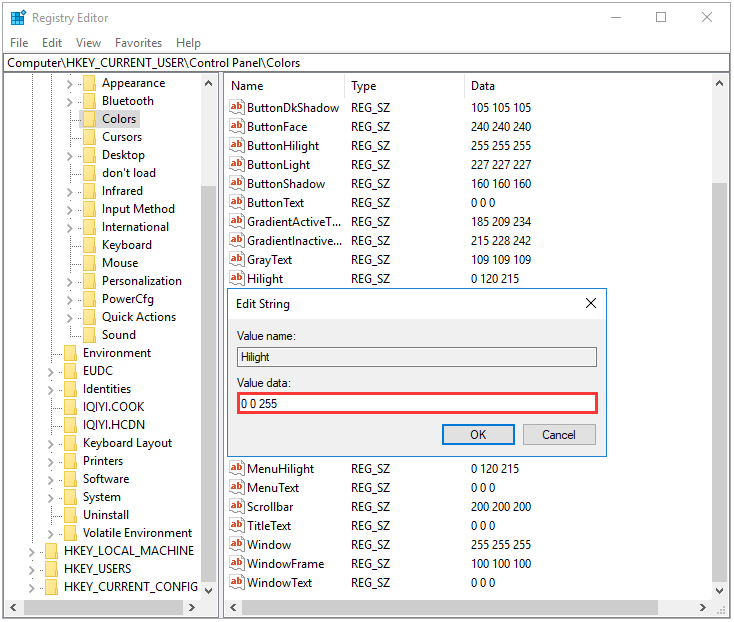
Step 3: To edit the border color of the selection rectangle, find and double-click Hilight in the right pane and then type the RGB color code in the Value date section. Please note the RGB has three values and you need to leave space between them when typing.
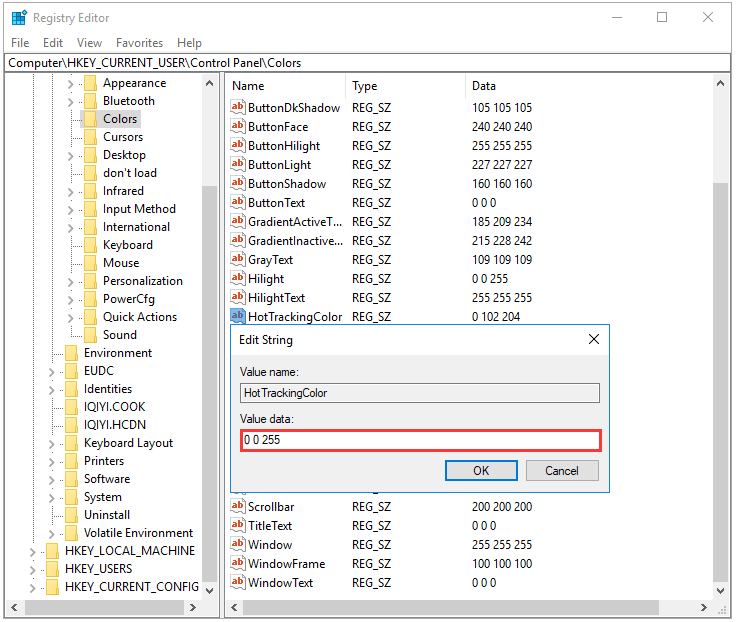
Step 4: To edit the inside color of the selection rectangle, you need to double click HotTrackingColor and then type the RGB color code in the Value data section.
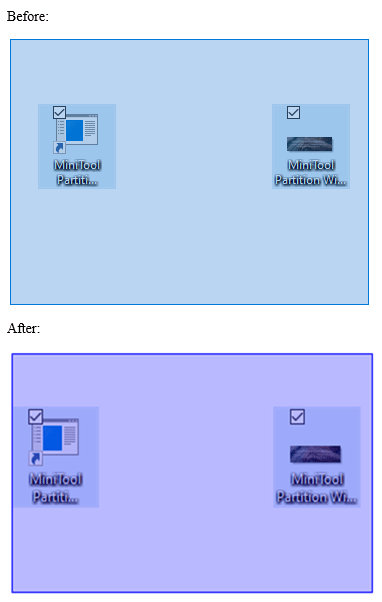
After editing the border color and inside color of selection rectangle, you should restart your computer to complete the changes.
Hide or Show Translucent Selection Rectangle
You can hide or show translucent selection rectangle via two methods. Keep reading and figure out what they are.
Way 1: Hide or Show Translucent Selection Rectangle via Registry Editor
Step 1: Lunch Registry Editor.
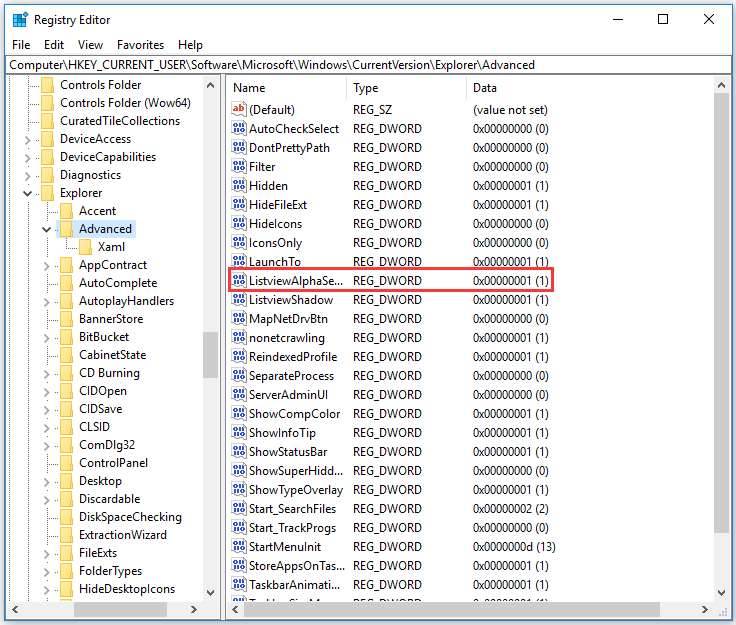
Step 2: Navigate to the following path and find and double-click ListviewAlphaSelect.
HKEY_CURRENT_USERSoftwareMicrosoftWindowsCurrentVersionExplorerAdvanced
- To hide translucent selection rectangle, set its Value data to 0.
- To show translucent selection rectangle, set its Value data to 1.
Step 4: Click OK after setting its Value data. When done, restart your computer.
Way 2: Hide or Show Translucent Selection Rectangle via Performance
Step 1: Type Control Panel in the Cortana’s search bar and then select the best-matched result.
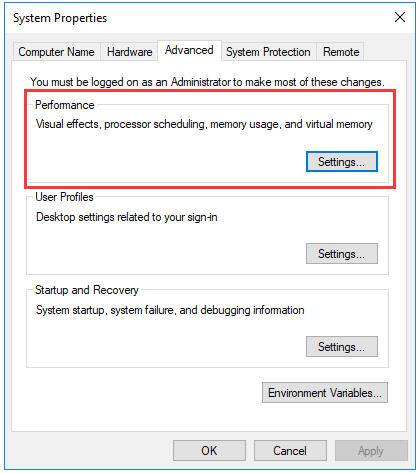
Step 2: Cick System & Security > System > Advanced system settings.
Step 3: In the Performance section, click the Settings button.
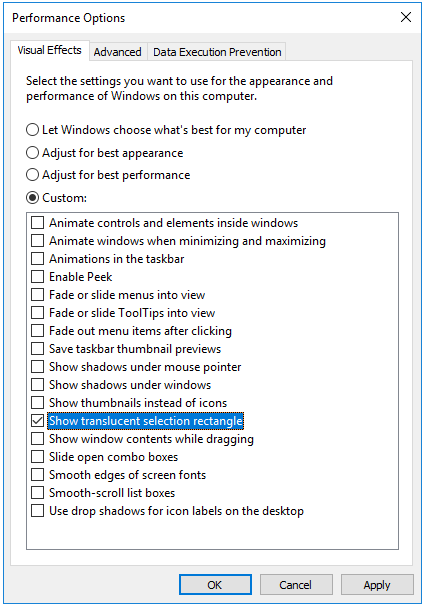
Step 4: In the Visual Effects tab, select Custom > Show translucent selection rectangle > Apply > OK to show the selection rectangle. To hide, keep it unchecked.
User Comments :