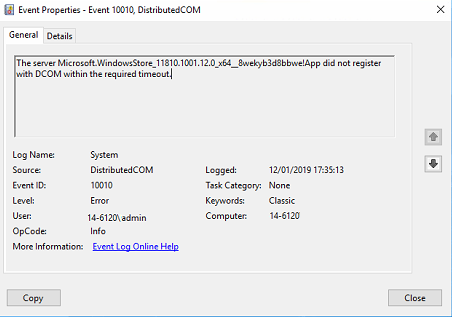
DCOM (Distributed Component Object Model) is a set of concepts and program interfaces that’s used by a client program to request one or more services from a server. It makes a client and server app communicate on the same machine. If a DCOM program fails to register itself timely, the server did not register with DCOM within the required timeout error will be displayed in the Event Viewer.
After analyzing extensive user reports, we summarize several tested solutions to the server did not register with DCOM within the required timeout issue. Let’s keep reading the following content.
![[Resloved] Unable to Execute File in Temporary Directory](https://images.minitool.com/partitionwizard.com/images/uploads/2021/06/unable-to-execute-file-in-temporary-directory-thumbnail.jpg)
Fix 1. Enable the Function Discovery Resource Publication Service
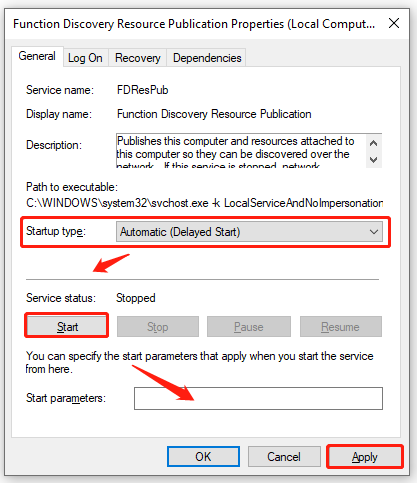
The Function Discovery Resource Publication service is a Windows service that can be used to build the connection between the attached resources and network. Some users found that the server did not register with DCOM within the required timeout Windows 10 issue can be resolved by changing the startup type of the service. For that:
Step 1. Press Win + R keys to open the Run dialog box, and then type services.msc in the box and hit Enter.
Step 2. In the Services window, right-click the Function Discovery Resource Publication service and select Properties.
Step 3. Change the Startup type to Automatic (Delayed Start) and click on the Start button.
Step 4. Click on Apply to confirm and reboot your computer. Then you can check if the unable to start a DCOM server issue is fixed.
Fix 2. Run Windows Store Apps Troubleshooter
According to a survey, the server did not register with DCOM within the required timeout Windows 10 can be caused by a glitch belonging to the Windows Store Apps. In this case, you can try running the Windows Store Apps troubleshooter to fix it.
Step 1. Press Win + I keys to open Windows Settings.
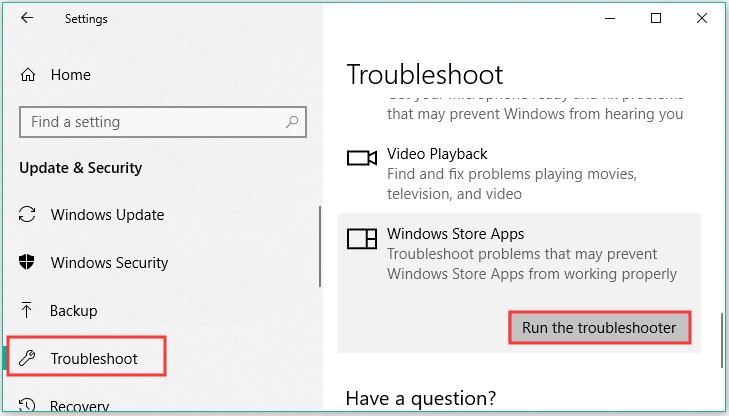
Step 2. Navigate to the Update & Security > Troubleshoot one by one.
Step 3. Find Windows Store Apps in the list, and double click it, and select Run the troubleshooter.
Step 4. After that, this tool will detect problems automatically and try fixing the error.
Fix 3. Disable the Default Administrator Account
Some users reported that the server did not register with DCOM within the required timeout Windows 10 error can occur due to the default administrator account at fault. Here you can try disabling the administrator account:
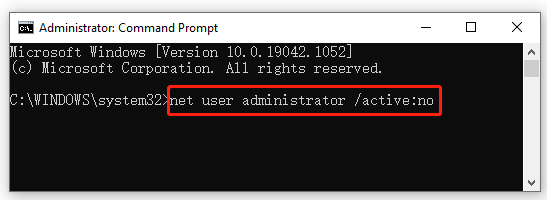
Step 1. Type cmd in the search box, and then right-click the Command Prompt app and select Run as administrator.
Step 2. Type net user administrator /active:no in the elevated Command Prompt window and hit Enter to disable the administrator account.
Step 3. Once the process completes successfully, restart your computer and log out of your current user account.
Fix 4. Disable the Updates from More Than One Place Option
Some users find that a certain Windows update setting is responsible for the server did not register with DCOM error. In this case, you can try disabling the Update from more than one place option. Here’s how:
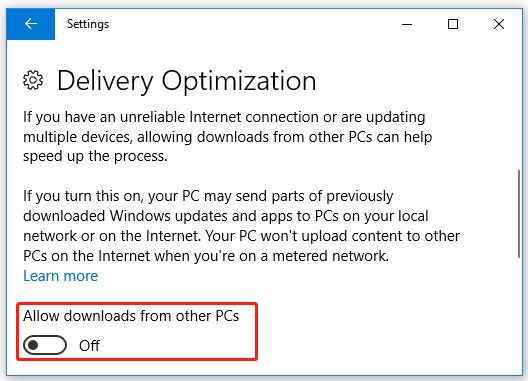
Step 1. Press Win + I keys to open the Settings window and select Update & Security.
Step 2. Scroll down the right sidebar and click on Advanced options under the Update settings section.
Step 3. Click on Delivery Optimization and toggle off the switch next to Allow downloads from other PCs.
Fix 5. Allow the Problematic Client Through Your Antivirus Program
If you installed the third-party antivirus software, it may block your program from accessing the DCOM server. Here you can try adding the affected program to the exclusion of your antivirus software. For that:
Step 1. Type firewall in the search box and then select the Windows Defender Firewall from the context menu.
Step 2. Click on Allow an app or feature through Windows Defender Firewall from the left pane.
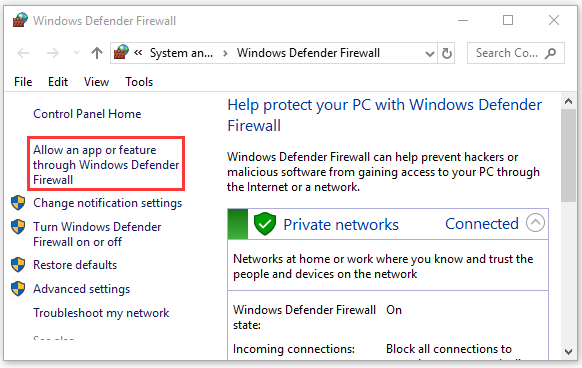
Step 3. Select the executable file of the affected program from the list and check the boxes next to both Private and Public. Then click OK to save changes.
If it still doesn’t work, you can try disabling the third-party antivirus software and see if the server did not register with DCOM within the required timeout Windows 10 issue is fixed.
Fix 6. Disable DCOM in Component Services
If all the above methods fail to work, you may consider disabling the DCOM in Component Services. Here’s how to do that:
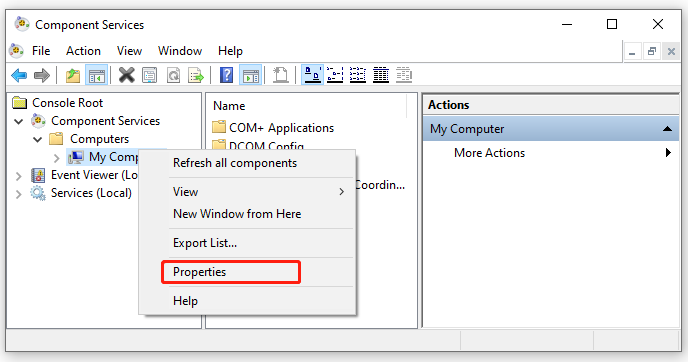
Step 1. Press Win + R keys to open the Run dialog box, and then type comexp.msc in it and hit Enter.
Step 2. Locate the Computer Services > Computers category, and then right-click My Computer and select Properties.
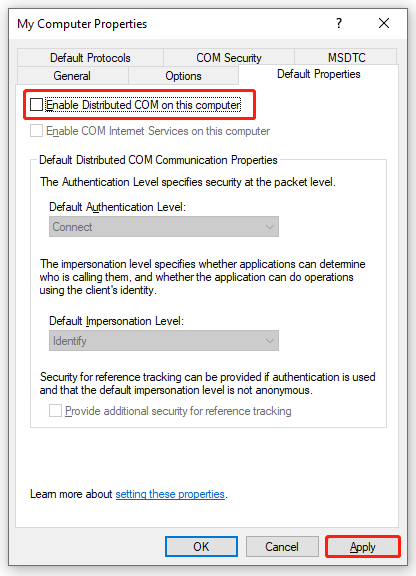
Step 3. Navigate to the Default Properties tab, and then untick the checkbox next to Enable Distributed COM on this computer and click on Apply.
User Comments :