Many times, when you try to perform an operation on a file (deletion, renaming, copy, movement, etc.), you may receive a “File In Use” dialog box saying “The operation can’t be completed because the file is open in another program.” In some cases, it will display the name of the process or program that is using the file. However, many times, it does not.
Well, how to know which process is using a file in Windows 11? Keep reading.
How to Know Which Process Is Using a File in Windows 11?
In Windows 11, you can quickly know which process is using a file. You can use the Resource Monitor tool in Windows 11, or use the command line in Windows PowerShell or Command Prompt to do this. Here is the guide to help you do that.
Use Resource Monitor
Resource Monitor is a Windows built-in tool that allows you to monitor resource consumption, such as the CPU, memory, disk, and network usage of active processes in Windows 11.
Step 1: Open Resource Monitor by typing resmon in the search box and pressing Enter. Or you can also open Resource Monitor through Task Manager (Ctrl + Shift + Esc) > Performance > Open Resource Monitor.
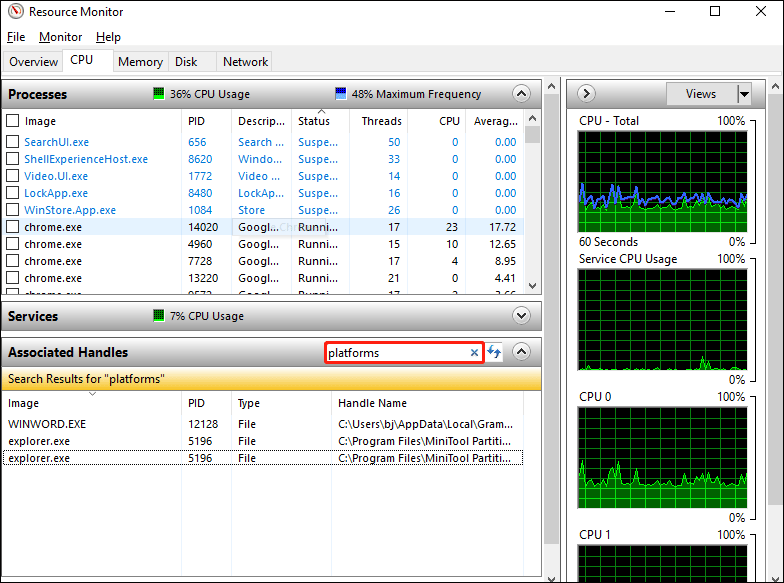
Step 2: Under the CPU tab, click Associated Handles to expand the section.
Step 3: In the search box, type the file’s name that you can’t modify, and then press Enter. It will show you a list of processes that saved the target file.
Once you know which process is using the file, you can right-click the process and select the End Process option to end or terminate the process through the task manager. After that, you can perform any operations on the file.
Use Handle Tool Through Command Prompt/PowerShell
To identify which process is using a file through the Windows terminal (PowerShell) or the Command Prompt in Windows 11, you need to use a command-line utility called Handle.
Well, the following steps tell you how to use Handle to find out which process is using a file in Windows 11.
Step 1: Download Handle from Microsoft and extract the ZIP folder.
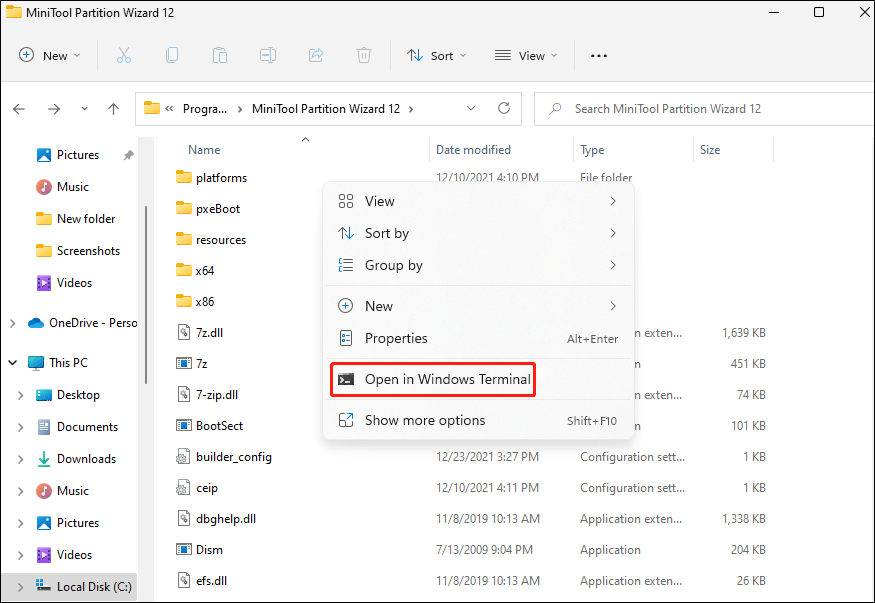
Step 2: Right click the folder and select Open in Windows Terminal to open PowerShell in Windows 11.
Step 3: In the PowerShell window, type .handle.exe -a -u “path to the locked file”. For example, to find the process that is using platforms, you need to type the following command: .handle.exe -a -u “C:Program FilesMiniTool Partition Wizard 12platforms”.
If you run the Command Prompt, type the following command: handle.exe -a -u <filename-with-path>.

Bottom Line
As you can see, a complete guide on how to know which process is using a file in Windows 11 is illustrated in the post. If you have any questions about the two methods, please leave them in the comment zone and we will try to answer them as soon as possible.
About The Author

Position: Columnist
Vega enjoys helping people with computer problems, including disk management, data recovery, data backup, and more. She is constantly expanding her knowledge in related fields. And she will continue to bring more easy-to-understand professional articles to help people solve various problems on the PC.
User Comments :