Google Slides is a popular presentation service available on many operating systems. In this post, MiniTool Partition Wizard introduces how to wrap text in Google Slides. If you usually make presentations, you can have a try!
Do I Need to Wrap Text Google Slides
Google Slides, developed by Google LLC, is a presentation program. It is available on various platforms, including Android, iOS, Microsoft Windows, macOS, BlackBerry, and Chrome OS.
Google Slides is commonly used as an alternative to Microsoft PowerPoint. It supports Microsoft PowerPoint file formats and allows users to create and edit files online. They can also collaborate with others in real-time while using Google Slides.
If you are not familiar with this program, this post might be helpful. Today, I’d like to introduce how to wrap text in Google Slides.
You might ask why you need to wrap text while making a presentation. Don’t worry. It is a feature that makes your pictures and text look more pretty. By wrapping text, you can make the text wrap around the images in your presentation. Therefore, if there are various elements in your presentation, it is a good choice to wrap text around them.
Now, let’s see how to wrap text in Google Slides.
How to Wrap Text in Google Slides
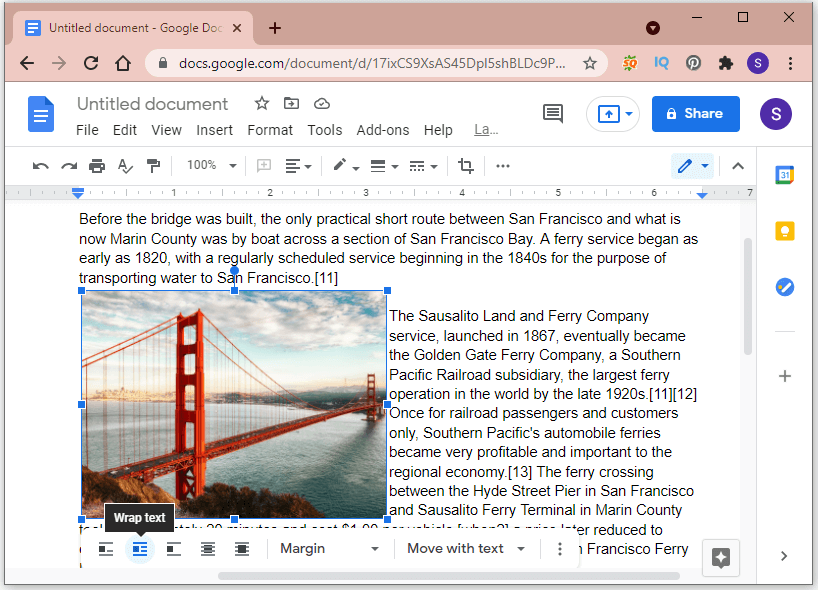
In a Word editing program, such as Google Docs and Microsoft Office Word, you can wrap text by clicking an image and selecting Wrap text directly.
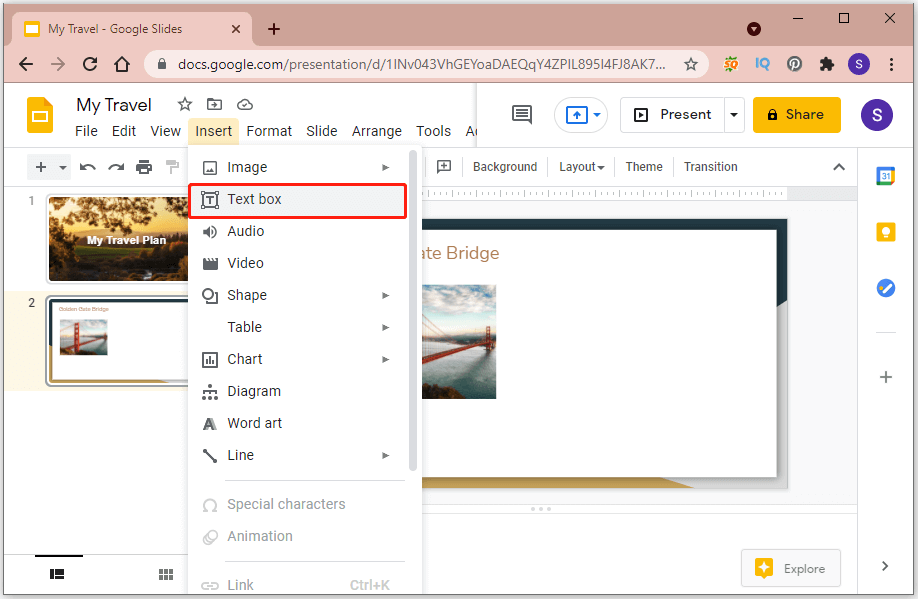
However, Google Slides doesn’t provide such a wrap text feature. Therefore, to wrap text around an image in Google Slides, you can only add text boxes around the picture. Here are the detailed steps for how to wrap text in Google Slides.
Step 1: Access Google Slides and start a new slide.
Step 2: Insert an image into your Google Slides. You can click the Insert option from the top toolbar and select Image. Google Slides allows you to upload an image from your computer or online. You can choose one according to your needs.
Step 3: Move and Resize the picture. Then click Insert > Text box from the toolbar.
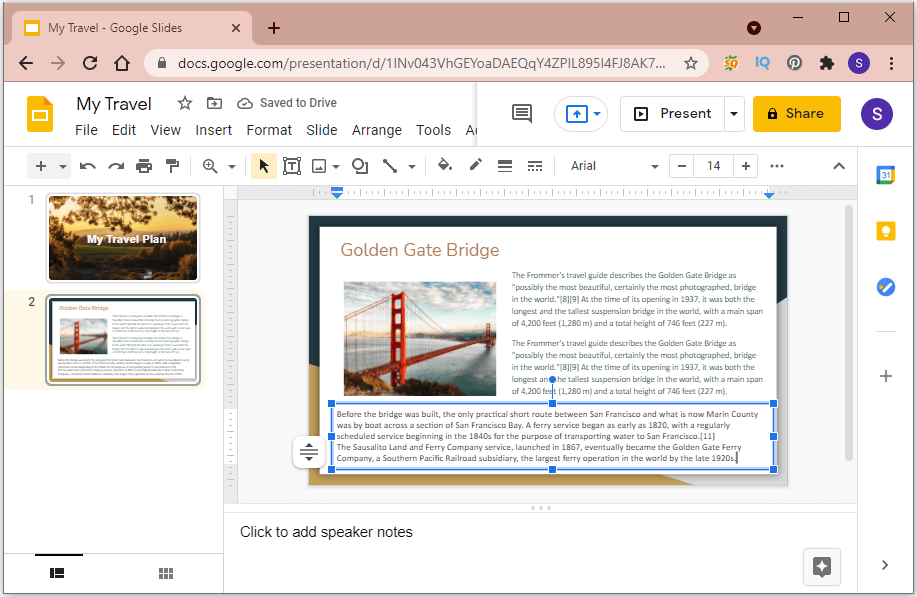
Step 4: Click the space next to your picture and drag the cursor to draw a text box. Then type the content in the text box. After that, you can move and resize the text box according to your needs by dragging the blue box edges.
Step 5: Repeat Step 4 to add multiple text boxes around the picture and input your desired content.
Then you can repeat the steps above to wrap text around an image in Google Slides for all your slides.
Here is an additional tip about how to wrap text in Google Slides. After adding text boxes and inputting content, you can select the text box and click Format from the top toolbar. Then choose Align & Indent > Justified to make the slide look better.
By the way, you can find various text formats in the tool Format > Text, such as bold, italic, underline, strikethrough, size, color, etc. You can use this tool to customize your text in Google Slides.
In addition to the method that you wrap text around a picture in Google Slides by yourself, you can also use a template that includes the example of text wrapping. If you can’t find a suitable template in Google Slides, this post might help: Top 6 Sites to Get Free Google Slides Themes/Templates 2021.
User Comments :