In 2016, Google released an artificial intelligence-powered virtual assistant called Google Assistant. Google Assistant is useful because it offers voice commands, voice searching, and voice-activated device control. However, there is no Google Assistant app for PC. Don’t worry, this post from MiniTool Partition Wizard shows you how to get Google Assistant for PC.
Do you have a Google account? If not, please create one now. After creating a Google account, follow the guide below to set up Google Assistant on your Windows computer.
Get Google Assistant for PC
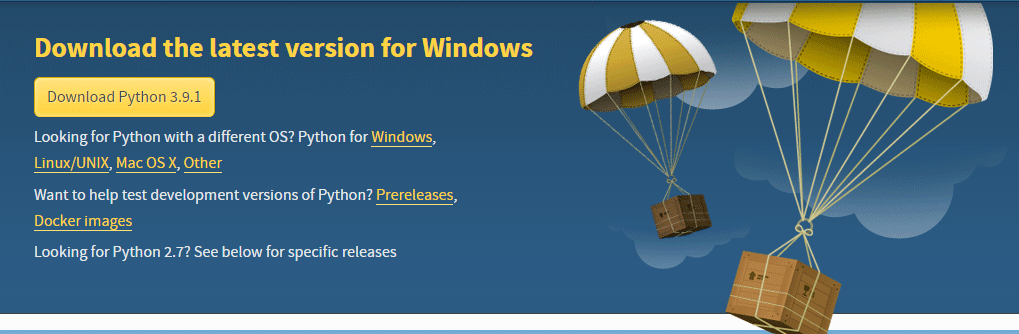
Step 1: Download and install Python on your Windows computer.
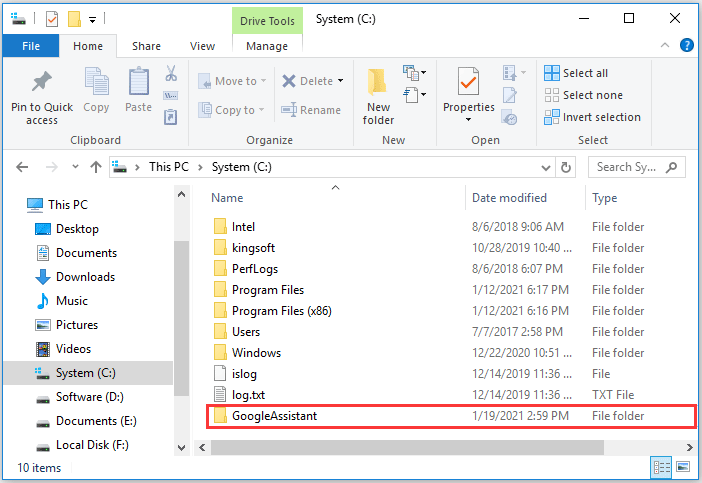
Step 2: Create a new folder named GoogleAssistant:
- Open Windows Fire Explorer.
- Go to the main drive directory.
- Right-click the blank space to choose New > Folder and then name the new folder GoogleAssistant.
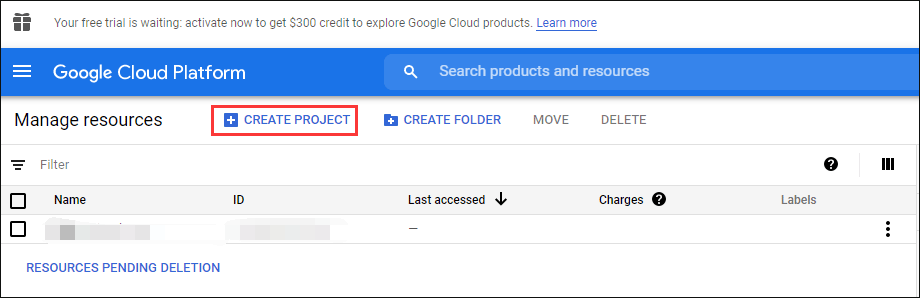
Step 3: Open Google Cloud Platform in Chrome and select CREATE PROJECT.
Step 4: Name the project as WinGoogleAssistant and then write down the Project-ID underneath that you will need later to use Google Assistant. Click Create.
Step 5: Open Google Assistant APIs and then select ENABLE to enable the Google Assistant API for your project.
Step 6: Click CREATE CREDENTIALS on the Google Assistant APIs website.
Step 7: On the Add credentials to your project screen, choose the following three responses and then choose What credentials do I need.
- For “which API are you using”, choose Google Assistant API.
- For “where will you be calling the API from”, choose Other UI (e.g., Windows, CLI tool).
- For “what data will be accessing”, choose User data.
Step 8: Next, will be a Select up consent screen window, select SET UP CONSENT SCREEN.
Step 9: Change the Application Type to Internal, type WinGoogleAssistant in the Application name zone, and click Save at the bottom of the screen.
Step 10: Select Create credentials > Help me choose. On the next screen, select the same options as you did in Step 7.
Step 11: Type WGAcredentials in the Name box and then click Create OAuth client ID. Next, click Done.
Step 12: Download the created credential by clicking the down arrow and save it in the GoogleAssistant folder in Step 2.
Step 13: Open Command Prompt:
- Press Windows + R at the same time to call out the Run dialogue box.
- Type cmd inside the dialogue box and then hit Enter.
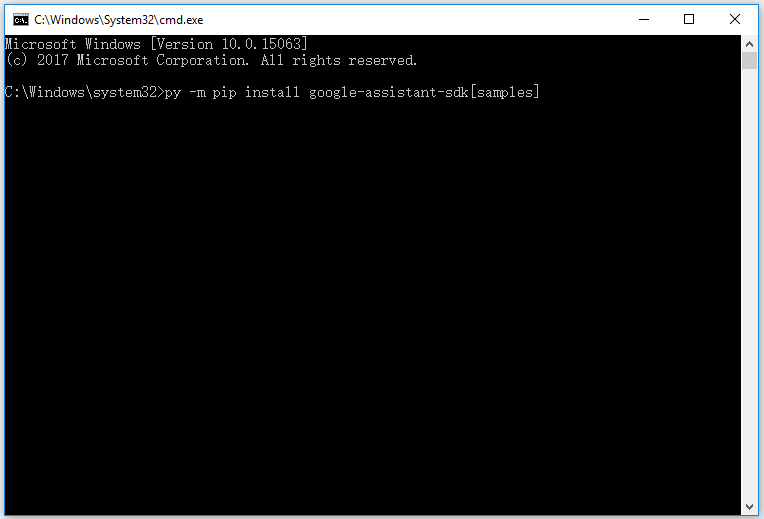
Step 14: Once Command Prompt launches, run the following command:
py -m pip install google-assistant-sdk[samples]
Step 15: When the installation process ends, run the following command:
py -m pip install –upgrade google-auth-oauthlib[tool]
Step 16: Go to File Explorer again and locate the credential file you have saved in the GoogleAssistant folder. Once you locate the file, right-click it and select Properties.
Step 17: On the file properties window, copy the file name. Next, go back to Command Prompt and paste the copied file name in the window. Press a spacebar and type –scope https://www.googleapis.com/auth/assistant-sdk-prototype –save –headless. Finally, hit Enter.
Step 18: You will see a URL displayed with a prompt where it asks you to Enter the authorization code. Select the entire URL starting with http:// and copy it.
Step 19: Open the URL using your browser and then select the same Google account you used to create credentials.
Step 20: Click Allow to give the application access to Google Assistant.
Step 21: You will see some characters. Click the Copy icon to copy these characters.
Step 22: Go back to the Command Prompt window, paste the copied characters into the window and then press Enter.
You will see a credential saved message, which means you have Google Assistant on your PC. However, to test that things are working as expected, please run the following command in Command Prompt.
py -m googlesamples.assistant.grpc.audio_helpers
Your computer should record five seconds of audio and play it back. If you hear the audio, Google Assistant has been set up on your PC.
Step 23: Find the Project-ID you have written done in Step 4. Next, type it in the Command Prompt window and hit Enter.
Step 24: Type googlesamples-assistant-devicetool –project-id in the Command Prompt window, Next, press the spacebar and type your Project-ID. Press a spacebar and type register-model –manufacturer “Assistant SDK developer” –product-name “Assistant SDK light” –type LIGHT –model “GA4W”. Finally, hit Enter to finish the setup process.
Now, you have set up Google Assistant on your computer. if you want Google Assistant with push to talk functionality, run the following command using Command Prompt.
py -m googlesamples.assistant.grpc.pushtotalk –device-model-id “GA4W” –project-id
Now, you can press the Enter key while the program is active and ask Google Assistant questions directly.

Bottom Line
That’s all about Google Assistants setup on PC. If you have any questions, please let us know by leaving them in the comment zone below.
User Comments :