In this article, MiniTool Partition Wizard makes a brief introduction about Generic PnP Monitor and displays some feasible methods to fix Generic PnP Monitor issue in Windows 10 for you.
Windows 10 provides plenty of new features for users, but it comes with some issues as well and the Generic PnP Monitor problem is one of them.
PnP, short for “plug and play”, is always associated with external computer hardware. If you have a PnP external device connected to your computer, it will start working without the need for any driver.
Sometimes, you may see a driver displayed as Generic PnP Monitor in the Device Manager. This indicates that your Windows cannot recognize the monitor. Commonly, the Generic PnP Monitor issue can be caused by outdated monitor driver or the insufficient capacity in hardware when you are upgrading to Windows 10.
Of course, the system cannot detect the monitor if it is not connected properly. So, you can firstly shutdown computer, turn off monitor and remove power cable, and disconnect the video cable. Then, reconnect all the cables, start your PC, and check if the Generic PnP Monitor problem is fixed after reconnecting the monitor.
If you are sure that the monitor is properly connected, you can try the following methods to fix Generic PnP Monitor issue in Windows 10.
Fix 1: Update Generic PnP Monitor Driver
As mentioned before, if the specific driver is outdated, you might encounter the Generic PnP Monitor issue. Therefore, updating the driver to the latest version might help you fix it. Here’s how to do that.
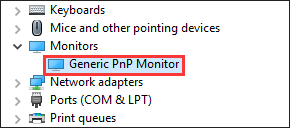
Step 1: Right-click the Start button and choose Device Manager to open it.
Step 2: Expand the Monitors category, right-click the Generic PnP Monitor, and choose Update driver.
Step 3: Choose Search automatically for updated driver software option to look for the latest updates for the monitor driver.
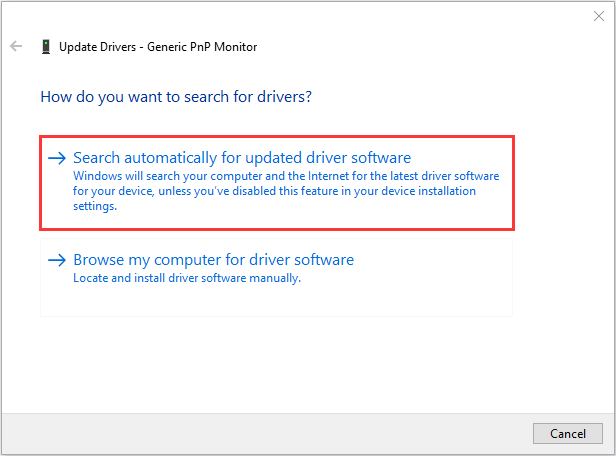
If there are any available updates detected, download and install them according to the onscreen instructions.
Fix 2: Update or Roll Back Display Card Driver
In some cases, the Generic PnP Monitor issue is related to the display (graphics) card driver. So, in this solution, you need to update your display card driver. The steps are similar to that of updating monitor driver and I won’t give further details here.
If the issue appears after you update the display card driver, then you can try rolling back the driver to the previous version instead. Just follow the instructions below.
Step 1: Open Device Manager and expand the Display adapters category.
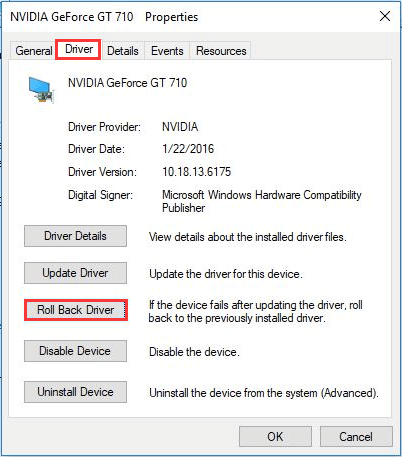
Step 2: Right-click your graphics driver and choose Properties.
Step 3: Switch to the Driver tab, and click Roll Back Driver option.
Step 4: Choose a reason why you roll back the driver and click Yes to start the process.
Once it’s done, restart your computer and check if the issue is resolved.
Fix 3: Update Your Windows
In addition, some users recommend updating the Windows 10 to the latest version and some of them have resolved the issue in this way. So, you can also have a try.
Step 1: Press Windows + I to open Settings.
Step 2: Navigate to Update & Security > Windows Update.
Step 3: In the right pane, click Check for updates.
If there are any pending Windows updates, download and install all of them.
Fix 4: Use System File Checker Utility
It is also possible that certain system files related to the monitor driver is missing or corrupted. In this case, you can employ the System File Checker utility to scan for system files issue and fix it.
Step 1: Press Windows + R to invoke Run window.
Step 2: Input cmd and press Ctrl + Shift + Enter to launch Command Prompt as administrator.
Step 3: In the command console, type sfc /scannow and press Enter.
Then, this utility will start scanning your system files and replace the problematic ones with the cached copy. Wait until the process is completed, restart the computer and check if the Generic PnP monitor issue has been resolved.
User Comments :