
To delete extended partition in Windows 10/11, you must first remove all logical drives inside it. Then, you can delete the empty extended partition with MiniTool Partition Wizard, Disk Management, or DiskPart and turn the space into unallocated space.
How to Delete Extended Partition
To delete an extended partition, here are 3 tools you can use:
| Tool | Best For | Interface |
| MiniTool Partition Wizard | Beginners & power users—visual preview, built-in recovery | Graphical (GUI) |
| Disk Management | Quick, occasional tasks with Windows’ built-in tool | Graphical (GUI) |
| DiskPart | Advanced users—scripting & automation | Command-line |
Before you start:
- Back up all important files on the logical drives — deletion is not reversible from within these tools.
- Close any programs that are using files on those drives.
- Remember: you must delete every logical drive inside the extended partition before the extended partition itself can be removed.
Method 1. Delete Extended Partition Using MiniTool Partition Wizard
MiniTool Partition Wizard makes deleting extended partitions much easier than Disk Management and DiskPart because it clearly displays the partition structure and lets you preview changes before applying them.
MiniTool Partition Wizard FreeClick to Download100%Clean & Safe
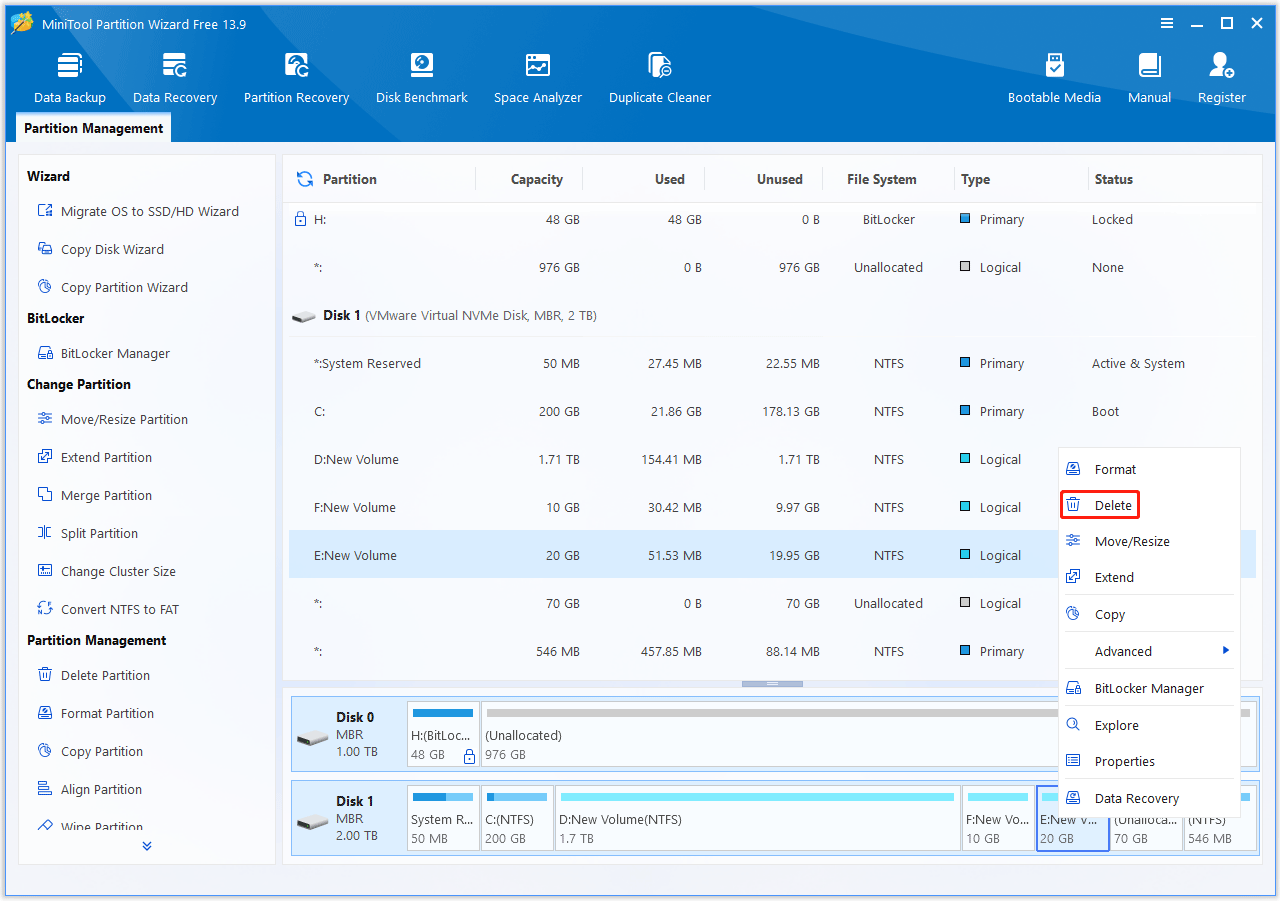
Step 1. Install and launch this free partition manager. In the main interface, you will see all logical partitions with a light blue color.
Step 2. Right-click each logical drive and choose Delete. Repeat until every logical drive inside the extended partition has been removed.
Step 3. Now, you can preview that the extended partition becomes the unallocated space. Finally, click Apply to execute the pending operation. Then click Yes to confirm.
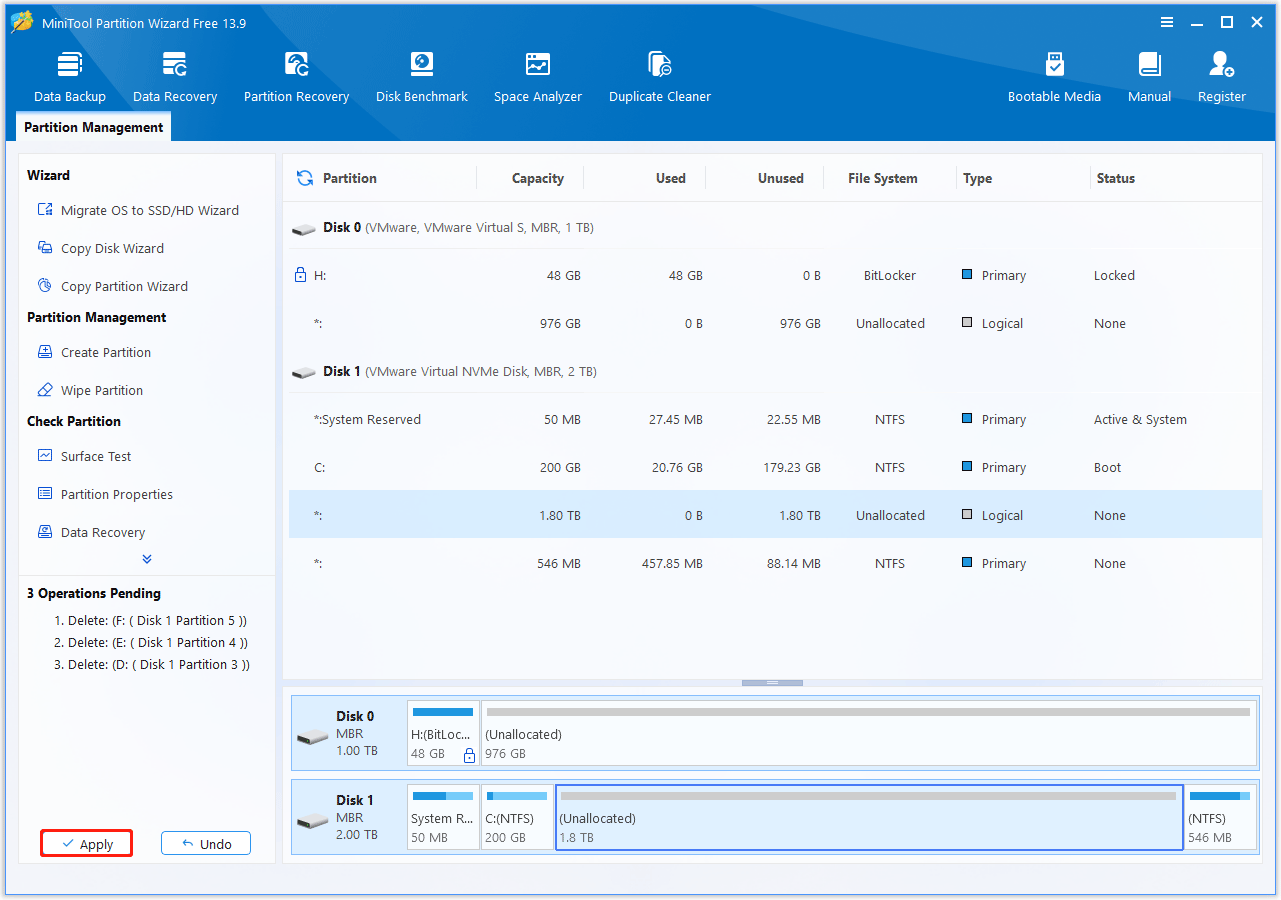
Now, you can reuse the unallocated space to:
- Create a new partition
- Extend an existing partition
- Merge partitions
Method 2. Delete Extended Partition Using Disk Management
Disk Management is the built-in Windows utility for partition management. It also supports deleting extended partitions. Here are the steps:
Step 1. Open Disk Management.
- Press Win + X.
- Select Disk Management.
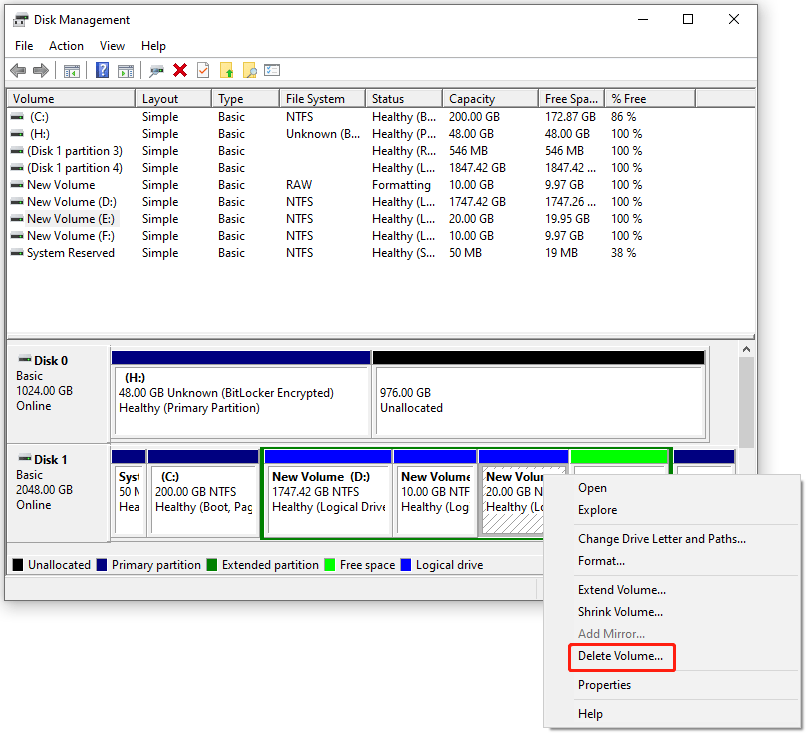
Step 2. Delete logical partitions.
- Locate the logical drives inside the extended partition.
- Right-click each one.
- Choose Delete Volume.
- Repeat until all logical drives have been deleted.
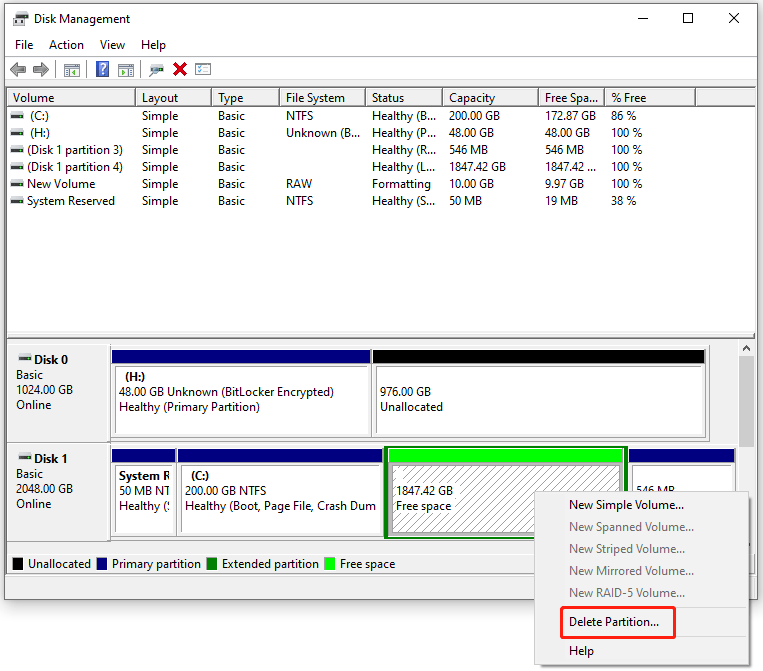
Step 3. After every logical drive is gone, right-click the green extended partition area and choose Delete Partition. Then you can see the space changes to Unallocated.
Method 3. Delete Extended Partition Using DiskPart
Advanced users can use DiskPart from Command Prompt to remove extended partition.
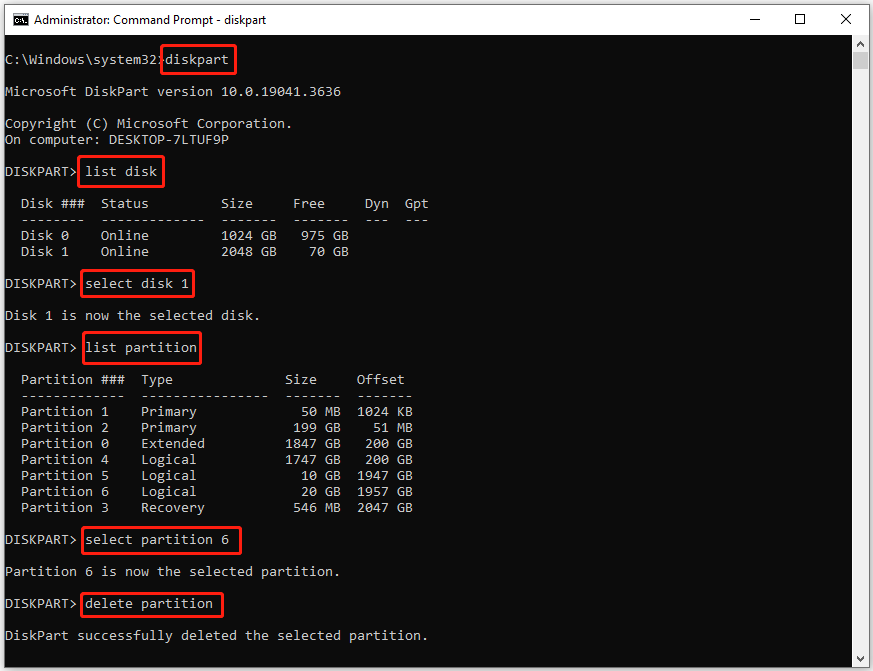
Step 1. Search for CMD. Right-click Command Prompt and choose Run as administrator.
Step 2. In the Command Prompt window, type diskpart and press Enter.
Step 3. Type the following commands to delete logical partitions and press Enter after each one.
- list disk
- select disk 1 (Replace 1 with your disk number.)
- list partition
- select partition * (Replace * with the number of your logical partition.)
- delete partition
Repeat until every logical drive has been deleted.
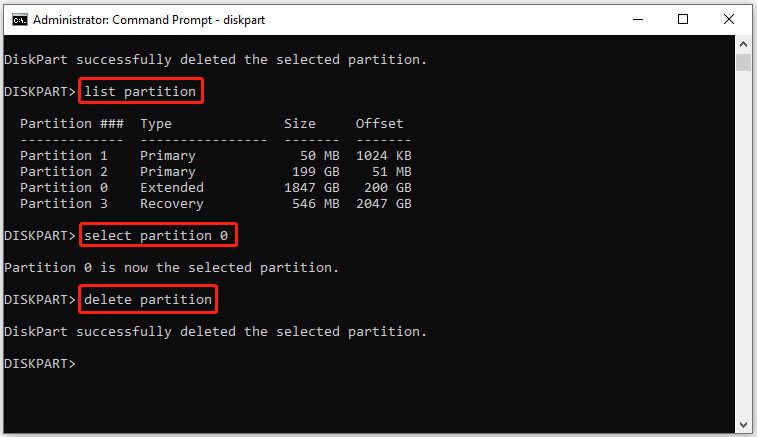
Step 4. After deleting all logical partitions, type the following commands to delete the extended partition.
- list partition
- select partition # (Replace # with the number of your extended partition.)
- delete partition
What Is an Extended Partition & Can You Delete It?
An extended partition is a special partition type on MBR (Master Boot Record) disks. Since MBR only allows 4 primary partitions, Windows uses one extended partition as a container to hold multiple logical drives (D, E, F, etc.), letting you create more than 4 usable partitions in total.
- Primary Partition: Independent and bootable — the C drive is always a primary partition.
- Extended Partition: A non-bootable container with no drive letter; it only holds logical partitions.
- Logical Partition: Sub-partitions inside the extended partition, used for daily data storage.
Can you delete it? Yes. Deleting an extended partition turns it into unallocated space you can reuse to extend a partition, create a new one, or simply reclaim disk space.
The only catch: you must delete every logical drive inside it first, as covered in the steps above — an extended partition can’t be removed while it still contains logical drives.
Delete Extended Partition FAQ
Depending on whether new data has overwritten the disk, you may be able to recover lost/deleted partitions.
Tools such as MiniTool Partition Wizard's Partition Recovery feature can help recover deleted partitions before they are overwritten.
1. Logical drives still exist.
2. The disk is write-protected.
3. Disk corruption is preventing modifications.
Bottom Line
Deleting an extended partition on Windows requires one important extra step: you must first delete all logical drives contained within it. After that, you can remove the empty extended partition using Disk Management, DiskPart, or a graphical tool like MiniTool Partition Wizard.
Always back up your data before making partition changes, as deleting an extended partition permanently removes all logical drives and their contents.
If you have any questions or suggestions about MiniTool Partition Wizard, contact us via [email protected]. We’ll reply as soon as possible.
About The Author

Position: Columnist
Charlotte is a technology columnist with a strong focus on the Windows operating system, specializing in disk management, backup, and data recovery. She is passionate about analyzing computer errors, identifying root causes, and delivering practical solutions. In her free time, she stays updated on the latest developments in computer systems and hardware while continuously learning new technologies to broaden her expertise. Her writing style is clear and easy to understand, making complex technical topics accessible even to users with limited computer knowledge.
User Comments :