As you know, a custom resolution provides you with more flexibility to add screen resolution and refresh rate for your display. So, a great many users intend to set a custom resolution Windows 10. MiniTool will walk you through detailed steps to do that.
Windows 10 allows you to set the screen resolution from a list of standard screen resolutions based on your graphics card and monitor. If you want to get more flexibility to add more screen resolution and change refresh rate for display, you need to create a custom resolution on Windows 10.
The detailed steps for Windows 10 custom resolution vary depending on the manufacture of your graphics card. So, the following guides are provided based on 3 common graphics card (NVidia, AMD, and Intel).
Now, let’s see how to set custom resolution Windows 10!
Case 1. Set a Custom Resolution Windows 10 Based on NVidia Graphics Card
If your computer is using the NVidia graphics card, please follow this full guide.
Step 1. Right-click on the empty space of your Windows desktop and select the NVidia Control Panel from the context menu.
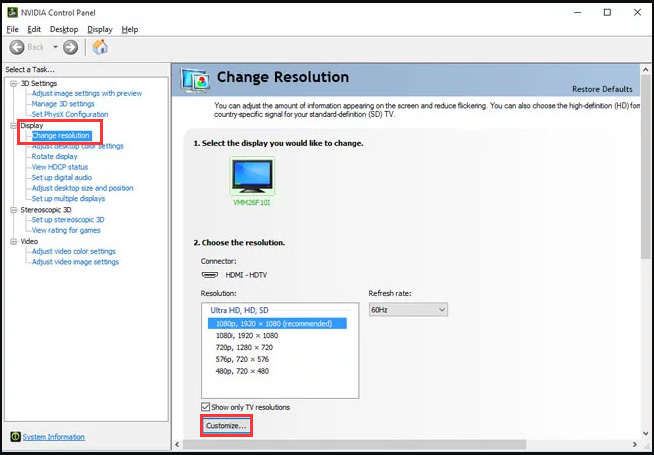
Step 2. In the pop-up window, expand the Display category and click on Change resolution on the left pane.
Step 3. Then scroll down the right sidebar and click on the Customize button.
Step 4. Select the checkbox of Enable resolutions not exposed by the display and click on the Create Custom Resolution button.
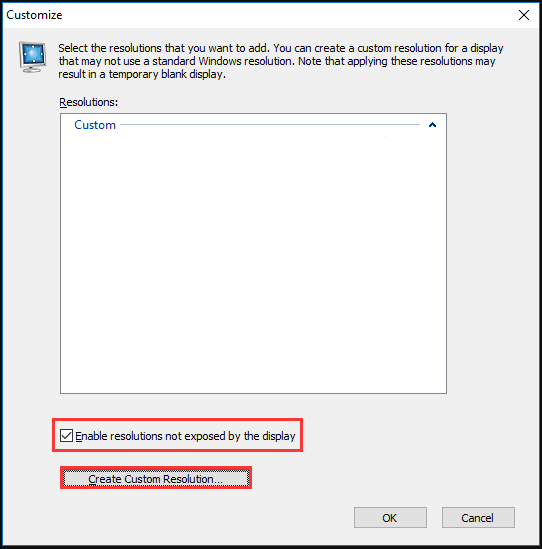
Step 5. Now, you can fill the desired values in the boxes and click on the Test button. After that, you can save the custom resolution Windows 10 if the test is successful.
Recommended article:
Case 2. Set a Custom Resolution Windows 10 Based on AMD Graphics Card
This part will introduce the detailed steps to set custom resolution Windows 10 based on AMD graphics card. For that:
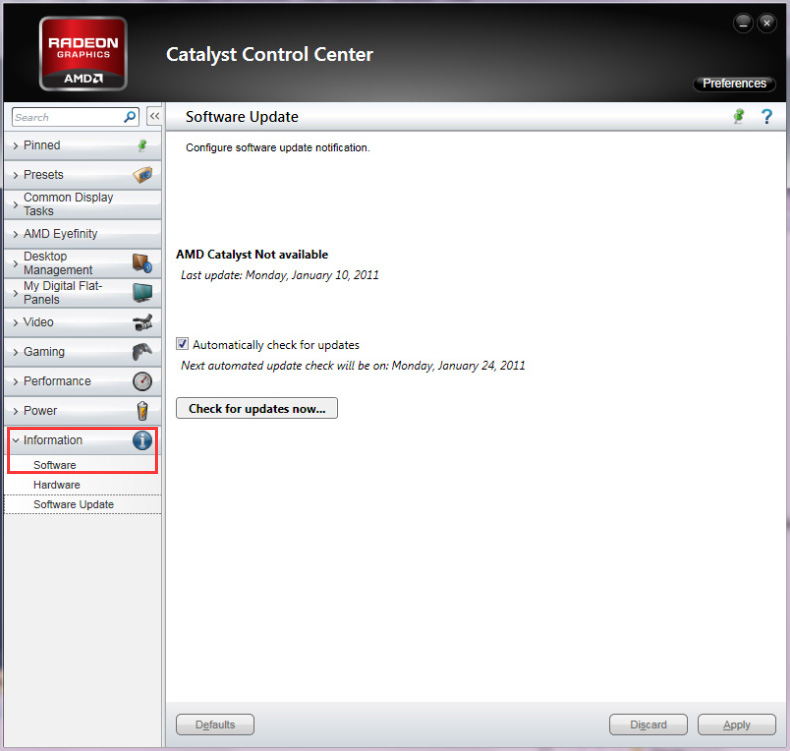
Step 1. Right-click the empty space on your desktop and choose the AMD Catalyst Control Center.
Step 2. Navigate to the Information >Software from the left pane.
Step 3. Select the Driver File Path and then copy the selected driver file path text.
Step 4. Press Win + R keys to open the Run dialog box, and then type regedit and hit Enter.
Step 5. In the Registry Editor window, navigate to the drive path that you copied in Step 3.
Step 6. Double click the 0000 folder and find the DALNonStandardModesBCD1 registry key. Right-click the key file and select Edit and type the desired values in order.
Step 7. After setting the desired values, click on OK to save the changes and restart your computer.
Now, you should see the Windows 10 custom resolution here when launching the AMD Catalyst Control Center.
Case 3. Set a Custom Resolution Windows 10 Based on Intel Graphics Card
Now, let’s see how to create custom resolution Windows 10 based on the Intel graphics card. For that:
Step 1. Right-click the empty space on your desktop and choose Graphics Properties.
Step 2. Select the Advanced mode when you are prompted to select an application mode.
Step 3. Navigate to the Display Devices tab and check if the Custom Resolutions/Modes button is available. If it is, click on the button. If not, please go to the program and run it.
C :> Windows>System32>CustomModeApp.exe
Step 4. In the Basic Settings window, click on the Custom Resolutions button and type your desired values on the right pane.
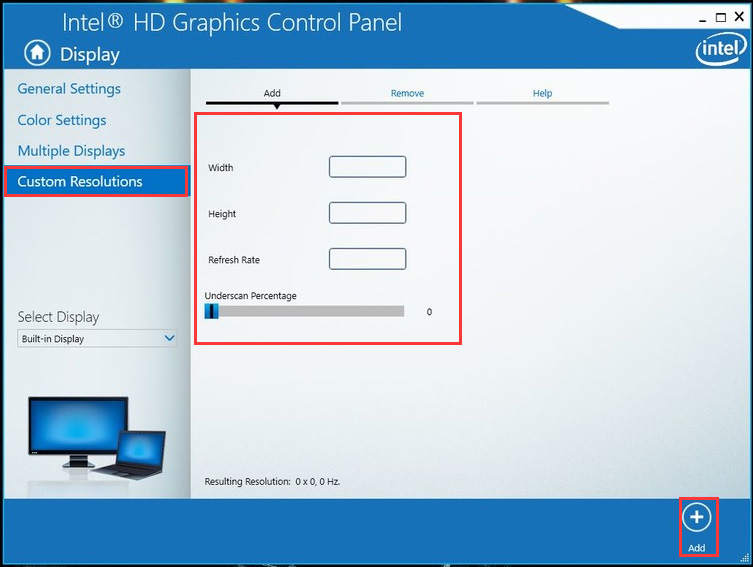
Step 5. Click on Add icon, and then click on Yes when prompted.
Step 6. Click on OK to save the changes.
User Comments :