Are you struggling to fix the Steam connection error “could not connect to Steam network”? It is a great inconvenience that you cannot play games as normal. Don’t worry. In the post of MiniTool, you will get several effective troubleshooting methods.
Steam is an amazing online game platform that you can use it to manage your games with ease. You can enjoy a fantastic gaming experience from it, but you may also be vexed about some problems like failed to load Steamui.dll, Steam game uninstalled itself, and especially the Steam connection error.
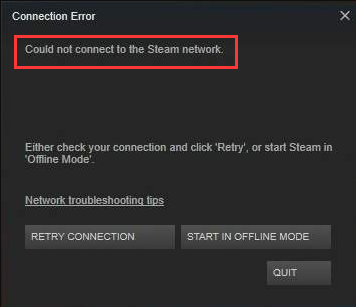
The error message “Could not connect to Steam network” usually pops up when trying to log in to your Steam account. When you encounter the error, the first step that you can do is to restart your computer.
A simple restart can clear up the software crashes, driver issues and reset your network settings, which can probably fix the Steam not connecting error. If a restart fails to work, you can try the following methods.
Solution 1. Change Your Steam’s Internet Protocol
UDP (User Datagram Protocol) is the original Internet protocol for many Steam users. However, the protocol becomes unstable sometimes. In this case, you can change it to TCP (Transmission Control Protocol), which is more reliable and faster.
Therefore, if you encounter the “could not connect to the Steam network” error, you can try changing it. Here’s how to do that.
Before you do, make sure you close the Steam client completely and log out of your account. If you still can't add tcp to the end of the shortcut, you can try resetting TCP.
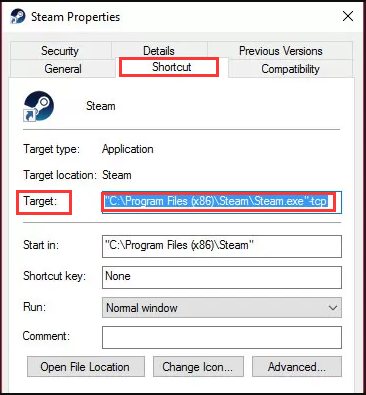
Step 1. If there is a Steam shortcut on the desktop, right-click it and select Properties.
Step 2. In the Properties window, navigate to the Shortcut tab.
Step 3. In the Target dialogue box, add –tcp to the end. The entire text line is “C:Program Files (x86)SteamSteam.exe“ -tcp.
Now, you can re-launch your steam client and see if the Steam connection error is fixed.
Solution 2. Check Your Internet Connection Works Normally
In addition, you can check if your Internet connection works as normal or not. It is very simple to operate. You can open the browser to check if your computer can connect the Internet normally. Alternatively, you can check your network adapter. Here’s how.
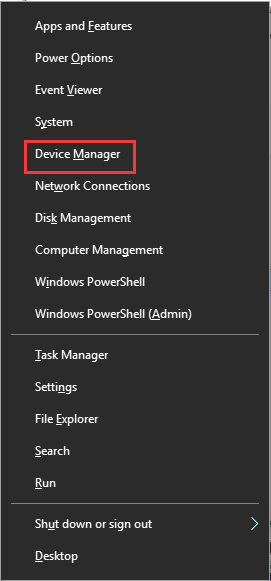
Step 1. Press Win + X keys to open the context menu and select Device Manager from it.
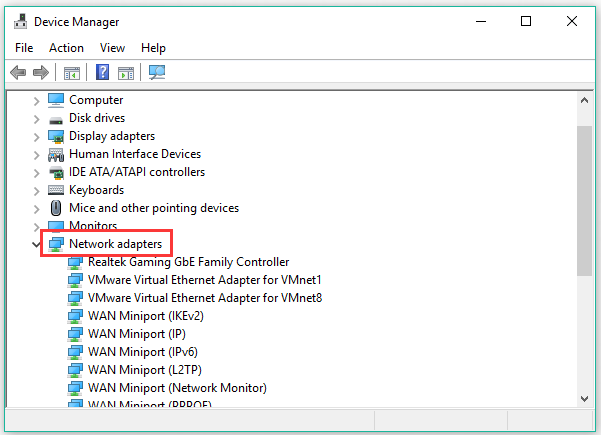
Step 2. In the pop-up window, navigate to the Network adapter and expand it, and then you will find a list of WiFi /LAN adapters with their own official name.
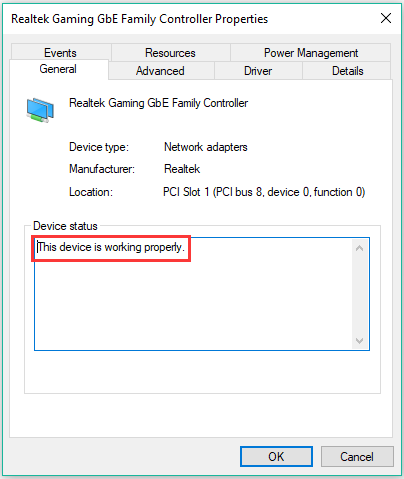
Step 3. Double click one adapter to open its Properties window, and then see if there is a window that states this device is working properly. Here you can check all the adapters one by one.
Step 4. If you made any changes to your network settings, you need to revert them by running certain commands. Press Win + R keys to open the Run box, and then type cmd in it and hit Enter.
Step 5. Type the following commands and hit Enter after typing each command.
- ipconfig/release
- ipconfig/all
- ipconfig/flushdns
- ipconfig/renew
- netsh int ip set dns
- netsh winsock reset
Step 6. After running these commands, restart your computer and check if the error “could not connect to Steam network” is fixed.
Solution 3. Reinstall Your Steam Client after Deleting Its Files
If the above methods fail to work, you can try reinstalling your Steam client. If you follow the steps below, this operation will not delete your gaming data. So, please don’t worry.
Step 1. Right-click the Steam shortcut on your desktop and select Open file location to open its root directory.
Step 2. Delete some files such as appcache, config, bin, and others except the following folders and files that are used to launch Steam:
- Steamapps
- Userdata
- Skins
- Steam.exe
- Ssfn files
Step 3. After deleting the files, launch your Steam from the Steam.exe launcher and then Steam will download some files and update itself.
When the reinstallation completes, you can check if the Steam connection error still persists.
Solution 4. Update the Network Driver
The outdated or problematic network adapters are also responsible for the Steam connection error. So, you can try updating the network adapter. For that:
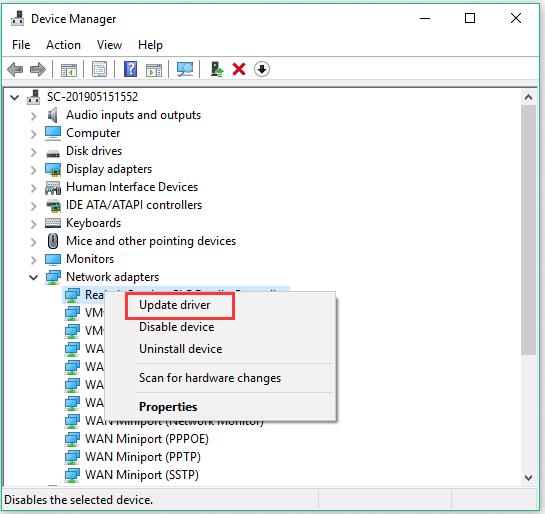
Step 1. Open the Device Manager window by following the Solution 2.
Step 2. Right-click the network adapter and select Update driver from the menu.
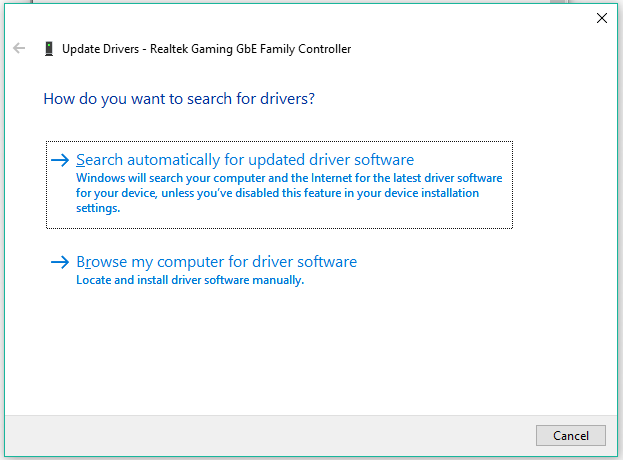
Step 3. In the pop-up window, choose how to search for drivers. Here are 2 options: automatically and manually. You can choose one based on your needs and follow the on-screen instructions to complete the update.
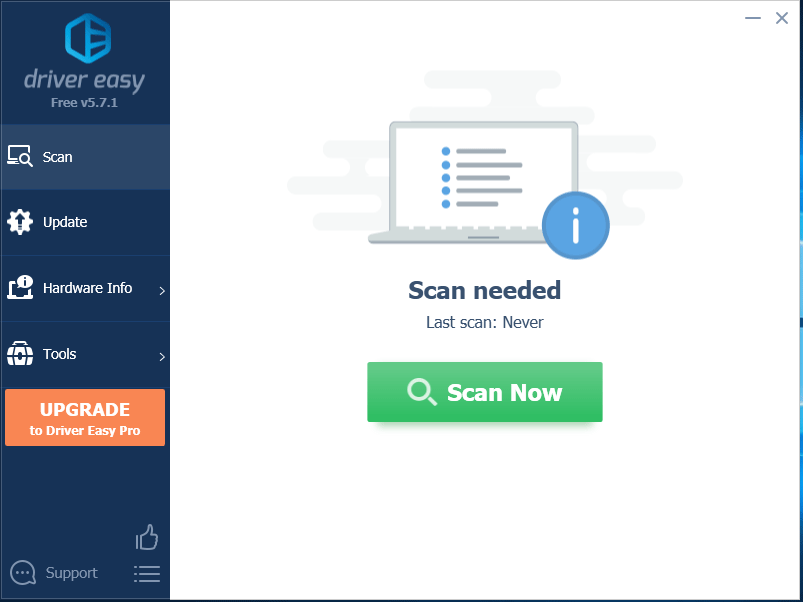
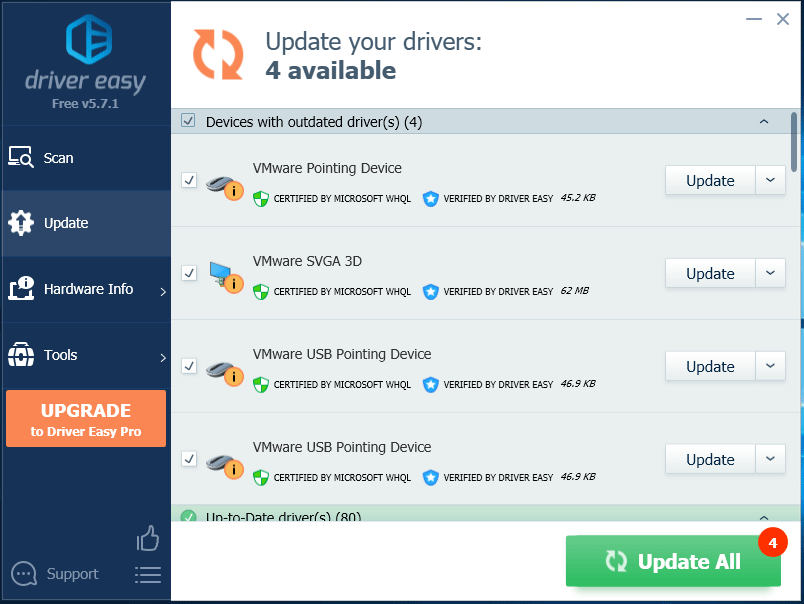
If the above method failed to update drivers, you can use a professional third-party program to update drivers. Driver Easy Pro can detect all outdated drivers and update them with just one click. Here is the guide:
Step 1: Install Driver Easy and launch it. Click the Scan Now button.
Step 2: After the scanning process is completed, click the Update All button to download and install the latest drivers for all devices with outdated drivers.

The 4 methods to fix the problem “can’t connect to Steam” have been told to you. Now, it’s your turn to have a try.
User Comments :