Windows 11 allows you to set a lot of default apps (applications). Generally, setting a default app makes some of your operations more convenient and faster. For example, when you open a photo on your computer, you can directly view it by double-clicking on it without choosing a program to open it because there is a default app for photos/pictures set by Windows.
Sometimes you install multiple apps that all can be used to open the file you want to view, but the default app is not the one you want to use. In this case, what can you do? Don’t worry. Reading this post and you will learn how to change default apps on Windows 11 with the following two effective methods.
Method 1: Change Default Apps via Settings
You can go to Settings to change default apps on Windows 11. In Settings, you can choose two ways to change the default apps. Before learning the two ways, you’ better know how to navigate to the default apps settings page. Here is the guide.
Step 1: On the Start menu, select Settings.
Step 2: Select Apps from the left toolbar.
Step 3: Click Default apps in the right pane.
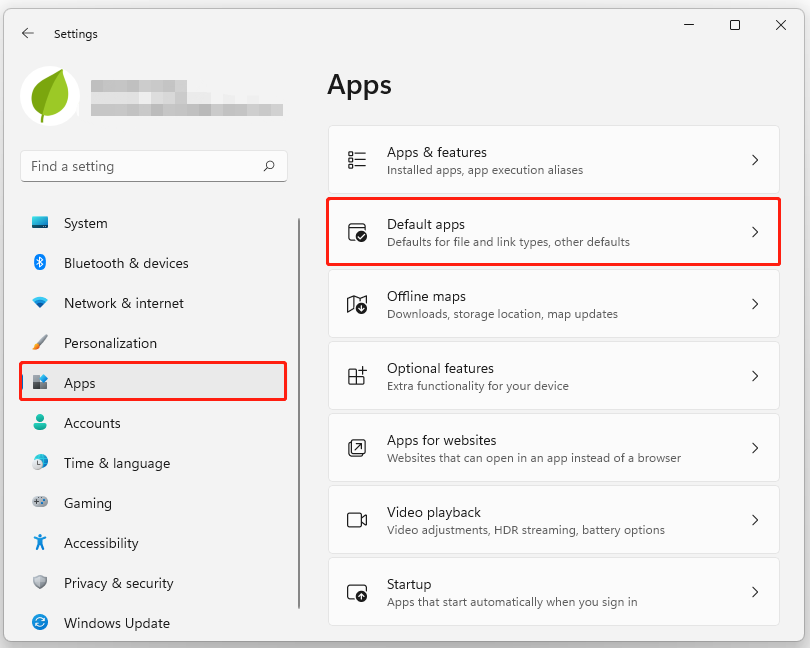
In this way, you can open the default apps settings page. Then, there are two ways for you to change default apps on Windows 11. One is to set a default for a file type or link type. Another is to set defaults for applications.
Set a Default for a File Type or Link Type
The specific steps of setting a default for a file type or link type are as follows.
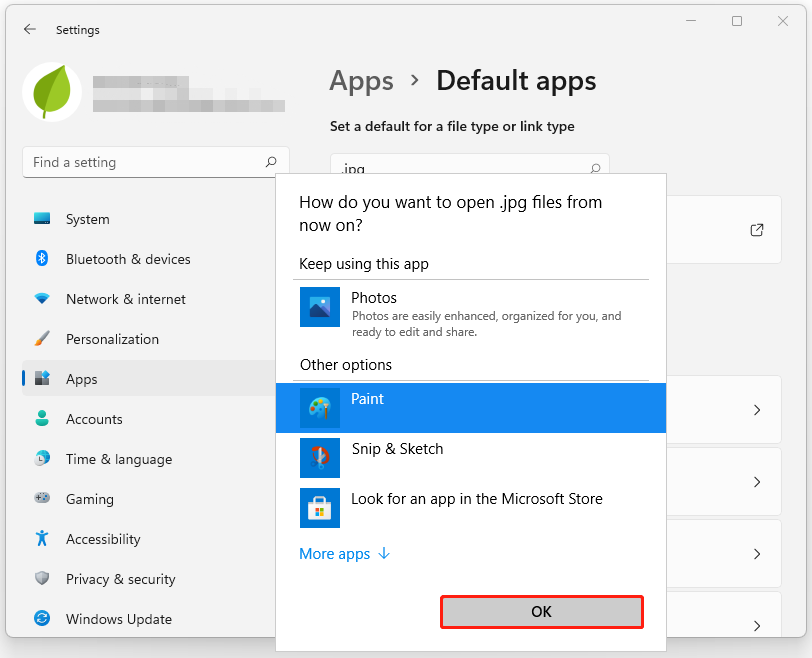
Step 1: After opening the default apps settings page, type the file type for which you want to change the default app in the search bar, such as .mp3, .jpg, etc.
Step 2: Click on the original default app. Then, choose the app you want to set as the new default.
Step 3: Click OK to confirm the change.
Set Defaults for Applications
Here is the tutorial for setting defaults for applications.
Step 1: Open the default apps settings page.
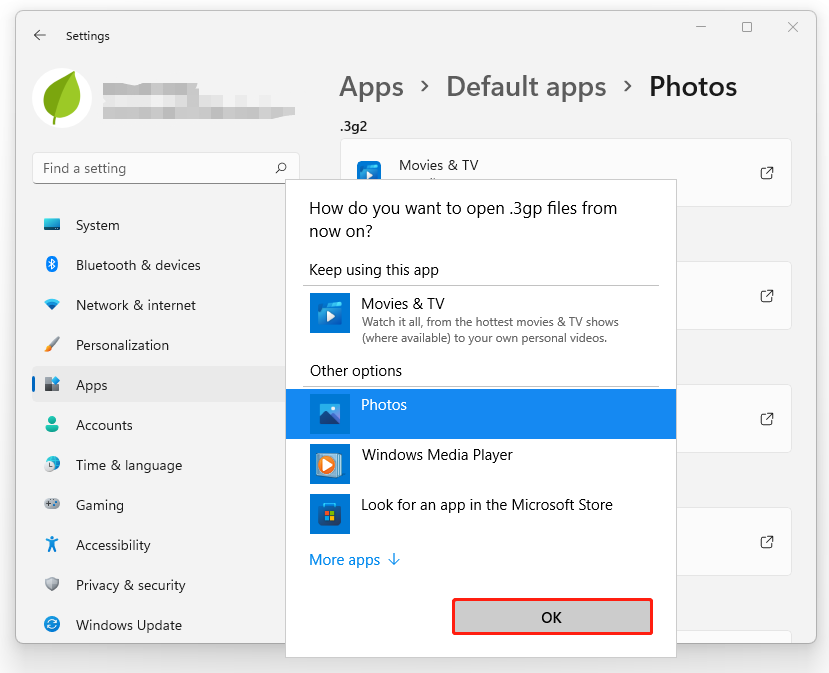
Step 2: Under Set defaults for applications, select your desired app in the list of apps or type its name in the search bar.
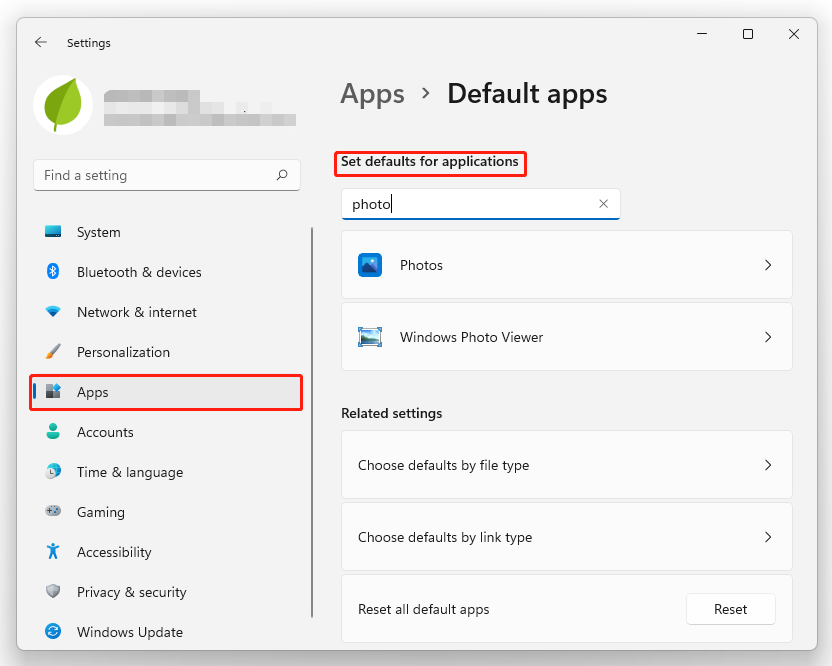
Step 3: Then you will see all the file types it can open and the current default app for those file types. Click the file type for which you want to change the default app. Finally, click OK.
After that, it is complete to change a default app on your Windows 11 PC. You can repeat the above steps to set any apps you want to be the default.
Method 2: Change Default Apps via File Explorer
Besides, you can choose a new default app using File Explorer. You can open File Explorer in two ways. There is the tutorial.
Open A File by Open with
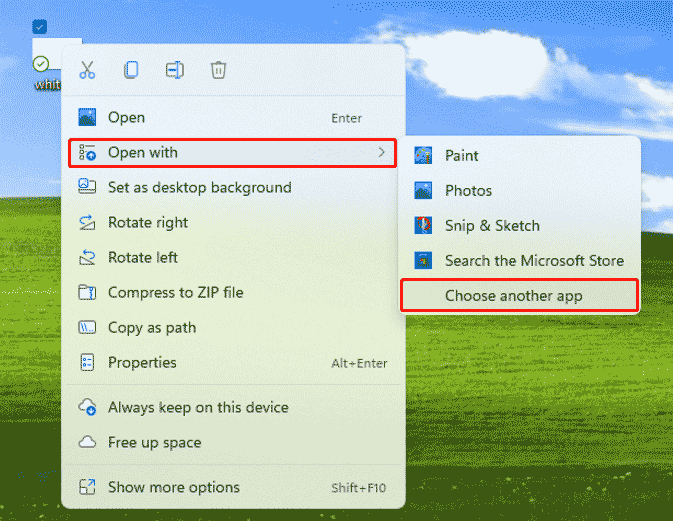
Step 1: Right-click the file that you want to change the default app. Then, click Open with and select Choose another app.
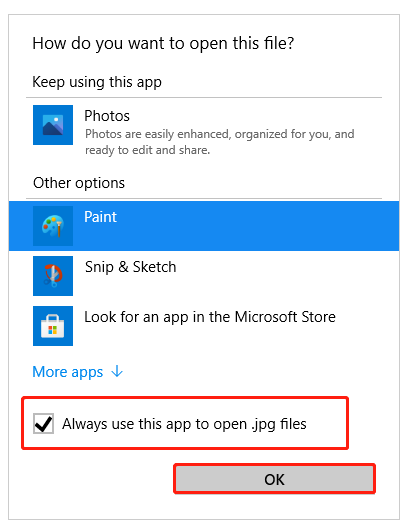
Step 2: Select your desired app as the default app.
Step 3: Check “Always use this app to open … files”. Finally, click OK to perform the change.
After these operations are completed, you can open this file by a new default app.
Open A File by Properties
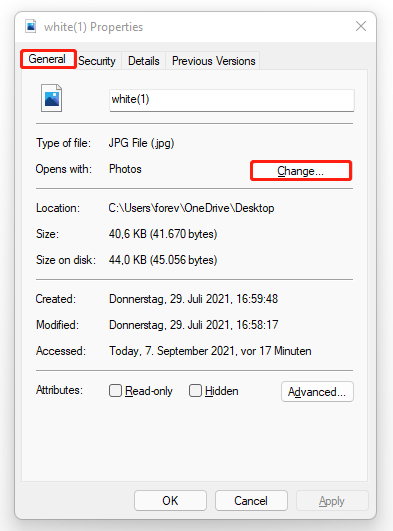
Step 1: Right-click on the target file and select Properties.

Step 2: On the General tab, click the Change button.
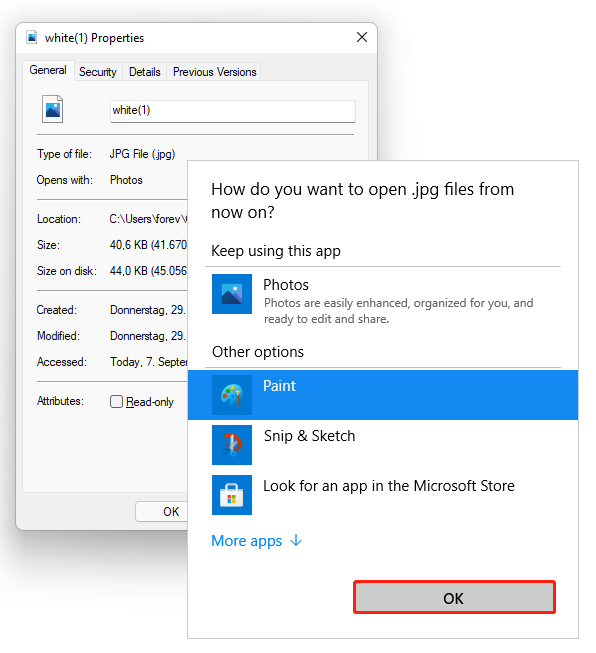
Step 3: Select your desired app as the new default program.
Step 4: Click OK to save this change.
With the above methods, you can easily change default apps on Windows 11. Except for them, when you install a new app and open a file that can be opened with the new app, Windows 11 will prompt you to choose a new default app.
User Comments :