If users have any problem when using MiniTool Partition Wizard, then can go to Help section in the Tool Bar. Check this post for more information about the Help item.
Help
The Help item in Menu Bar has 6 broad items as following:
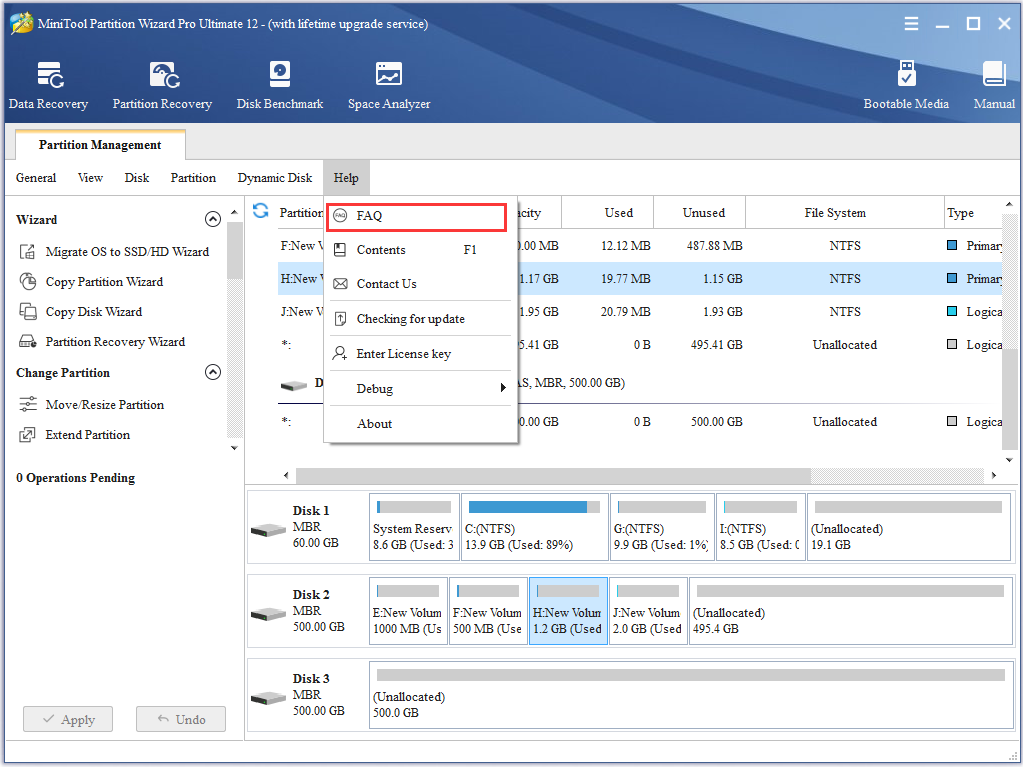
1. FAQ: Go to Help > FAQ and users will enter a website which shows them how to use this software to solve some common disk or partition issues.
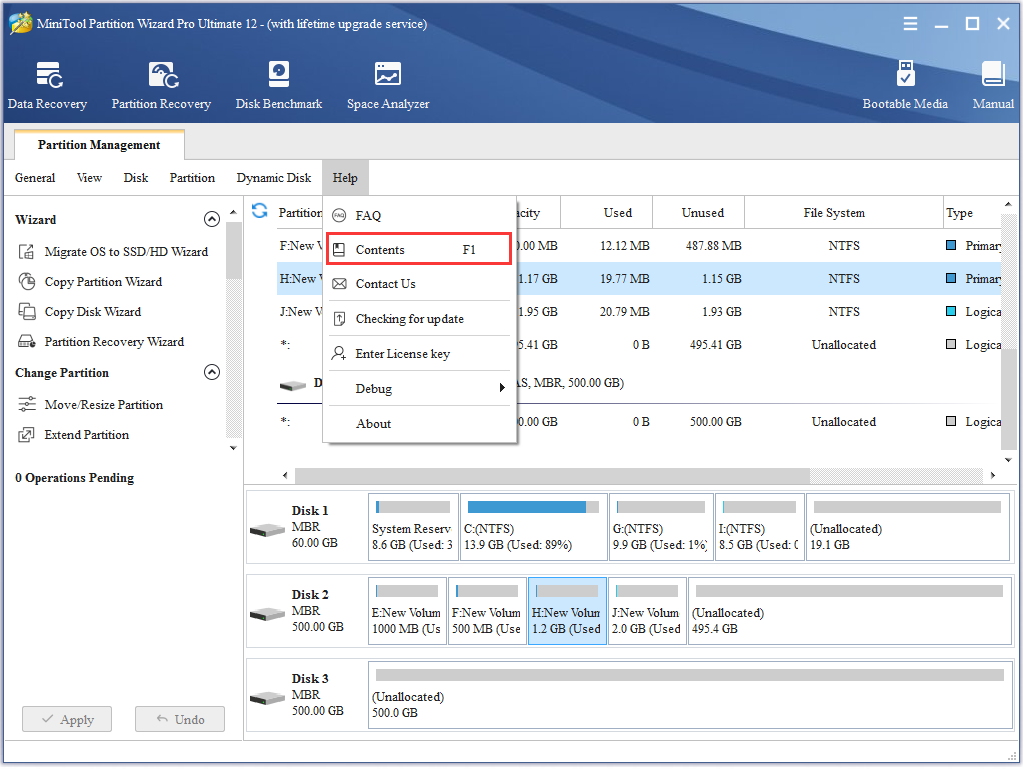
2. Contents: Go to Help > Contents F1 or press on F1, and users will get the interface where all functional tutorials of this program are shown.
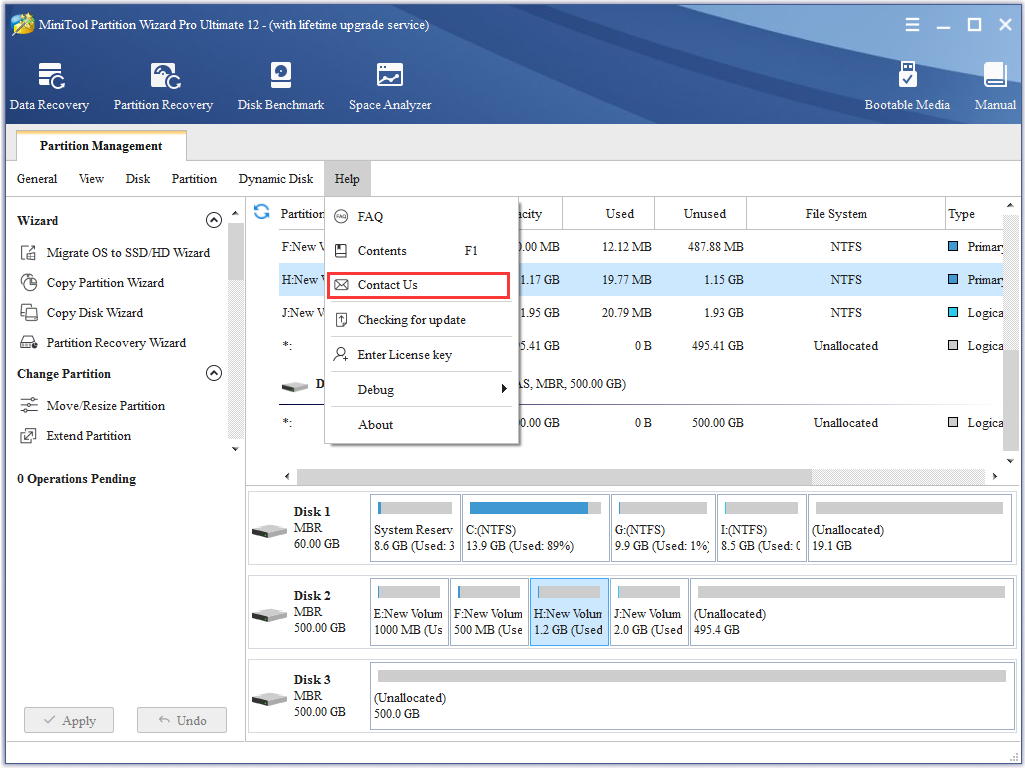
3. Contact Us: Go to Help> Contact Us, users can contact MiniTool Partition Wizard’s technical support directly to get help.
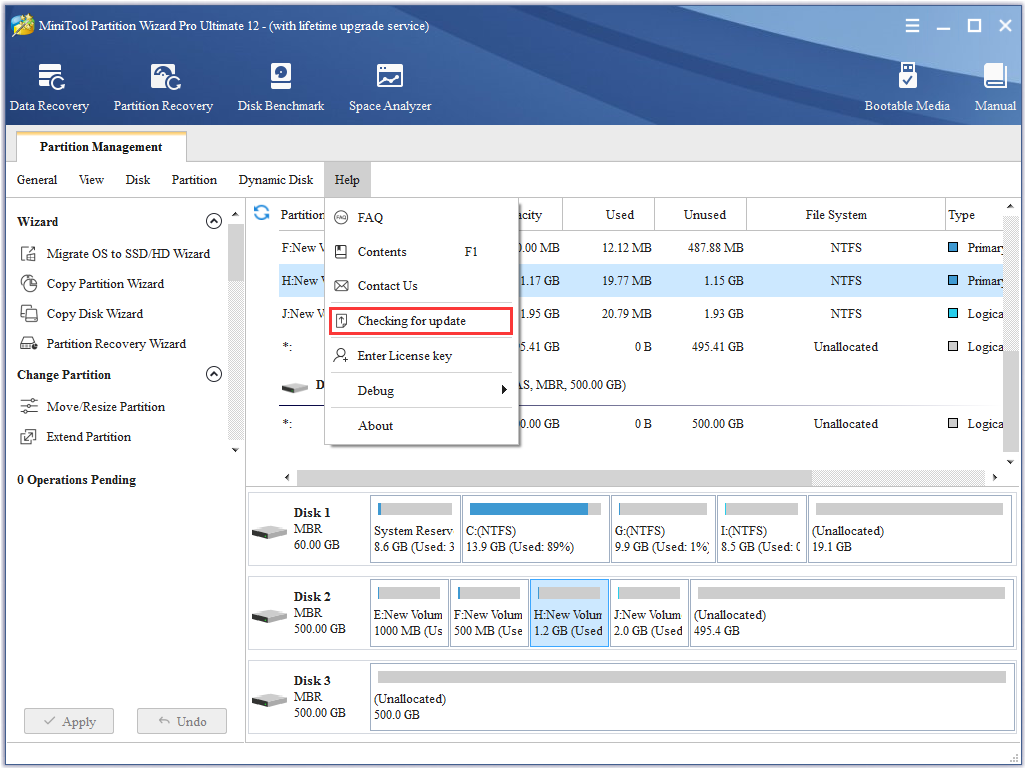
4. Checking for Upgrade: Go to Help > Checking for upgrade, and this software will check whether there is a new version available or not.
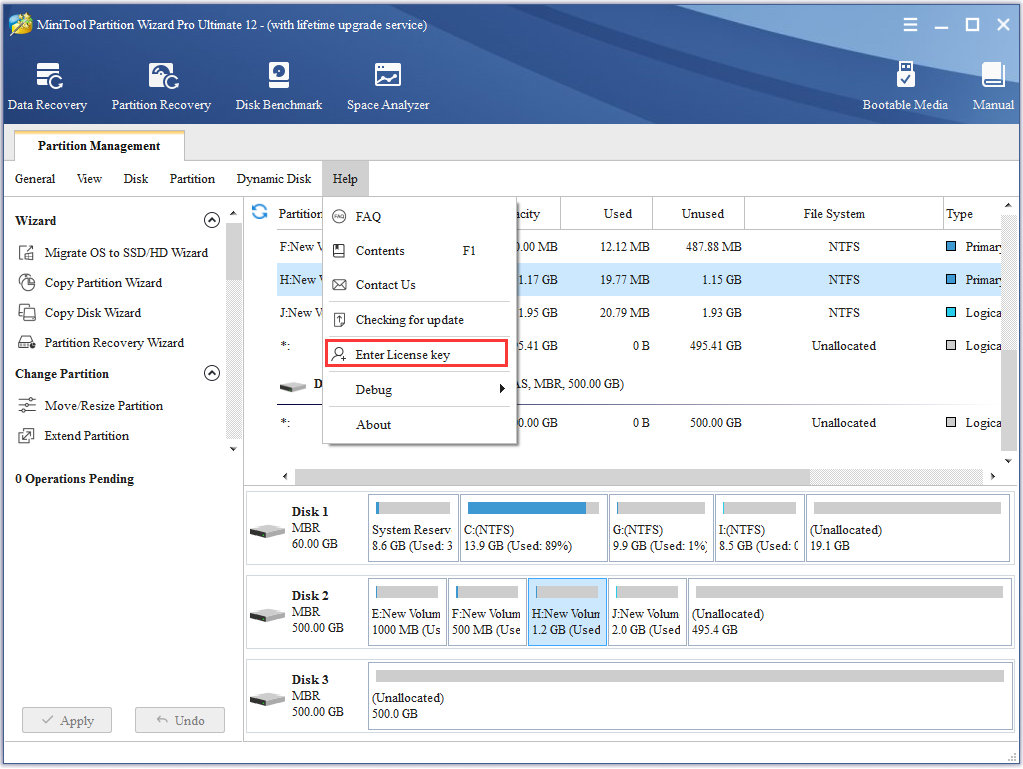
5. Enter License Key: If users purchase a license key from the official site, they should go to Help > Enter License key and enter the pop-out interface to register for the corresponding edition.
6. Debug Help:
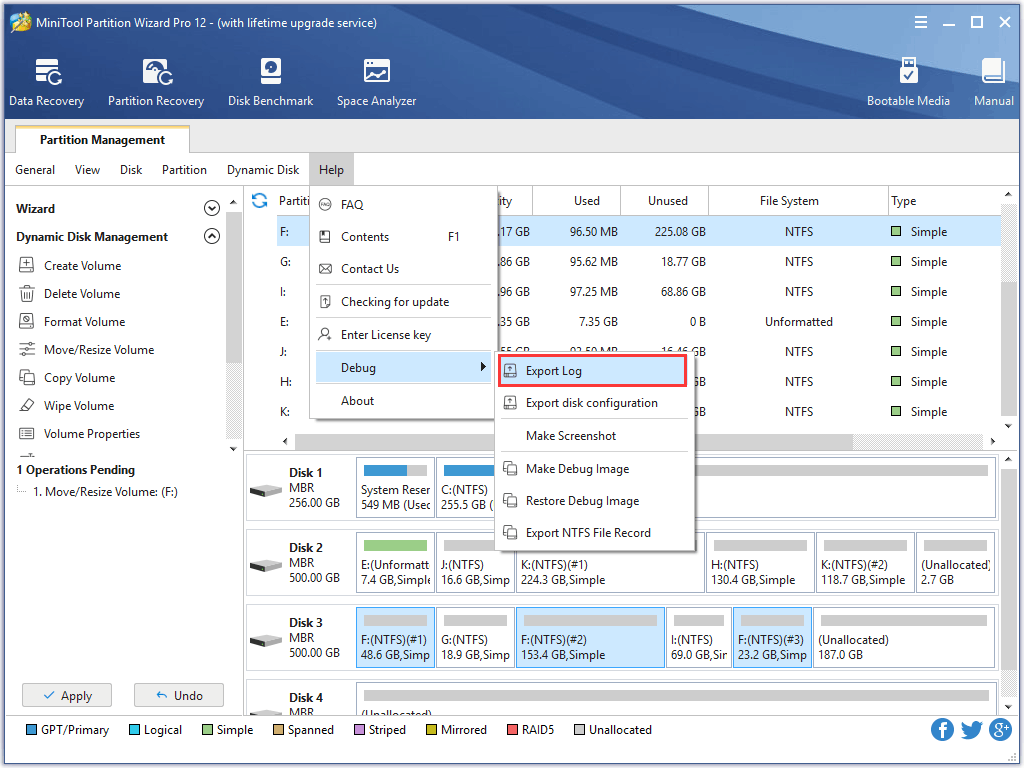
1). Export Log: Go to Help > Debug Help > Export Log to export the log of operations and save it to the specified path.
Step 1. Go to Help > Debug Help > Export Log.
Step 2. Choose a proper storage path, set the file name and then click on Save.
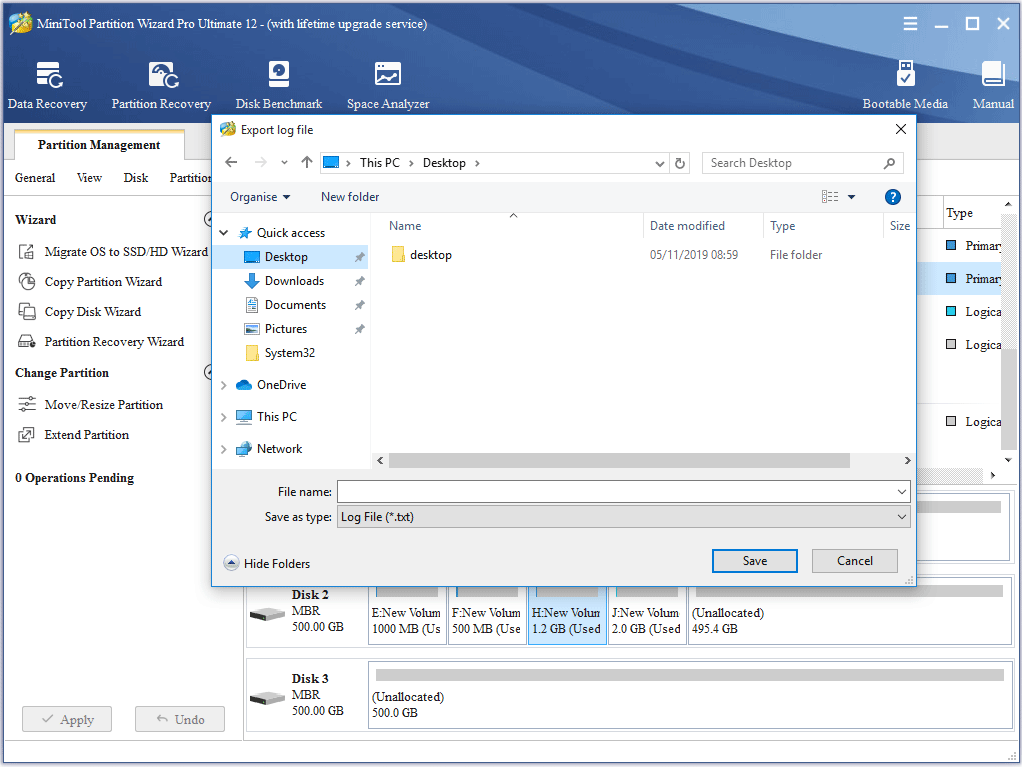
At last, the log will be stored on the specified path.
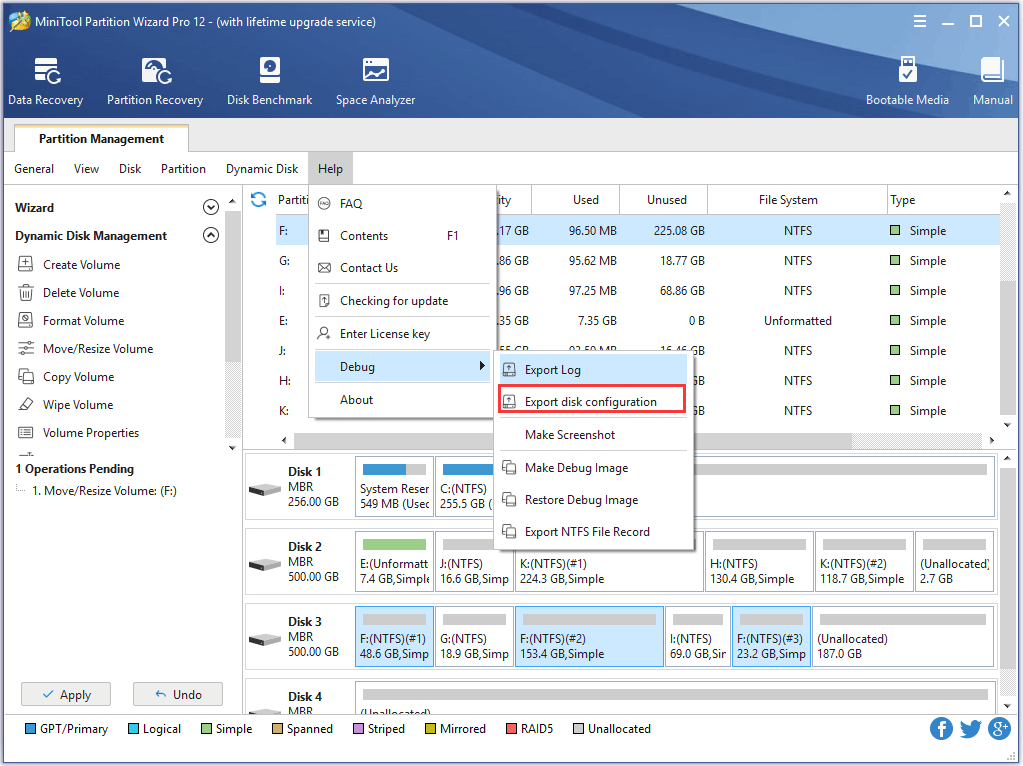
2). Export Disk Configuration:
Step 1. Go to Help > Debug Help > Export disk configuration.
Step 2. Select a proper path to store this disk configuration and set a name for it on this pop-out interface. Then click on Save.
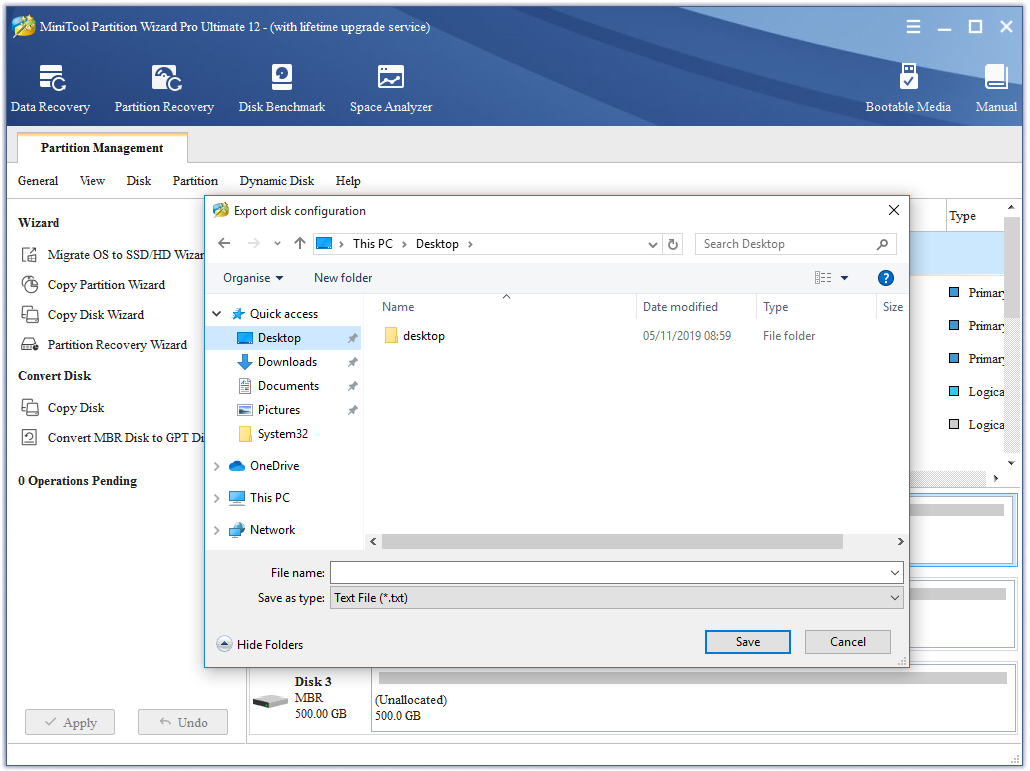
The disk configuration will be stored on the specified path.
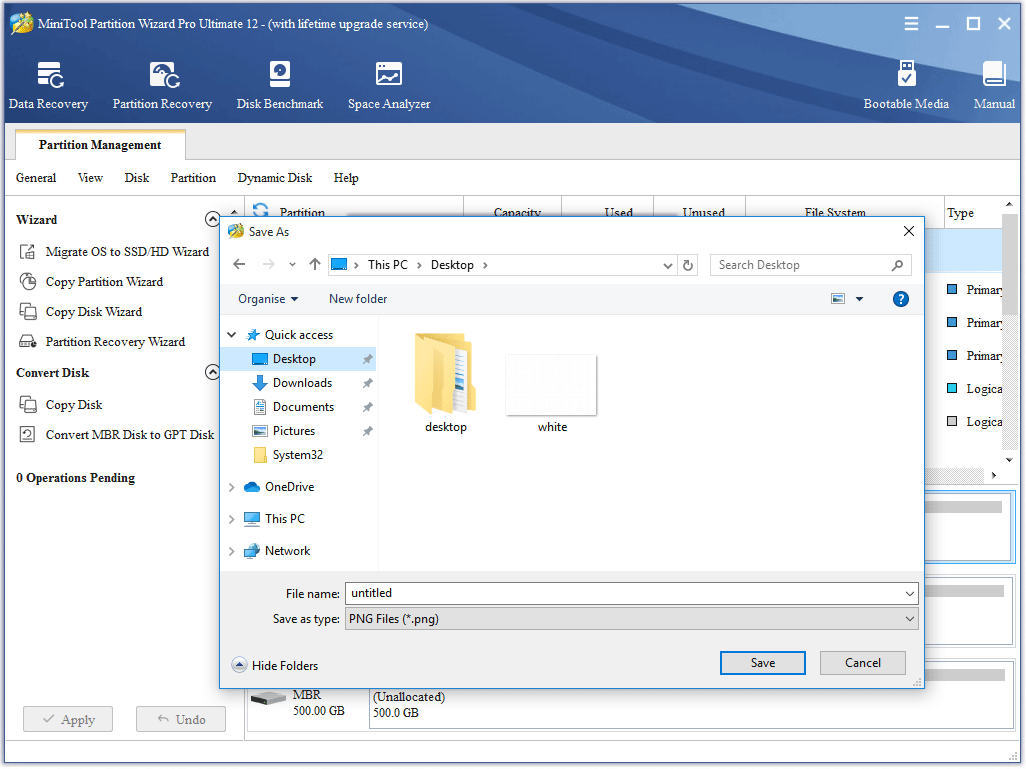
3). Make Screenshot:
Step 1. Go to Help > Debug Help > Make Screenshot.
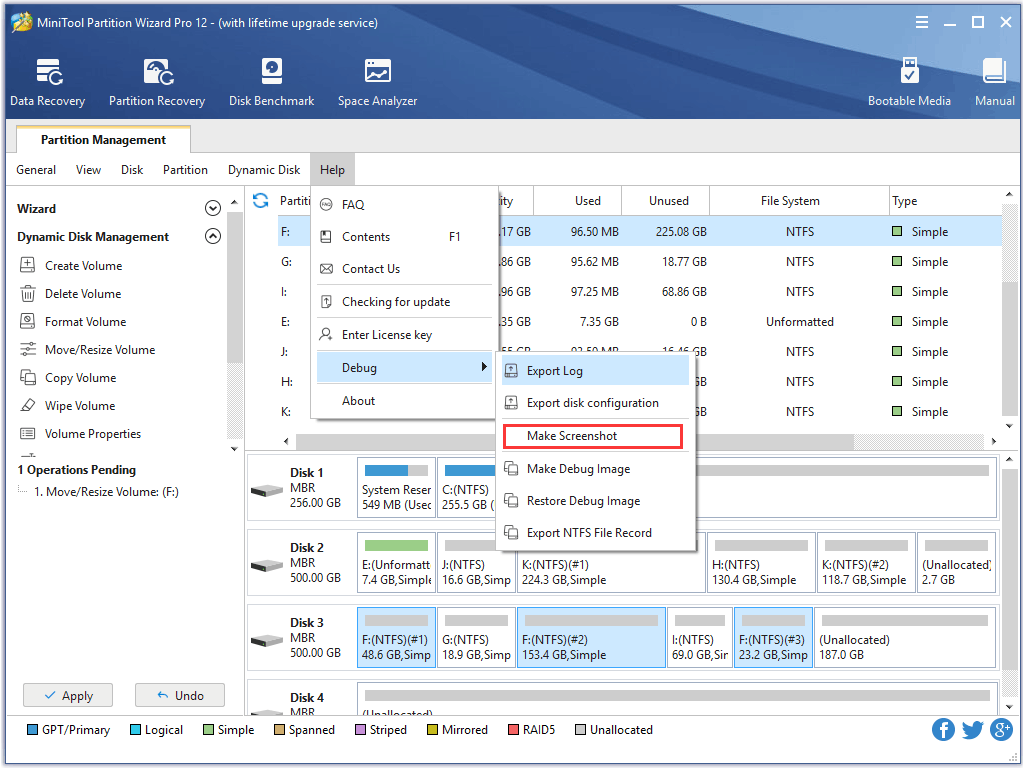
Step 2. Click on Save Screenshot to continue.

Step 3. In this second pop-out window, select a storage path, add a name for the screenshot and then click on Save. The screenshot will be stored in the specified path finally.
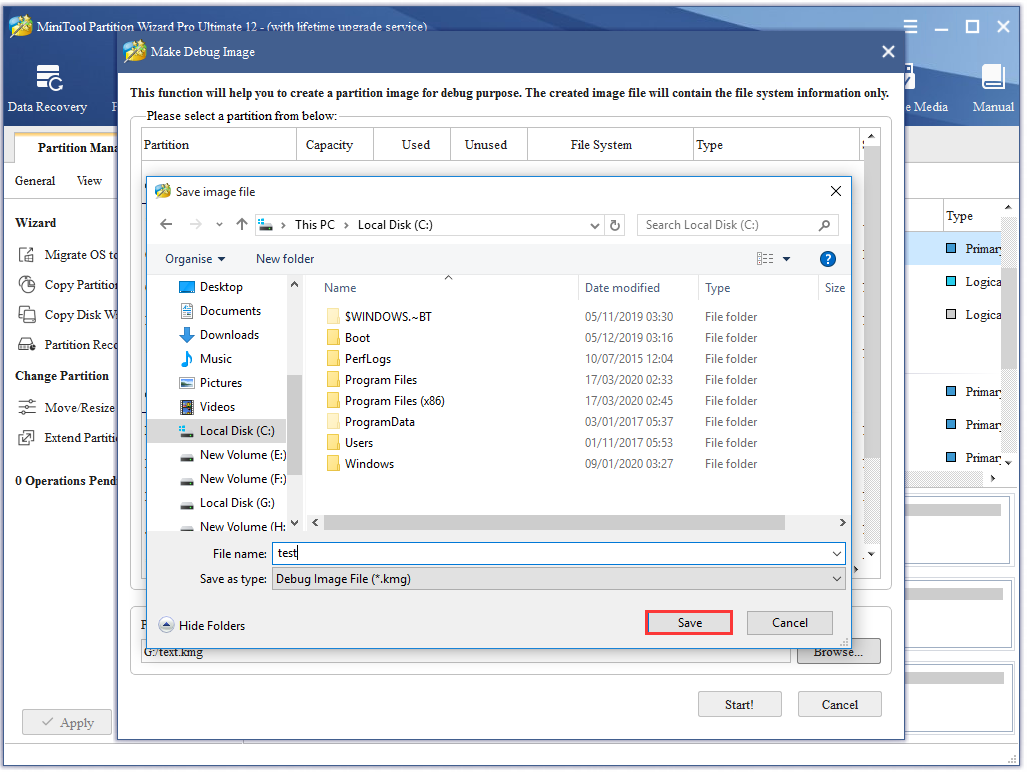
4). Make Debug Image:
This function will help users to create a partition image for debugging purpose. The created image file will contain the file system information only. It supports NTFS file system only.
Step 1. Go to Help > Debug Help > Make Debug Image.
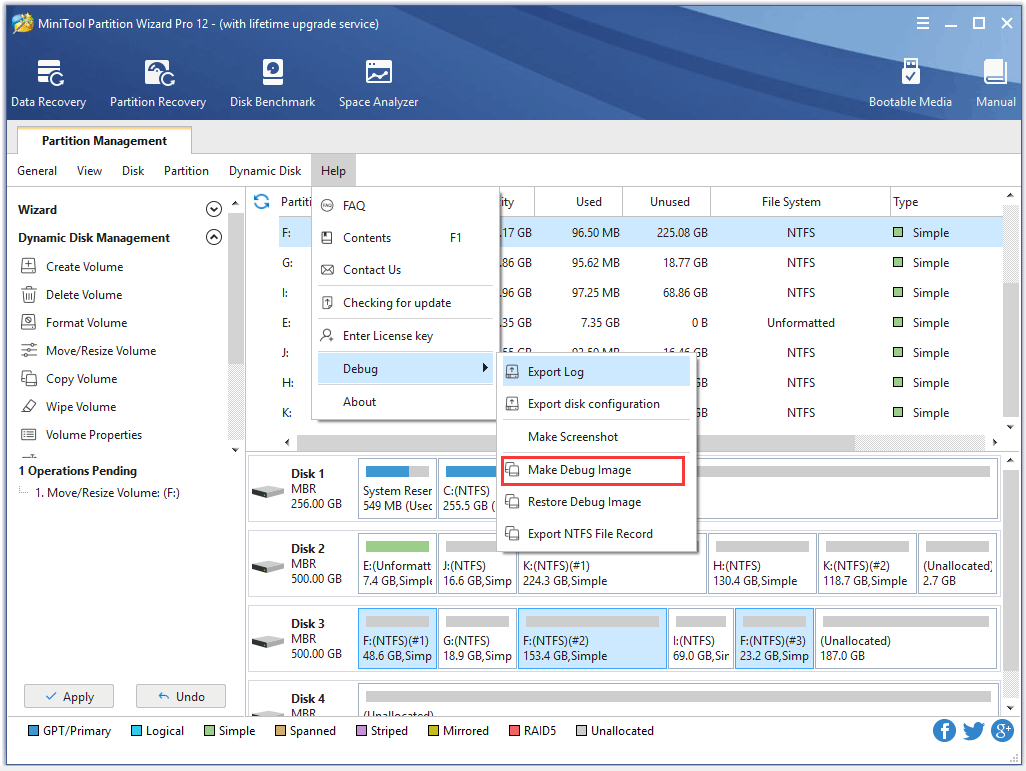
Step 2. Click on Browse button. There will be a pop-out window which enables users to choose a proper stored path and set the file name. Then press on Save to continue.
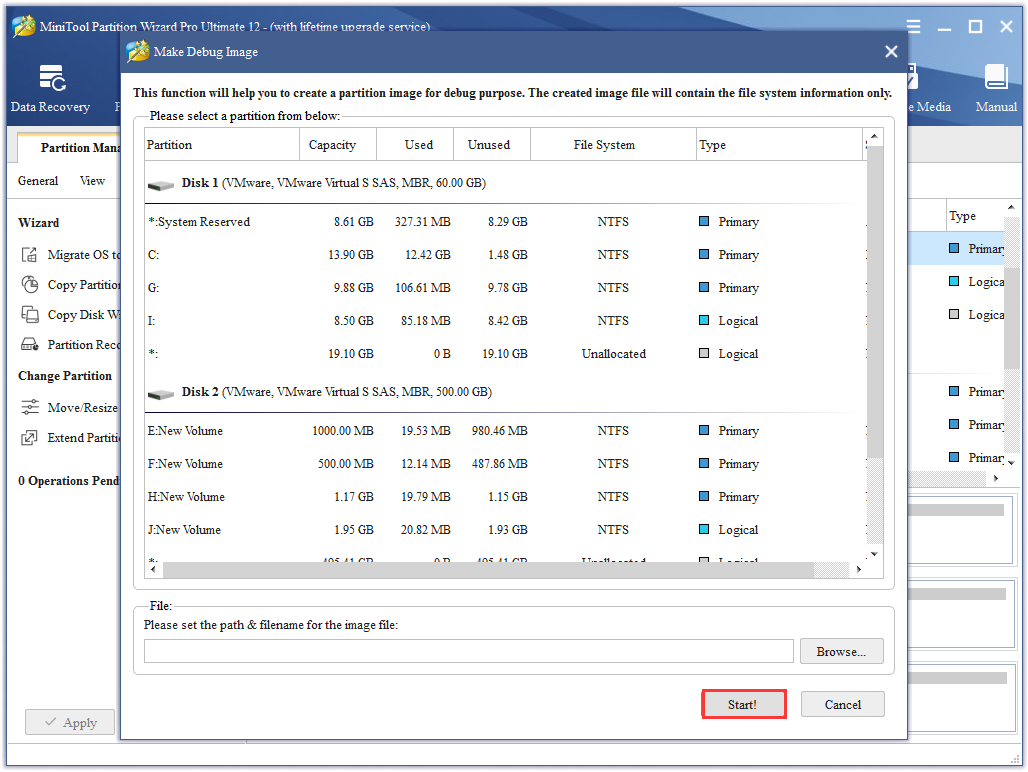
Step 3. Click on Start! and this software will start the debug image making process. Just press on OK when this process is finished. Then, the debug image will be saved on the specified path.
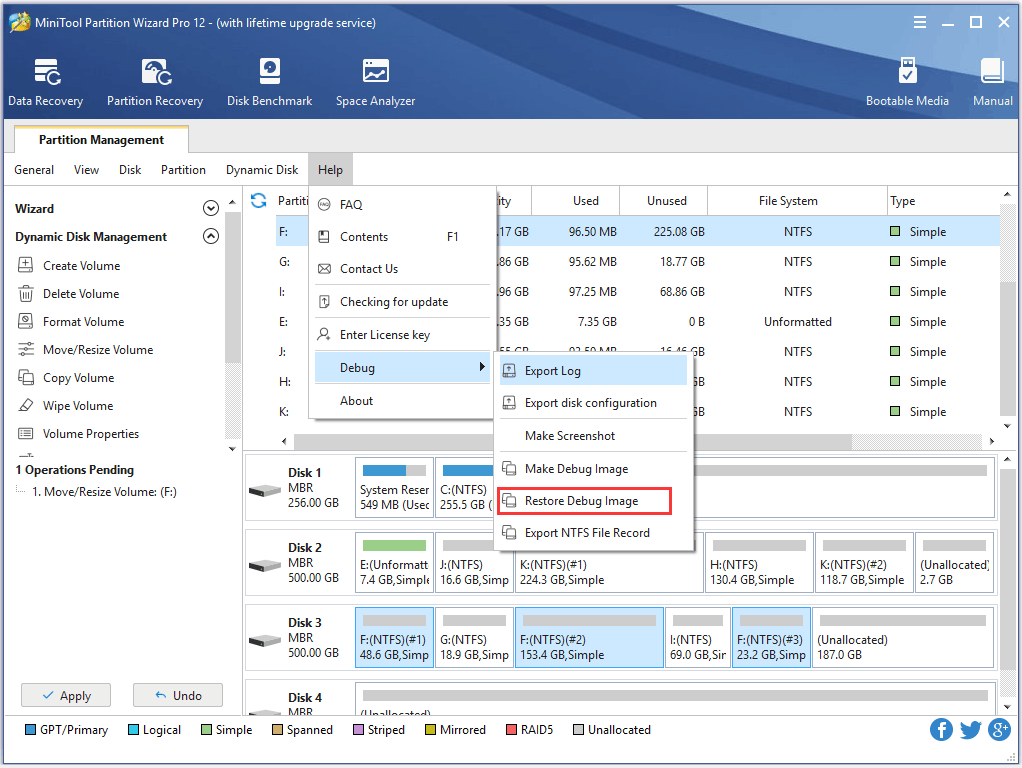
5). Restore Debug Image:
This function will help users to restore debug image file to a partition for debug purpose and just support NTFS file system.
Step 1. Go to Help > Debug Help > Restore Debug Image.
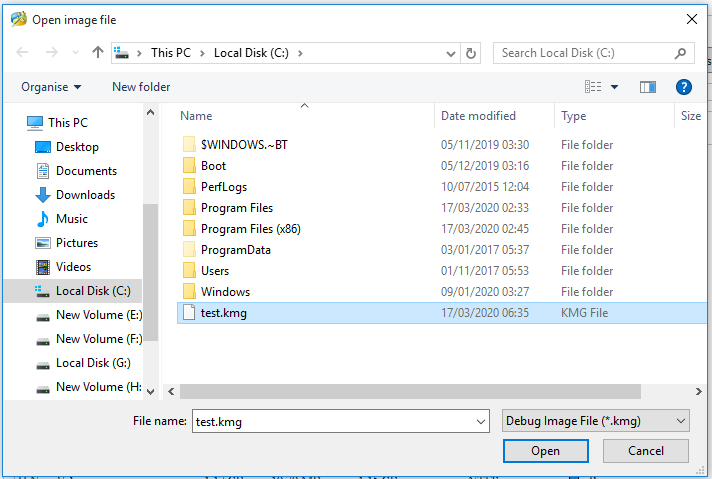
Step 2. Click on Browse button on the pop-out window.
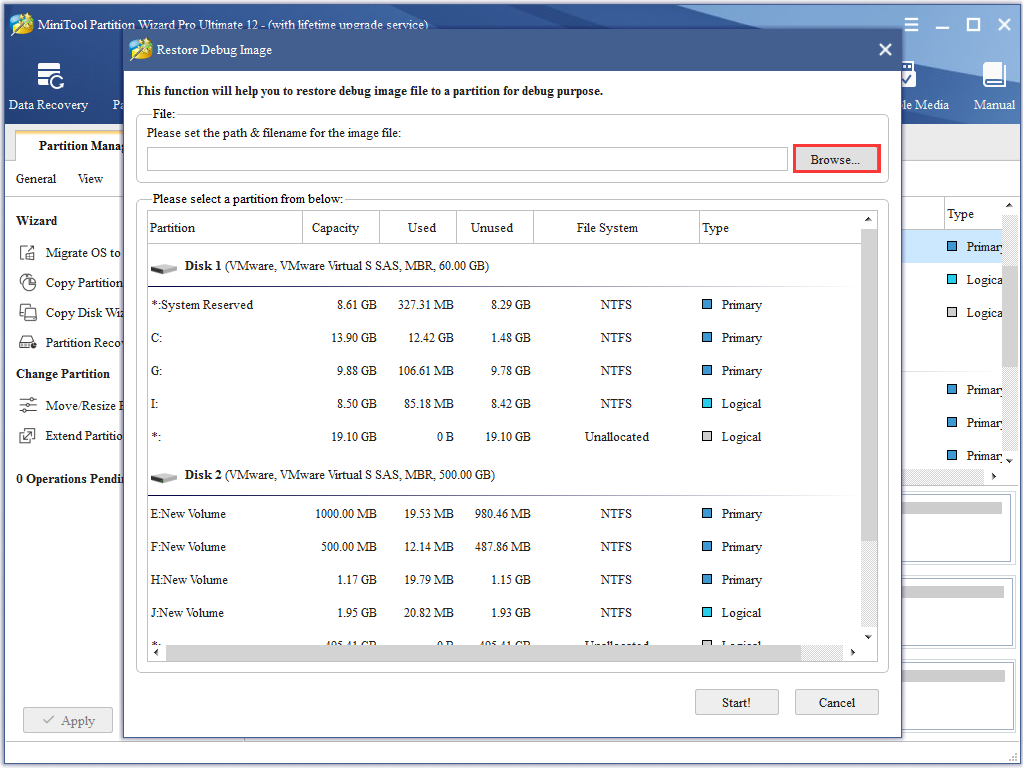
Step 3. Pick the target debug image from the computer on this second pop-out window and then press on Open to continue.
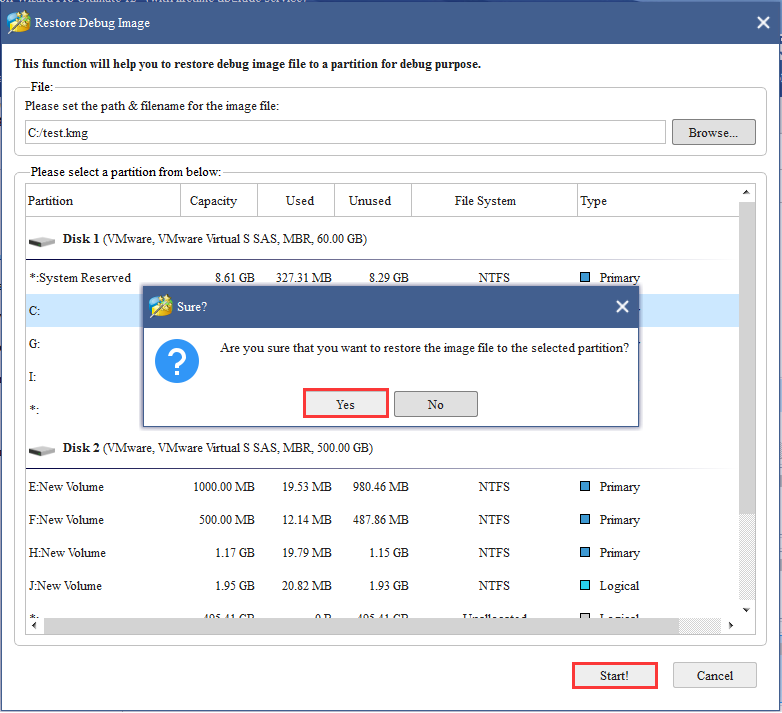
Step 4. Select a partition from this interface, click on Start! and then press on Yes from the pop-out window to start the restoring process.
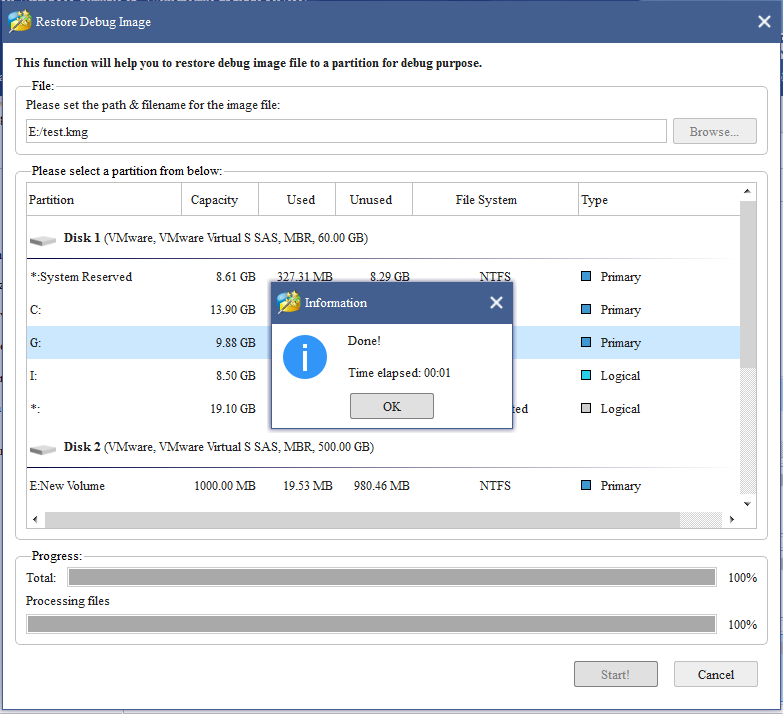
Step 5. Click on OK when the restoring process is finished.
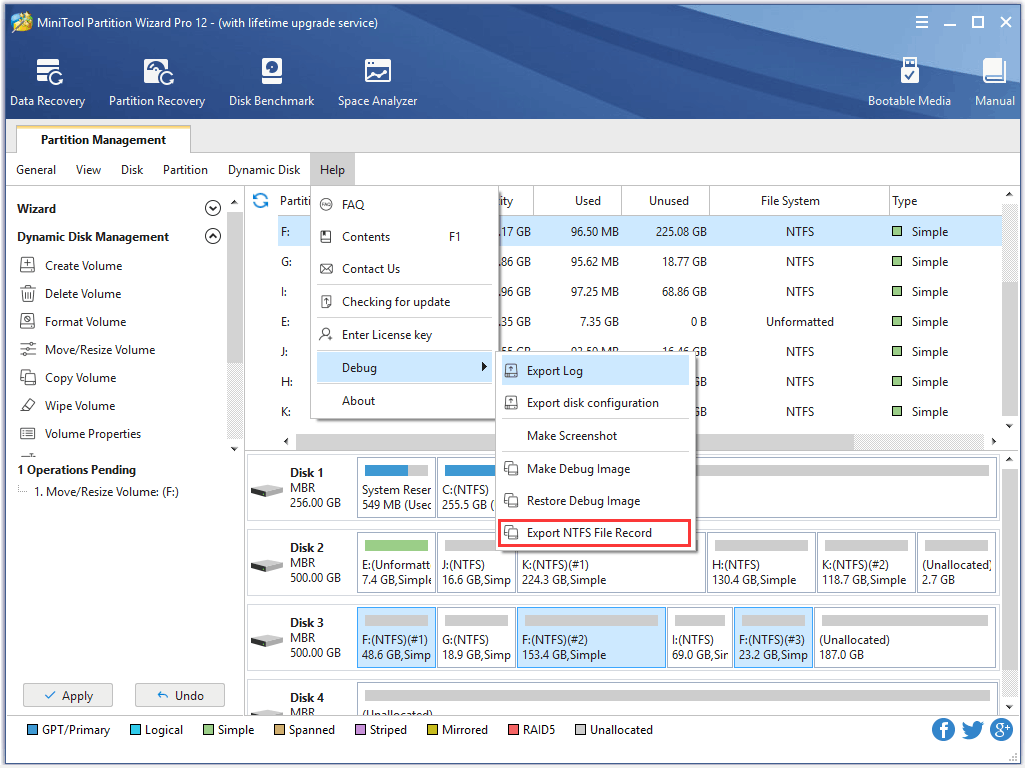
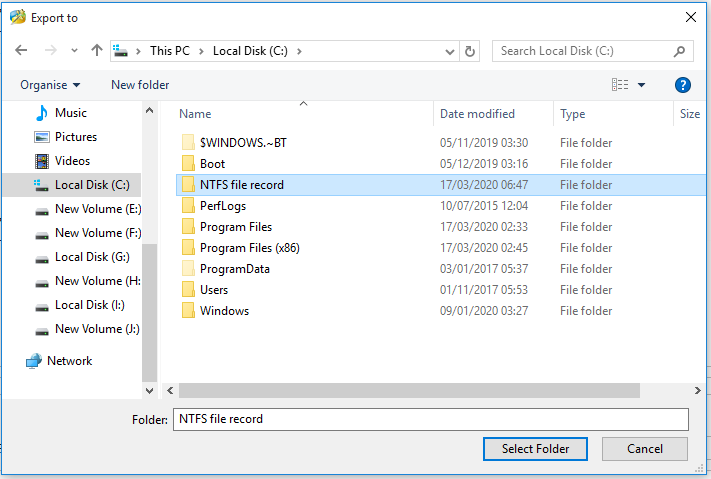
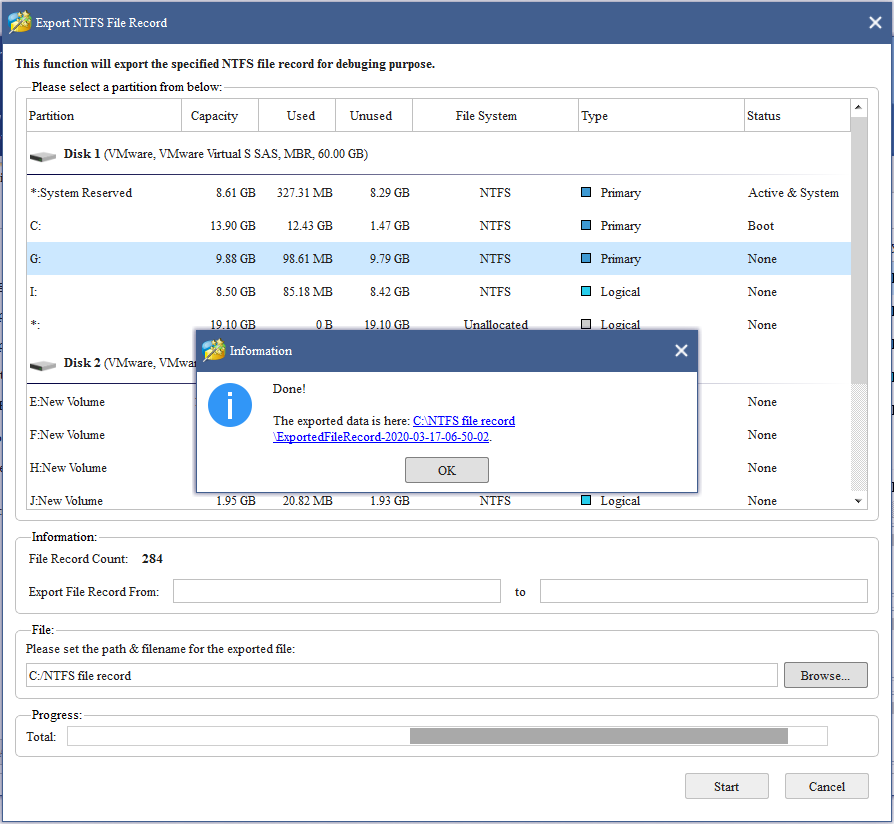
6). Export NTFS File Record: This function will help users to export NTFS file record.
Step 1. Go to Help > Debug > Export NTFS File Record.
Step 2. Select a folder to store the exported file. Then click Select Folder.
Step 3. Select a partition from this interface, click on OK from the pop-out window.
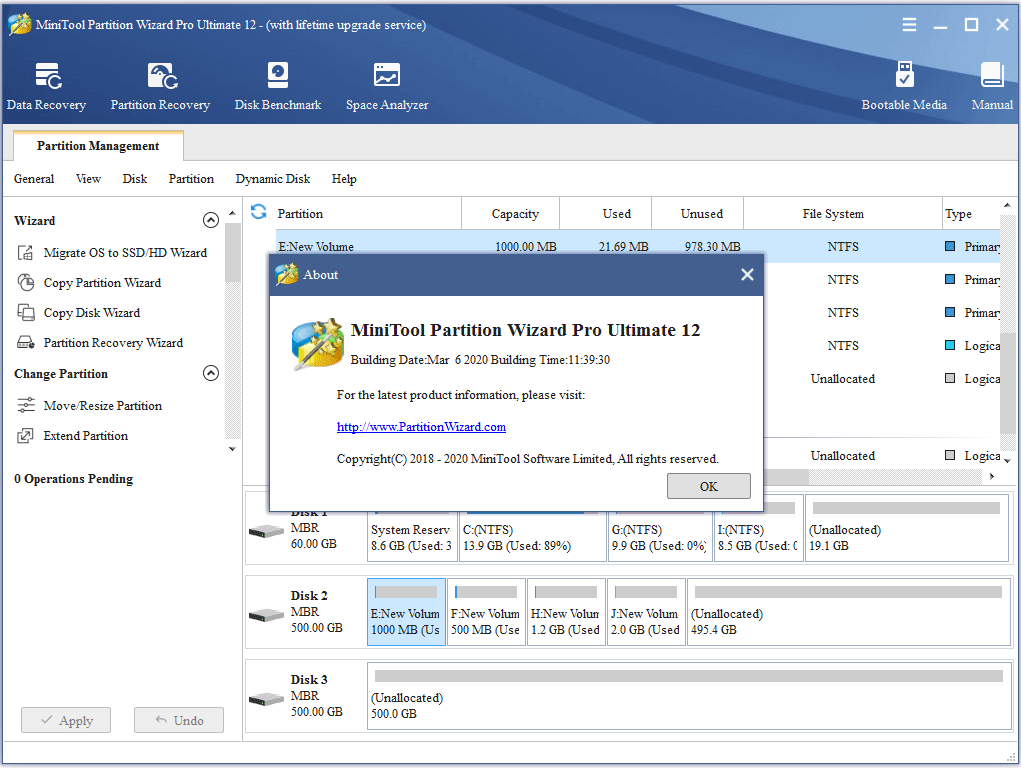
7).About: Go to Help > About, and users will see a pop-out window as follows, which will show them some information about this software such as building date, building time, and copyright.
User Comments :