Duplicate files can accumulate on your computer and external hard drives, taking up storage space and slowing down your system. This guide shows how to use MiniTool Partition Wizard Duplicate Cleaner to find duplicate files and remove them.
About Duplicate Cleaner
Duplicate Cleaner is a new feature in MiniTool Partition Wizard that helps you detect and remove duplicate files stored across your PC and external drives.
Over time, repeated downloads, accidental copies, and backup redundancies can occupy large amounts of storage. By scanning and identifying unnecessary duplicates, this tool helps you reclaim disk space, organize your files, and maintain efficient storage usage.
This guide explains how to configure, run, and manage scans using Duplicate Cleaner.
MiniTool Partition Wizard FreeClick to Download100%Clean & Safe
How to Use Duplicate Cleaner
Step 1. Launch MiniTool Partition Wizard to enter its main interface.
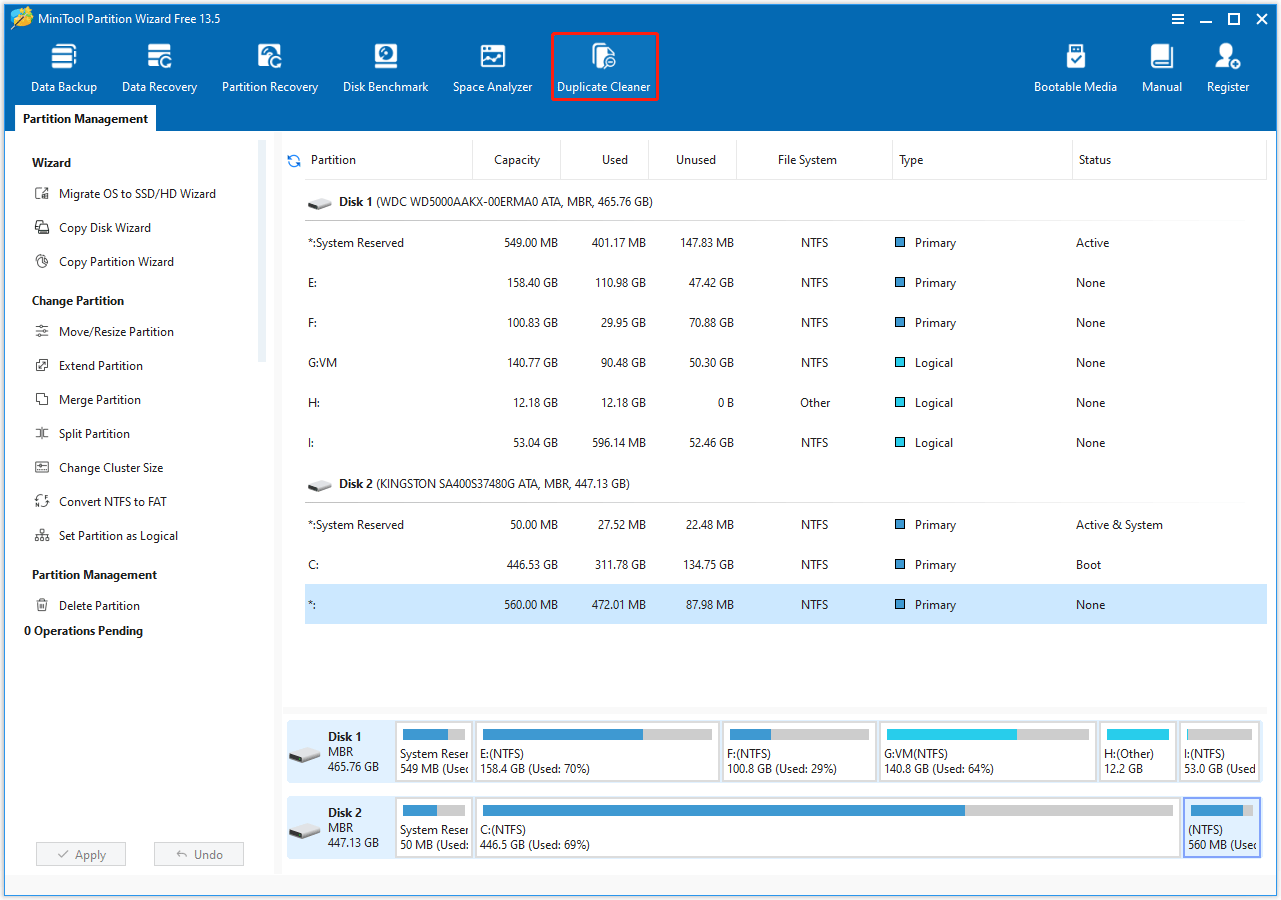
Step 2. Select the Duplicate Cleaner feature on the top toolbar.
Step 3. In the following interface, configure the scan settings, including location and file type.
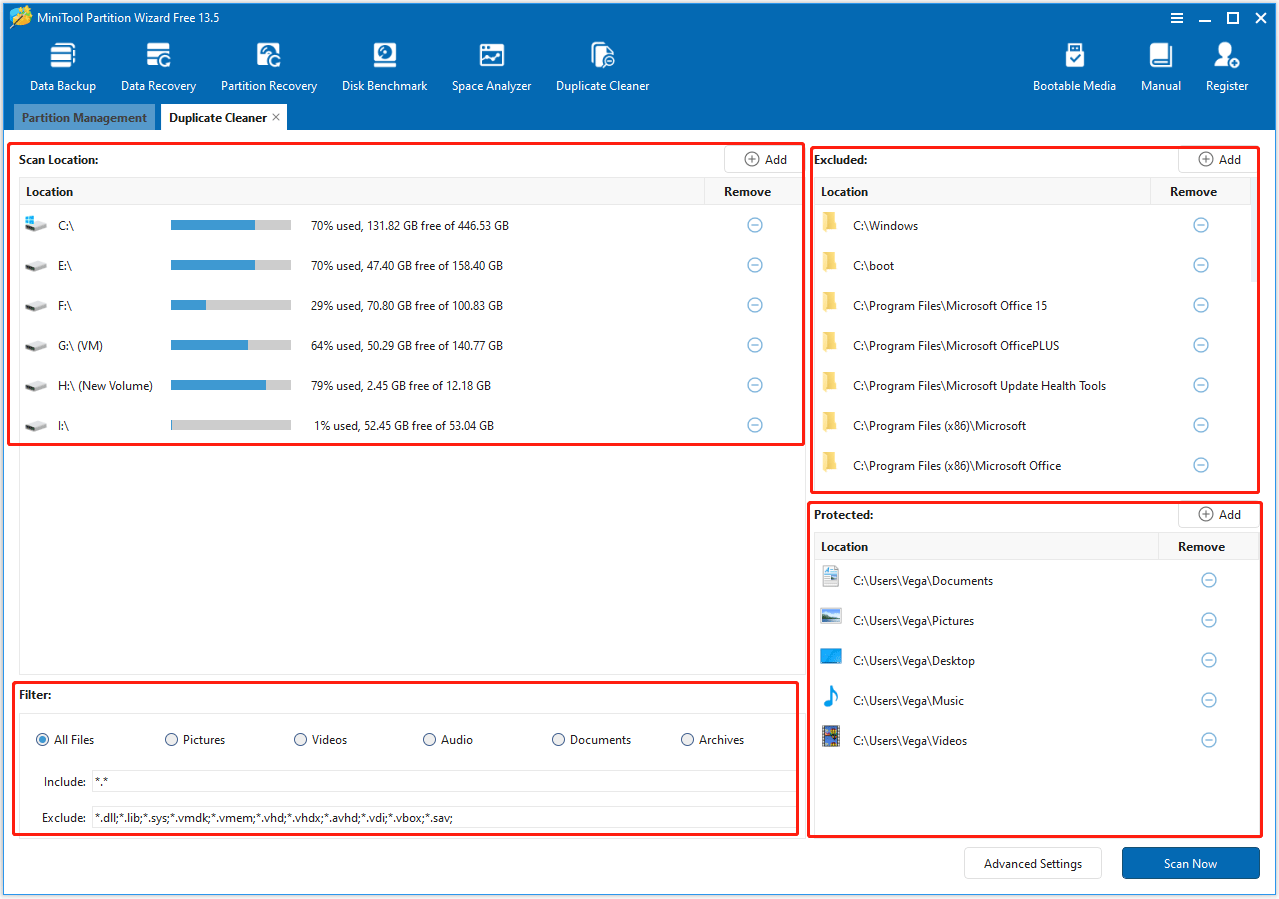
1. Scan Location: By default, all detected partitions with drive letters are displayed, including those on internal drives, external drives, USB flash drives, and other supported storage devices.
- Click the Add icon to add partitions or folders.
- Click the Remove icon to remove the selected partition or folders.
2. Excluded: Certain system folders (e.g., C:\Windows, C:\boot, and C:\Program Files) are automatically excluded to prevent accidental deletion of critical files. Additional partitions or folders can be added or removed as needed.
3. Protected: Some important folders or partitions can be marked as protected. Files there are scanned but will appear as locked on the results page and cannot be deleted. Protected folders or partitions can be added or removed according to requirements.
4. Filter: All file types are scanned by default, or specific categories can be selected, such as pictures, videos, audio, documents, or archives. Duplicate Cleaner supports most common file formats, ensuring no important files are missed.
Under All Files, the Include section is not editable because the scan covers all file types by default. *.* represent any filename and file type.
Certain file types are excluded by default to protect system and virtual disk files. These files will not be scanned or deleted. The Exclude list can be customized if needed, but changing it may affect scan results.
Use Advanced Settings to adjust file size limit, choose the hash comparison method, and set file protection options for a more precise scan.
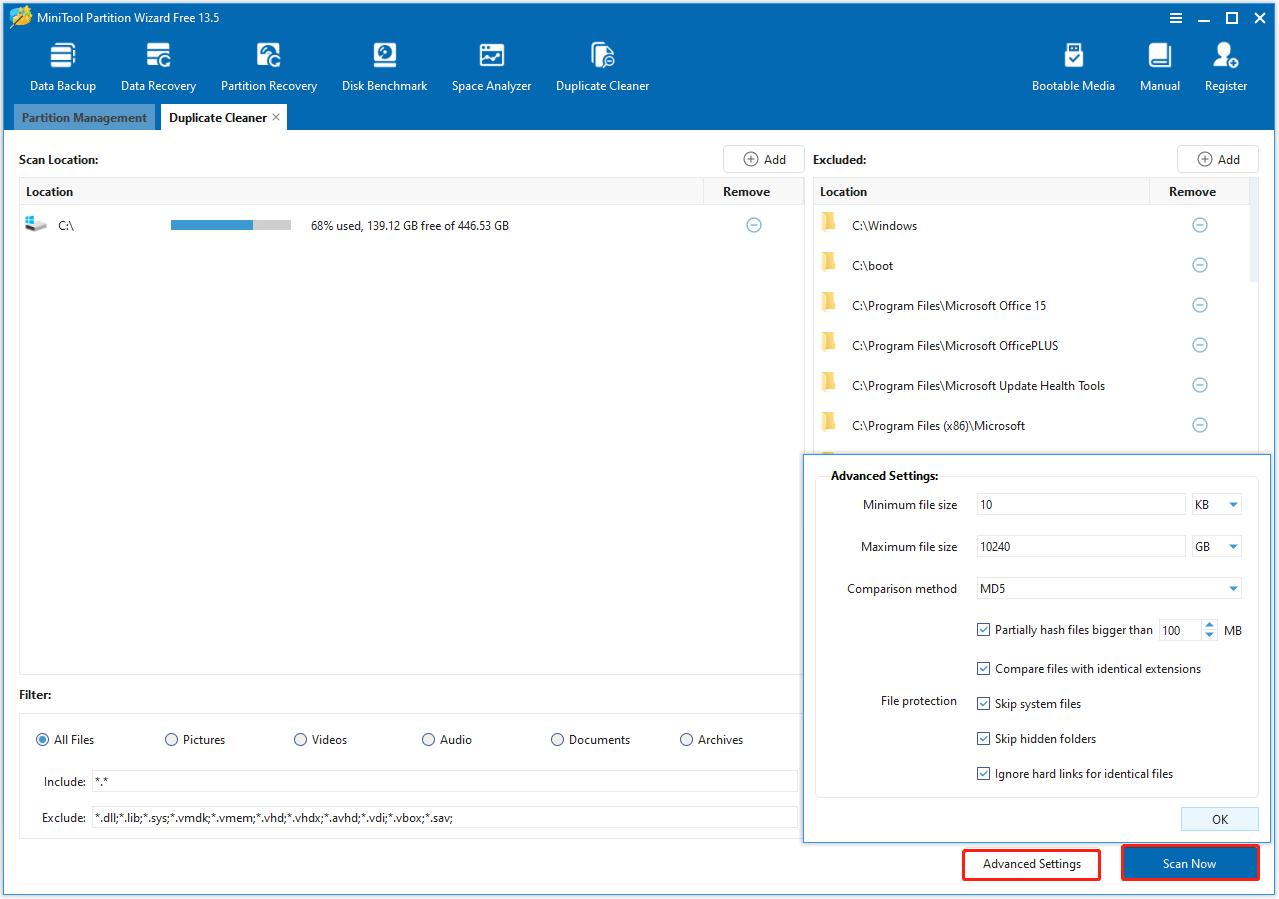
1. Minimum/Maximum file size: Set the range of file sizes to scan.
2. Comparison method: Choose between two hash algorithms, MD5 (default) and SHA-1. MD5 is fast and suitable for everyday scenarios, while SHA-1 offers higher accuracy and is recommended when handling important files.
3. File protection:
- Partially hash files bigger than: Use partial hash comparison for large files to speed up scanning.
- Compare files with identical extensions: Only search for duplicate files with the same extension.
- Skip system files: Exclude critical system files from scanning.
- Skip hidden folders: Do not scan hidden folders.
- Ignore hard links for identical files: Prevent counting hard links as duplicates.
Once the scan settings are configured, click Scan Now.
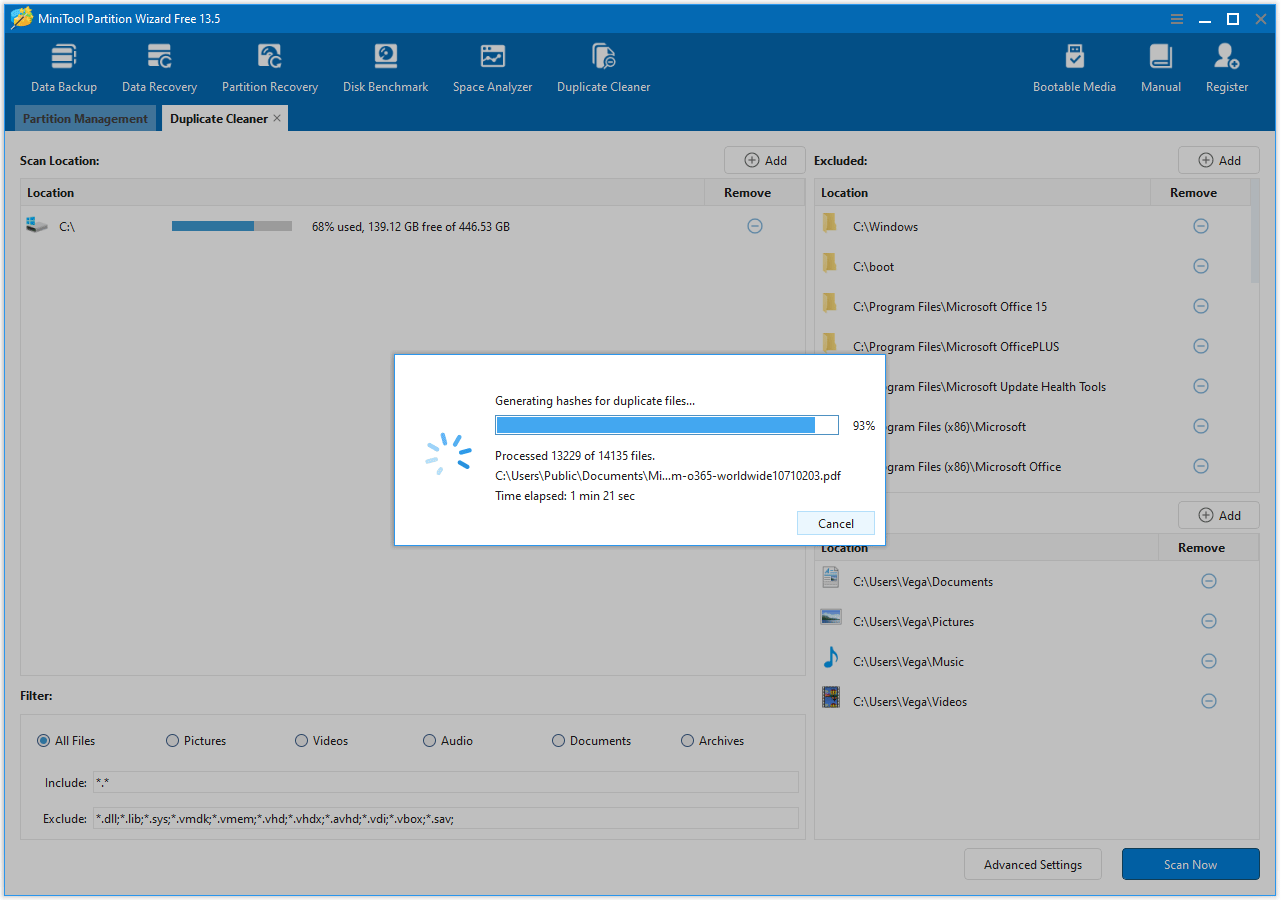
Step 4. Wait for the process to complete. The duration may vary depending on the number of partitions and files being scanned.
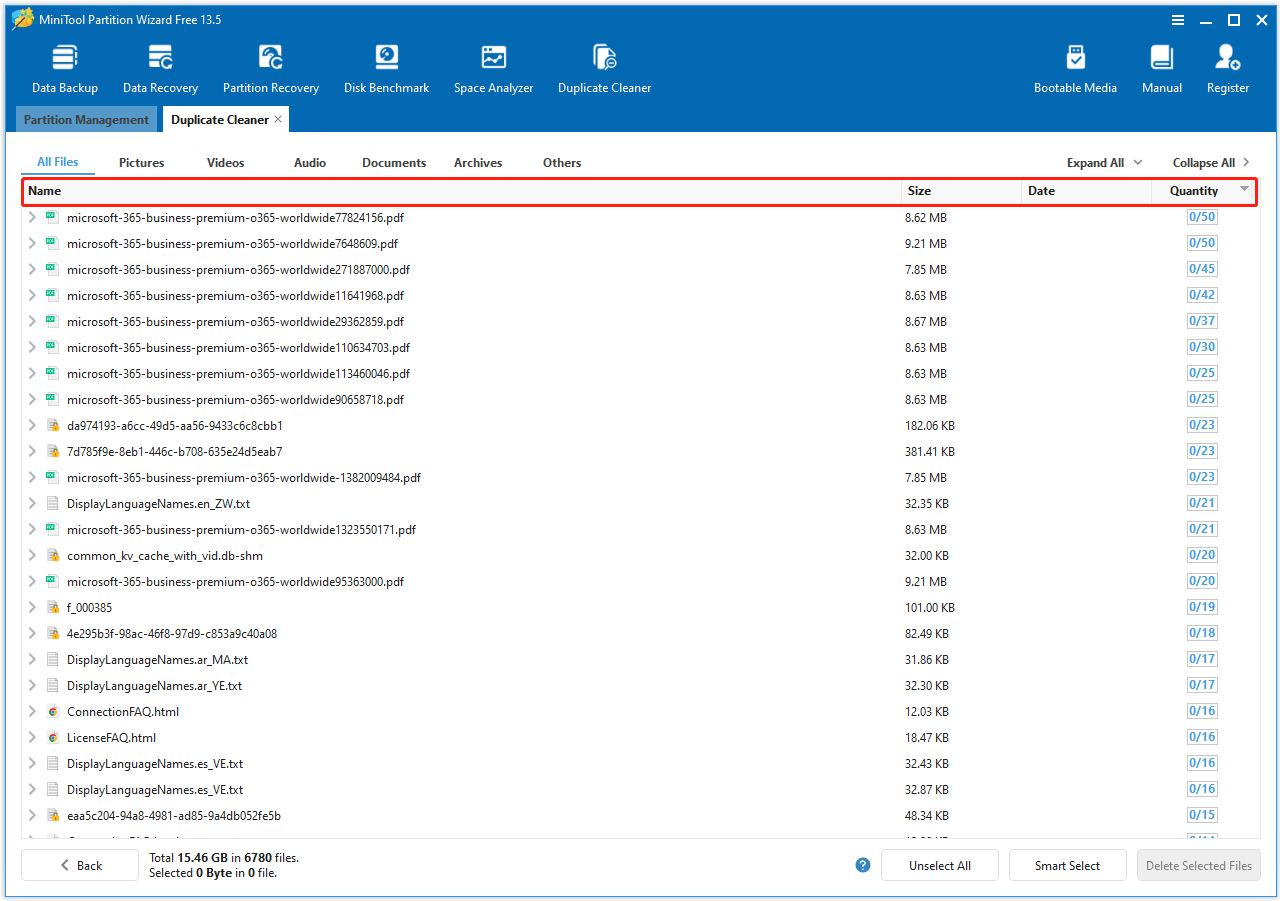
Step 5. After scanning, the results show all duplicate files with their size and quantity.
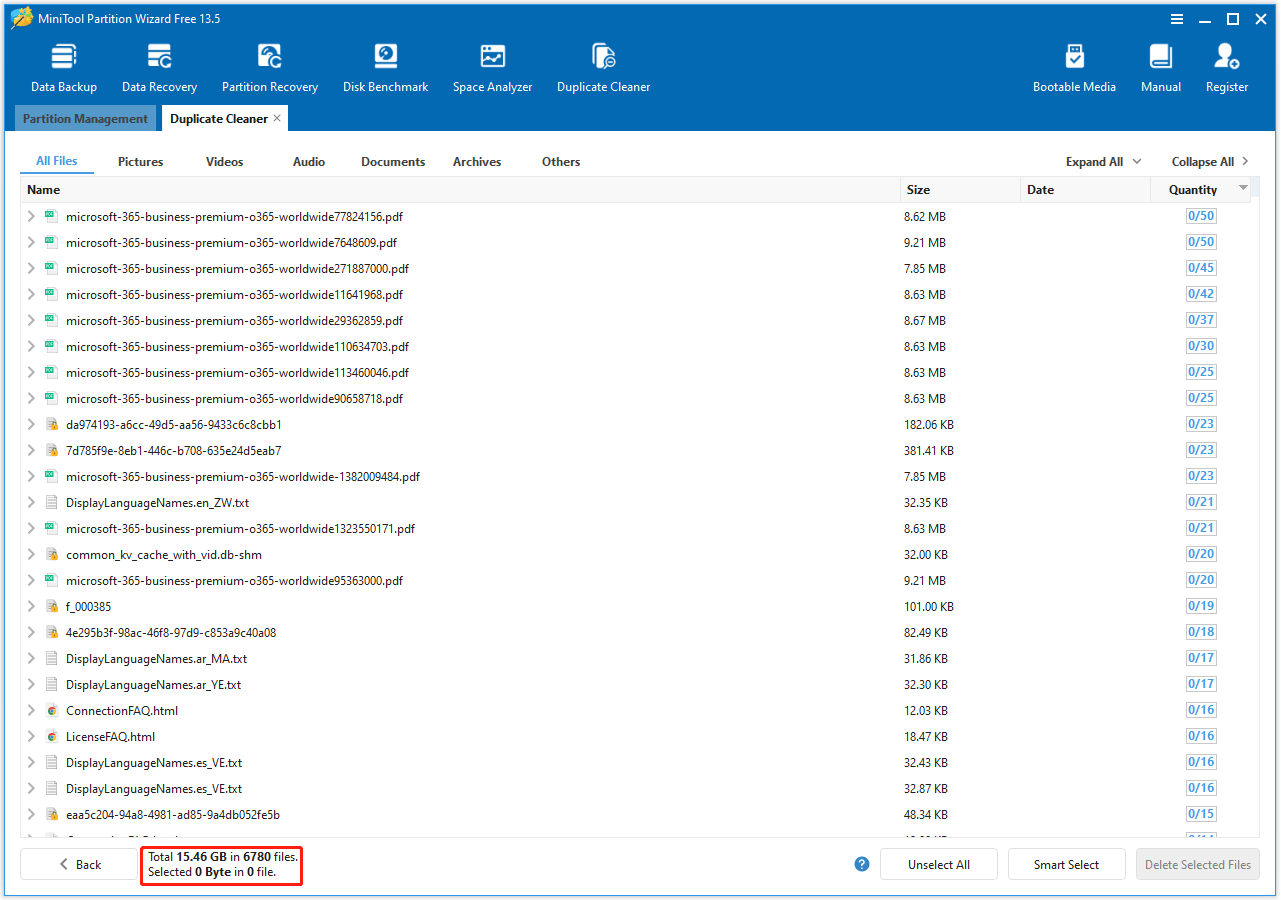
Filter by file type to quickly view duplicates in specific categories, such as pictures, video, audio, documents, or archives.

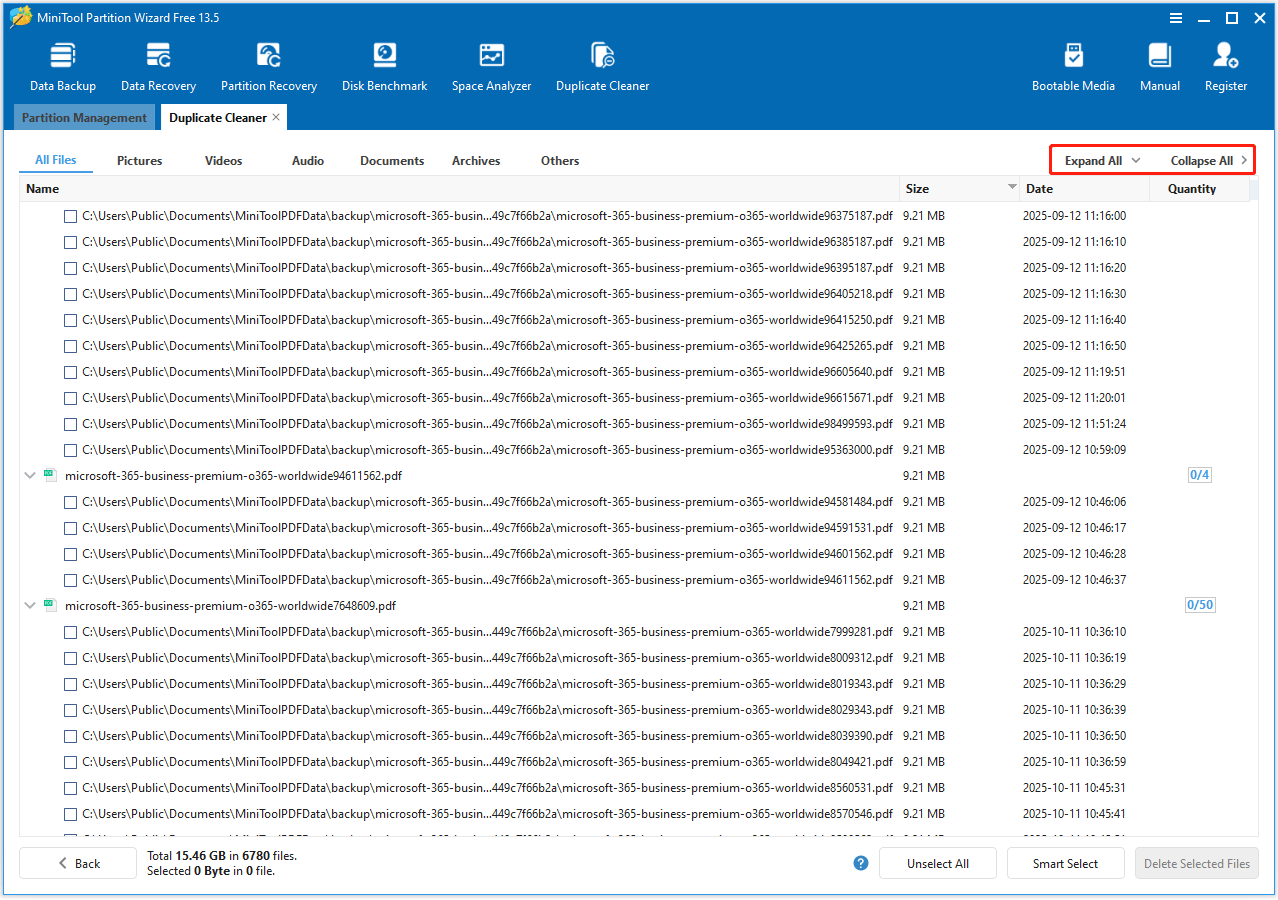
Click Expand All to view the full path of all duplicated files for easier inspection and selection, and Collapse All to hide the paths, showing only filenames.
Sort files in this section by name, size, or quantity to easily identify and manage duplicates.
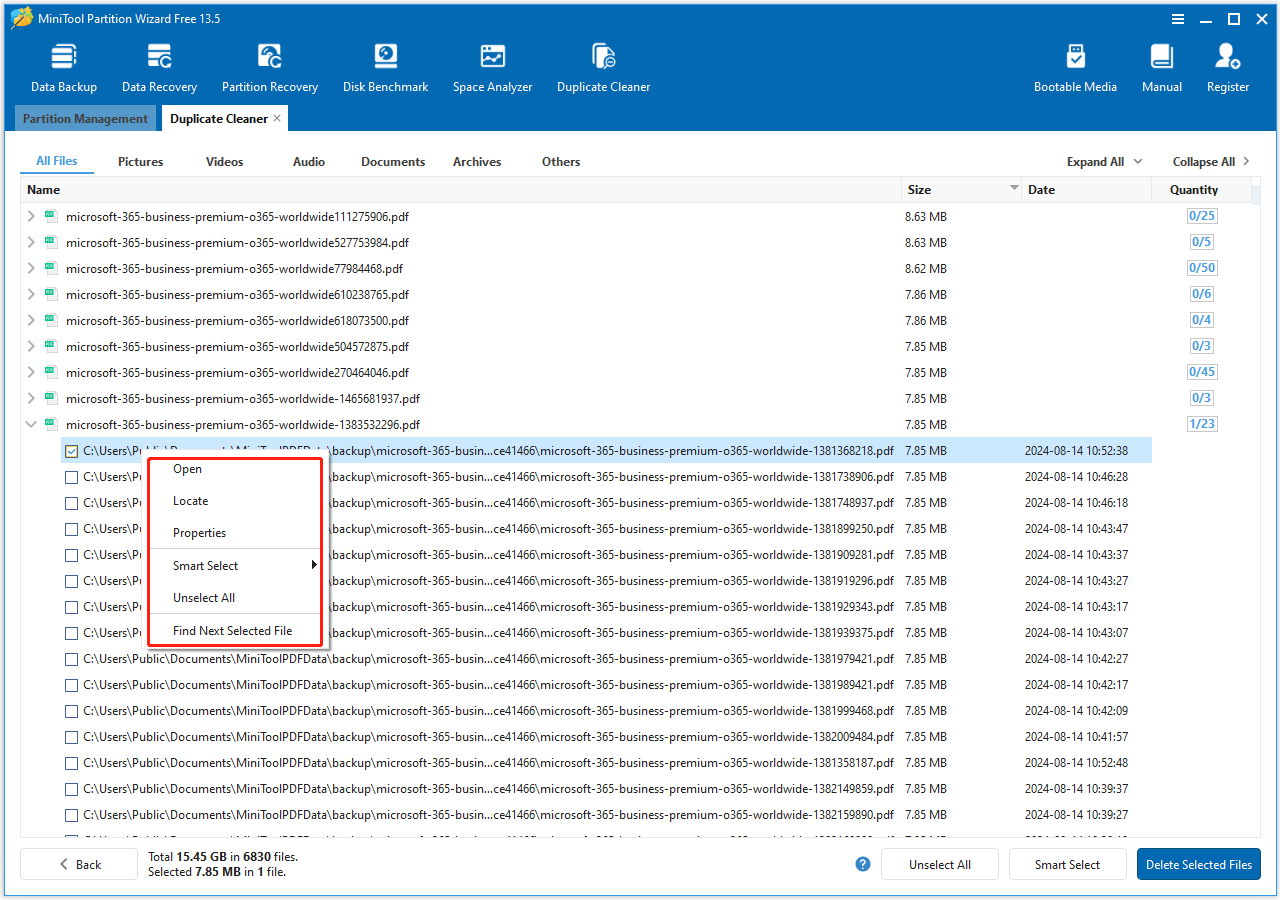
Step 6. To select the duplicate file to remove, the Smart Select button is provided. It includes multiple selection methods:
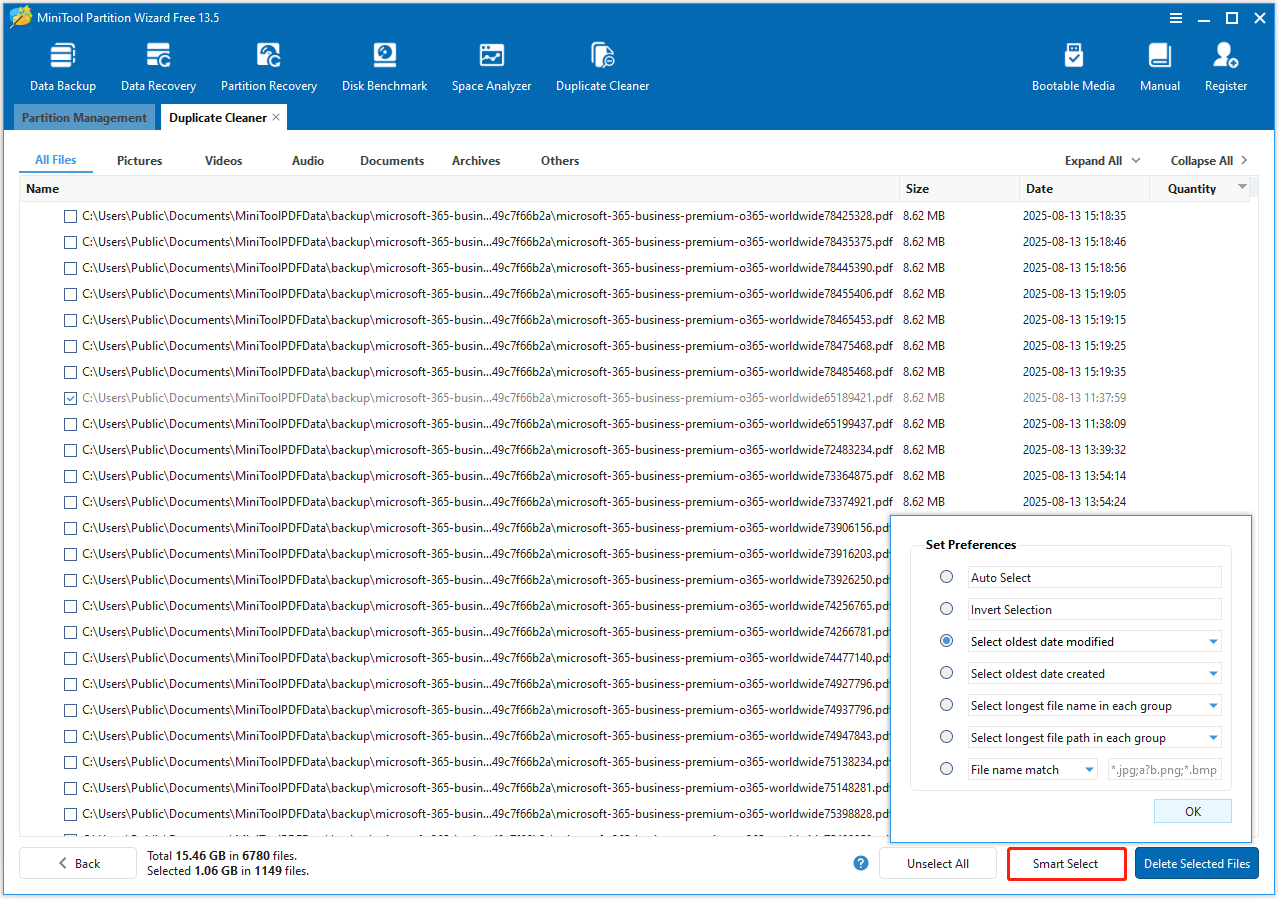
1. Auto Select: Exclude the oldest file, keeping only the original.
2. Invert Selection: Reverses the current selection of duplicates.
3. Select by Date Modified/Created: Choose the oldest or newest files by modification or creation date.
4. Select by File Name/Path Length: Choose files with the longest or shortest name/path within each group.
5. File Name/Path Match:
1) File Name Match
Use File Name Match to find files based only on the file name. This option is useful when you remember all or part of a file name, even if you are not sure about the file extension.
Matching rules
1. The match is applied only to the file name, not to the file path.
2. You can enter the complete file name to search for an exact match.
3. When searching by file name, entering only the complete file name without a wildcard or extension may not return results. To ensure a match, use a wildcard * or include the file extension.
4. You can enter a full or partial file name without a file extension. In this case, files with the same name but different extensions may be found.
5. You can also use wildcards to match unknown parts of the file name:
* represents any number of characters, including zero characters.
? represents exactly one character, including letters, numbers, spaces, or symbols.
6. Letters and words you enter (such as setup or backup) are treated as known text, not single characters.
Examples:
Case 1: Remember only the file name (extension unknown)
If you remember the file name but not the file extension, enter:
Installer*
This matches:
- installer.exe
- installer.msi
- installer.bat
- installer-pw.exe
- installer-mt.msi
- installer-ms.bat
Case 2: Remember the full file name
If you remember the complete file name of an EXE file, enter it directly:
installer.exe
This matches the file named:
installer.exe
Case 3: Only remember the file extension
If you only remember that the file is an EXE file, enter:
*.exe
This matches:
- setup.exe
- installer.exe
- backup_tool.exe
Case 4: Remember the ending of the file name
If an EXE file name ends with tool, enter:
*tool.exe
This matches:
- tool.exe
- backup_tool.exe
- repair_tool.exe
Case 5: Remember the beginning of the file name
If an EXE file name starts with setup, enter:
setup*.exe
This matches:
- setup.exe
- setup_v2.exe
- setup_backup.exe
Case 6: Remember the beginning and ending, but not the middle
If an EXE file name starts with data and ends with backup, but you forgot the middle part of the file name, enter:
data*backup.exe
This matches:
- databackup.exe
- data_backup.exe
- data_2023_backup.exe
- data-final-backup.exe
Case 7: Remember most of the name, but one character between them is unknown
If a PDF file name contains report and ends with 024, but one character between them is unknown, enter:
report?024.pdf
This matches:
- report2024.pdf
- report_024.pdf
- report 024.pdf
This does not match:
- report024.pdf
2. If you remember the file location or folder names, use File Path Match instead.
3. If no file extension is specified, File Name Match may return files with the same name but different extensions.
2) File Path Match
Use File Path Match to find files based on their full path. This is useful when you remember where a file is stored, but not its exact name.
The input can include a full file path or a partial path ending at a folder level.
Matching rules
1. The entire file path is treated as a single text string.
2. You can enter:
The complete file path for an exact match.
Part of the path to find files whose paths contain that text.
3. Wildcards are supported:
* represents any number of characters at the beginning, in the middle, or at the end of a path, including zero characters.
? represents exactly one character.
4. Letters and words you enter represent known text and are matched as exact character sequences, not as wildcards.
Examples:
Case 1: Remember part of the folder path (folder names may be incomplete)
If you don’t remember the complete folder path, but you remember part of one or more folder names, you can use * to match the missing characters or folders.
The unknown part may appear at the beginning, middle, or end of the path, and even inside a folder name.
a) Remember only part of a folder name
If you remember that the folder name contains project, but you do not remember the full folder name or its position in the path, enter:
*project*
This matches paths such as:
- D:\Work\ProjectFiles\images\cover.png
- E:\backup\old_projects\report.docx
b) Remember part of multiple folder names
If you remember that the path contains part of 2024 and part of images, but you don’t remember the complete folder names, enter:
*2024*imag*
This matches paths such as:
- C:\Users\Admin\Documents\2024_Data\Images_Backup\photo.jpg
- D:\Archive\2024Version\image_files\logo.png
c) Remember part of the path after the drive letter
If you don’t remember the drive letter or the folders before it, but you remember part of the later path, enter:
*\reports\final*
This matches paths such as:
- C:\Work\reports\final_version\summary.pdf
- F:\backup\old\reports\final\notes.txt
Case 2: Remember the folder path, but forgot one character in it
If you remember the folder path, but one character is uncertain, you can use ? to represent that single unknown character.
The missing character may appear in the drive letter, folder name, or any position within the path.
a) Forgot one character in a folder name
If a folder name is almost remembered as images, but one character is uncertain, enter:
D:\Work\imag?s
This matches paths such as:
- D:\Work\images\photo.jpg
- D:\Work\imagXs\design.psd
b) Forgot one character in the drive or folder name
If you remember the folder structure but are unsure about one character near the beginning of the path, enter:
?:\Projects\Backup
This matches paths such as:
- C:\Projects\Backup\data.zip
- D:\Projects\Backup\config.ini
Case 3: Remember partial folder names and subfolders
If you remember most of a folder name but are unsure about one character or want to match additional subfolders, you can combine ? with *.
For example, to search for a folder name similar to documents with one uncertain character and include subfolders, enter:
*\docu?ents\work*
This matches paths such as:
- C:\Users\Admin\Documents\work_files\plan.docx
- E:\Shared\docuXents\work\notes.txt
Step 7. After selecting duplicate files to remove, click the Deleted Selected Files button and choose one of the following options:
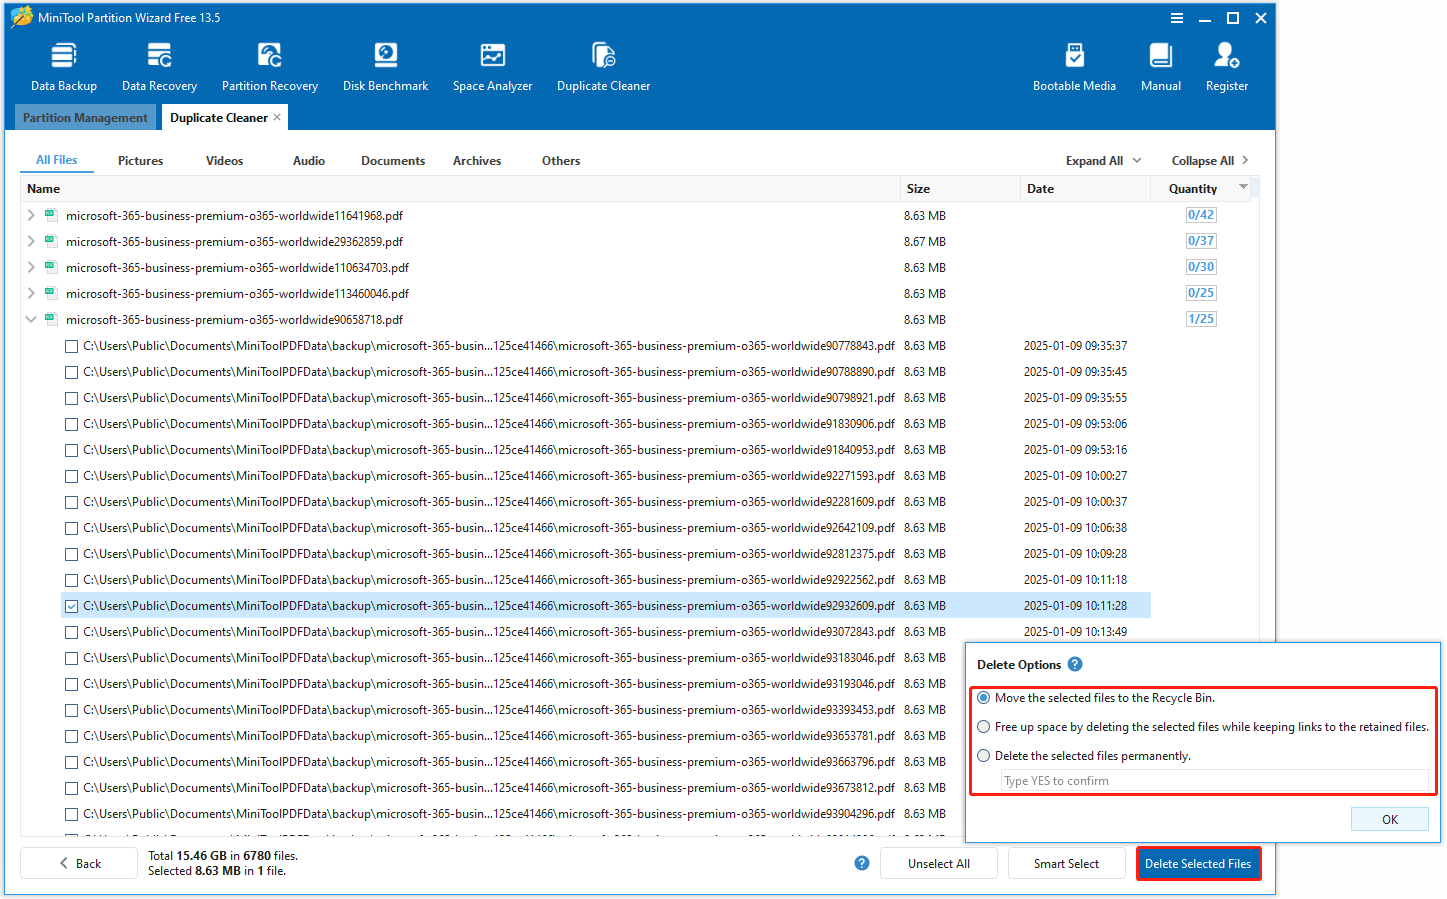
1. Move the selected files to the Recycle Bin: Selected files will be moved to the Recycle Bin and can be restored permanently deleted.
2. Free up space by deleting the selected files while keeping links to the retained files: Duplicate files are deleted, and links are created to the retained copies. This saves disk space while maintaining access to the original files in their locations.
- For duplicate files on the same NTFS drive, hard links will be created. A hard link is like a mirror of the original file on the same drive. It takes almost no extra space and behaves like the original file. However, copying a hard-linked file creates a new, independent file that does take up space.
- For duplicate files on different NTFS/ReFS drives, symbolic links will be created. A symbolic link is like a shortcut pointing to the original file on another NTFS or ReFS drive. It does not duplicate the file but lets you access it from its original location. If the original file is deleted, the symbolic link remains but cannot be opened because its target no longer exists.
3. Delete the selected files permanently: Selected files are permanently removed. Type YES to confirm.
Once the desired delete option is selected, click OK. Duplicate Cleaner will proceed to delete the duplicate files according to your selection.
About The Author

Position: Columnist
Vega enjoys helping people with computer problems, including disk management, data recovery, data backup, and more. She is constantly expanding her knowledge in related fields. And she will continue to bring more easy-to-understand professional articles to help people solve various problems on the PC.
User Comments :