Do you know what Java is? Do you need it? This post from the MiniTool Partition Wizard introduces how to install Java on Windows 11. Have a try if you are interested.
What Is Java?
Java is one of the most popular programming languages, developed by Oracle Corporation. It is widely used for desktop computers, android development, games, and other development tasks. A huge number of software developers are using this programming language.
Java is available on various platforms, including Microsoft Windows, macOS, Linux, and Solaris. Recently, Microsoft released a new operating system, Windows 11, the successor to Windows 10. If you have upgraded to Windows 11, you might wonder if Java is compatible with this new operating system. Don’t worry. Java is able to run properly on Windows 11.
Do I Have Java?
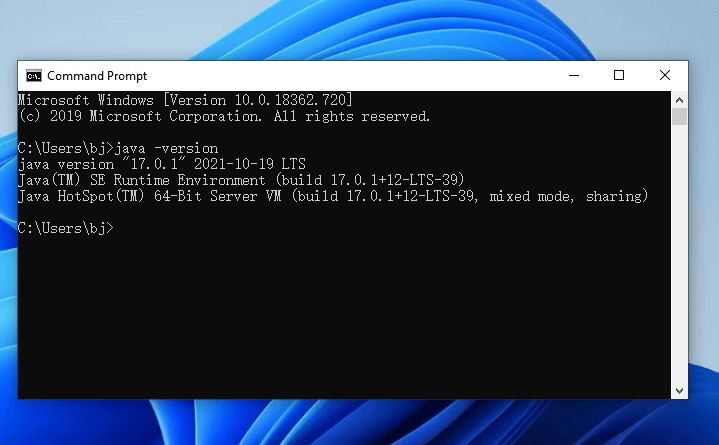
If you want to check whether Java is installed on your computer, you can visit Command Prompt. And here are the detailed steps.
Step 1: Press Win + S to open the Windows Search utility. Then search for Command Prompt and run the program.
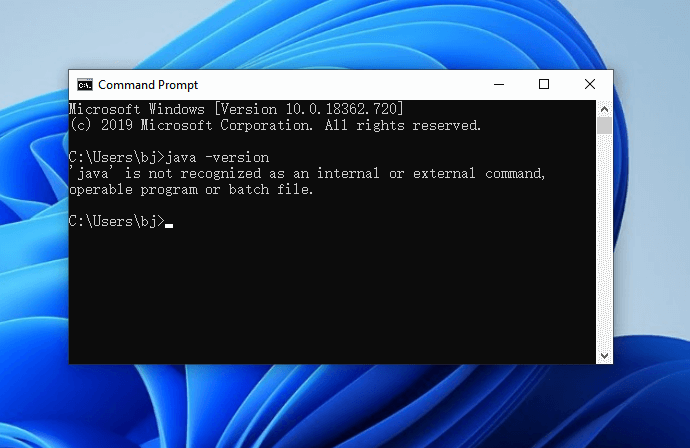
Step 2: In Command Prompt, input the command: java –version. Then press Enter.
If you receive the message that shows detailed information about the Java version, it indicates Java is already installed on your computer.
If you get the message “java is not recognized as an internal or external command, operable program or batch file”, it means you don’t have Java.
How to Install Java on Windows 11?
How to download and install Java on a Windows 11 computer? You can follow the steps below.
Step 1: Launch a web browser and visit the official Java download website.
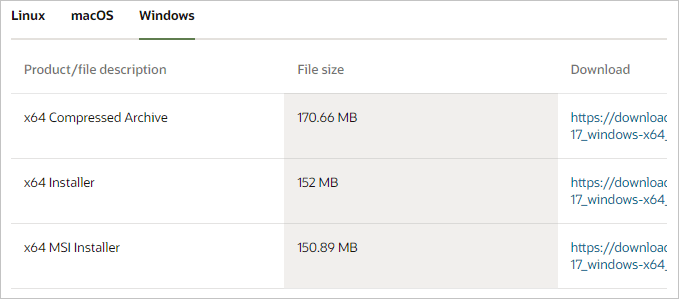
Step 2: Scroll down to find the Java SE Development Kit downloads section. Then select the Windows tab.
Step 3: Under the Windows tab, you can download three types of Java installation pack: x64 Compressed Archive, x64 Installer, and x64 MSI Installer. Here I take x64 Installer as an example.
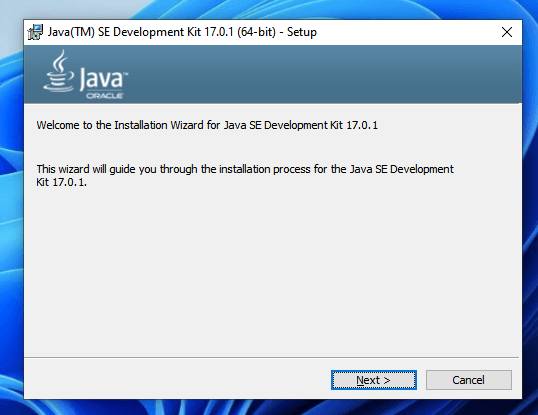
Step 4: Once the Java installer is downloaded successfully, open File Explorer and run the installer. And you will receive the Java setup wizard. Just click Next to continue.
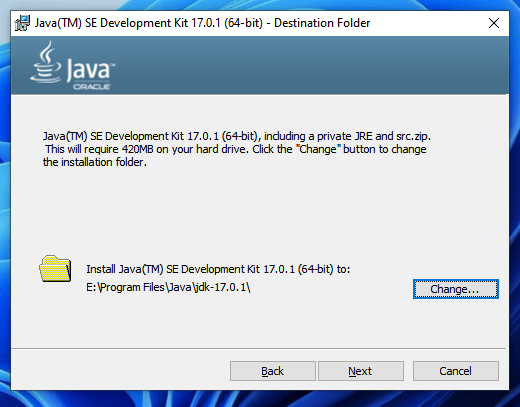
Step 5: On the next page, click the Change button. Select a path you prefer to install the program. Then click Next and wait until the installing process is finished.
Step 6: When Java is installed successfully, click Next Steps to get tutorials or click Close to exit the installation wizard.
How to Uninstall Java on Windows 11?
How to uninstall Java on Windows 11 if you don’t need the program anymore? An easy way is to use Control Panel.
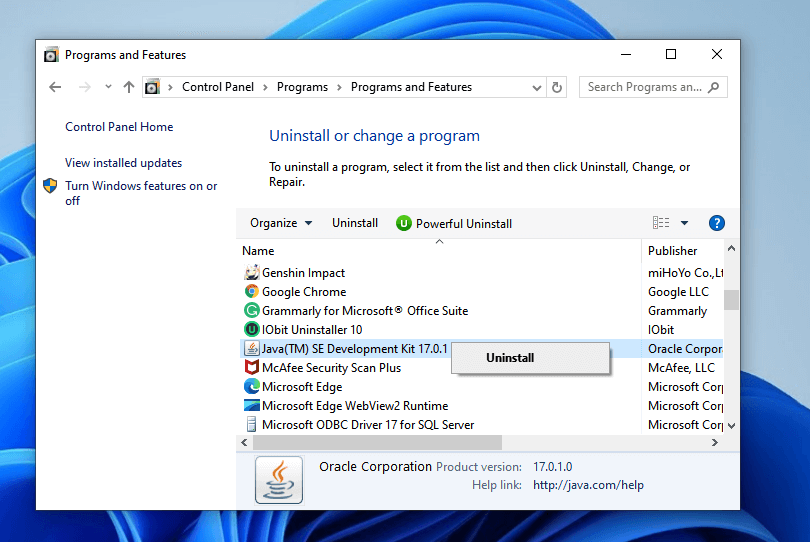
Step 1: Open Windows Search and search for Control Panel. Then run Control Panel.
Step 2: In Control Panel, select View by Category from the upper right corner. Then click Uninstall a program.
Step 3: In the following window, you can view all the installed programs and features on your PC. You need to scroll down to find your Java program and right-click it. In the pop-up menu, select Uninstall.
Step 4: Follow the on-screen instructions to finish the operation.
Further Tip:
If you are looking for a tool to manage your hard drive on Windows 11, you can try MiniTool Partition Wizard. It is a reliable and professional program, which can help you create, move, resize, delete, wipe, and format partitions. If you lose data on Windows 11, MiniTool Partition Wizard can also help you recover your files.
MiniTool Partition Wizard FreeClick to Download100%Clean & Safe
Hope this post can help you install or uninstall Java on Windows 11.
User Comments :