Protecting data safe should always be a crucial aspect of every operating system. Windows Information Protection, also known as WIP (hereafter referred to as WIP), is well used to protect automatically classified files. Now, let’s come to MiniTool Solution, you will get something useful about Windows information protection.
Why Use Windows Information Protection
WIP was designed by Microsoft to solve the data security issues especially for enterprises. This protection suite contains Azure Information Protection and Microsoft Cloud App Security.
As a mobile application management mechanism on Windows 10, WIP enables you to manage data policy enforcement for classified files on Windows 10 desktop operating system. It makes full use of Windows Defender ATP (the latest improvements are only available in Windows 10 version 1903 and later). With WIP, you can:
- Encrypt data: When you copy and download contents from a network share or an enterprise web location, using a WIP-protected device can help you to encrypt data on the device, which ensures the data safety. WIP helps protect sensitive data on local files or on removable media.
- Manage apps and restrictions: With WIP, you can make a protected apps list to decide which apps are allowed to access and use your enterprise data. After adding an app to the protected list, this app is trusted with enterprise data. On the contrary, all apps not on the list are prevented from accessing your enterprise data.
Besides, WIP boasts many benefits that help users protect Windows information.
- Support users to wipe sensitive corporate data from Intune MDM enrolled devices and leaving personal data alone.
- Personal data and enterprise data are separated without requiring employees to transfer the environments or apps.
- Don’t have to update the apps for making additional protection for existing line-of-business apps.
How Windows Information Works
WIP helps address your everyday data security problems in the enterprise, including:
- Prevent enterprise data leak, even the data of employee-owned devices that cannot be locked down.
- Maintain ownership of your corporate data.
- Control the network and data access and data sharing for apps.
Right now, perhaps you have an overall impression of WIP, the next important thing is how to configure WIP. Let’s see the step-by-step guide.
How to Configure Windows Information Protection
Step 1. You need to visit manage.microsoft.com and log in with a Windows Intune administrative account. If this is the first time you use it, you need to create an account.
Step 2. Then in the navigation panel on the left, select the option that says Windows Information Protection Policy.
Step 3. Within the window, please click on the Add Policy button to move forward.
Step 4. Then a dialog known as Create a New Policy will be shown, move ahead to expand Windows, and then choose Windows Information Protection.
Step 5. Next, click on Create and Deploy a Custom Policy button.
Step 6. Click on Create Policy, you will enter the process of creating WIP policy, and make sure you give a name for this policy.
Step 7. Specify the App rules based on your needs and enter the description.
In addition to creating a WIP policy, users can also set up sensitive labels.
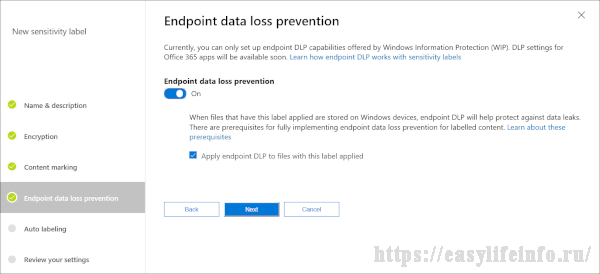
Protect Sensitive Labels with Endpoint Data Loss Protection
When it comes to managing sensitive labels, you can navigate to the Microsoft 365 compliance center.
Some users may not aware that Windows Defender ATP is able to extract a file to check whether this file has been contaminated with viruses or malware. Besides, it can also detect whether a file contains sensitive information such as credit card password or other types of important data.
In the Endpoint data loss protection, the default sensitive information types refer to credit card number, phone number, and so on. The interesting thing here is you can set up custom sensitive information types based on specified needs.
User Comments :