Have you come across hardware reserved memory windows 10? This issue troubles a lot of users. If you are still trying to resolve it, then you come to the right place. This post of MiniTool summarizes 6 fixes for hardware reserved memory.
When opening Task Manager, many users noticed that there is a large amount of hardware reserved memory Windows 10. Why Windows 10 not using all RAM? According to a survey, the hardware reserved memory is often related to an integrated graphics card. In addition, your BIOS can reserve some amount of memory.
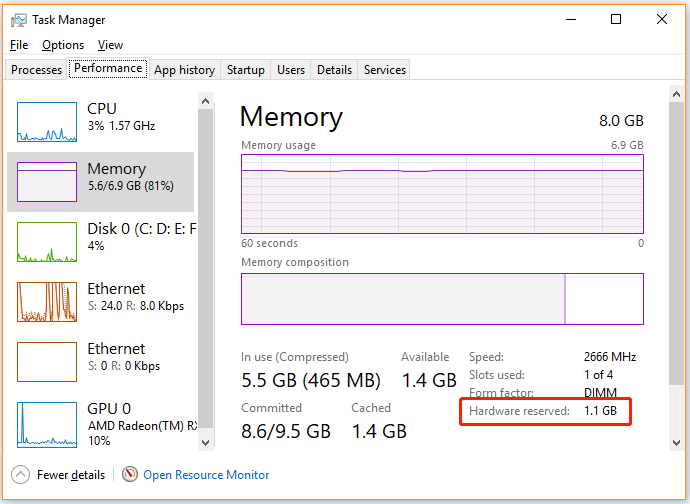
Fix 1. Check Your System Information
To fix hardware reserved RAM, the first thing you should do is to check your Windows 10 system is 32 bit or 64 bit. This is because a 32 bit Windows OS can only access 3.5GB RAM no matter how much RAM is physically installed on your PC. In this case, you need to install a 64 bit Windows 10 OS to access full RAM.
If you don’t know how to check Windows 10 operating system type, read this post: “What Is the Difference Between 32 Bit and 64 Bit (x86 vs x64)”.
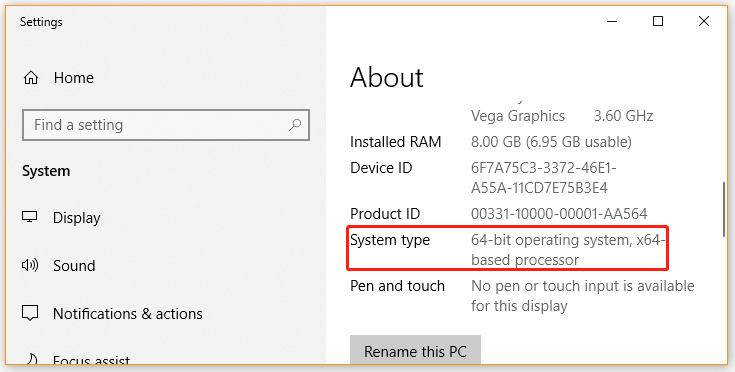
Fix 2. Change the Maximum Memory Used on Boot
There is a maximum memory option in the boot procedure that’s used to reserve RAM in Windows 10. If you set the maximum memory too high, you may find a large amount of hardware reserved RAM Windows 10. Here you can follow the steps below to change the settings.
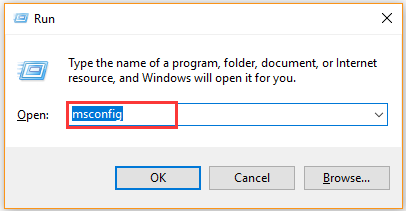
Step 1. Press Win + R keys to open the Run dialog box, and then type msconfig in it and hit Enter.
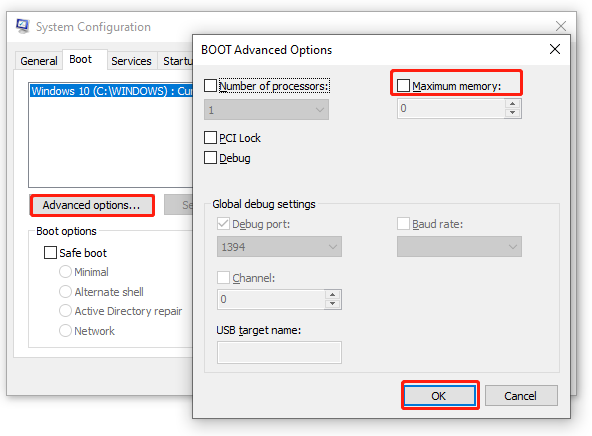
Step 2. In the System Configuration window, navigate to the Boot tab, and then select the Operating System from the list and click on Advanced Options.
Step 3. Untick the checkbox next to Maximum memory and click on OK to save the change.
Step 4. Click on Apply and OK in the System Configuration window.
Now, you can restart the computer and check if the hardware reserved memory Windows 10 issue still persists.
Fix 3. Optimize the Virtual Memory on Windows 10
Some users reported that the Windows 10 not using all RAM issue can be fixed by modifying the Virtual Memory. It is used by Windows to manage memory usage and located in the C: drive by default. Here you can try optimizing the virtual memory.
Step 1. Press Win + E keys to open the File Explorer, and then right-click This PC entry and select Properties.
Step 2. Click on the Advanced system settings on the left side of the window.
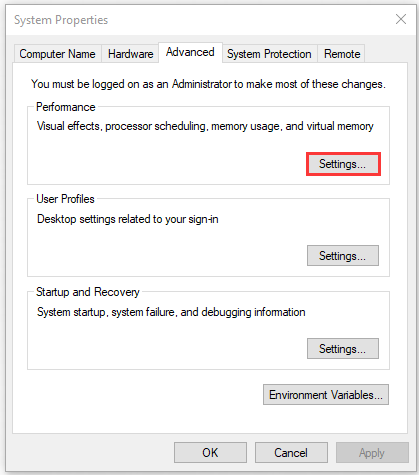
Step 3. Go to the Advanced tab and click on the Settings button under the Performance section.
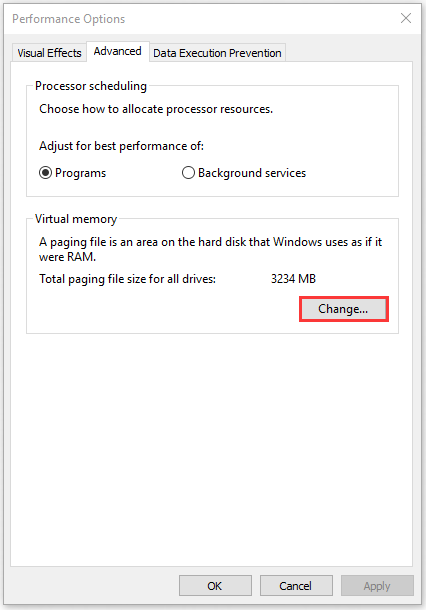
Step 4. Go to the Advanced tab and click on the Change button in the Virtual memory box.
Step 5. Uncheck the box next to Automatically manage paging file size for all drives.
Step 6. Select the C drive from the listed drives, and then select Custom size to larger and click on OK to apply the change. Here you can set it based on your actual situation.
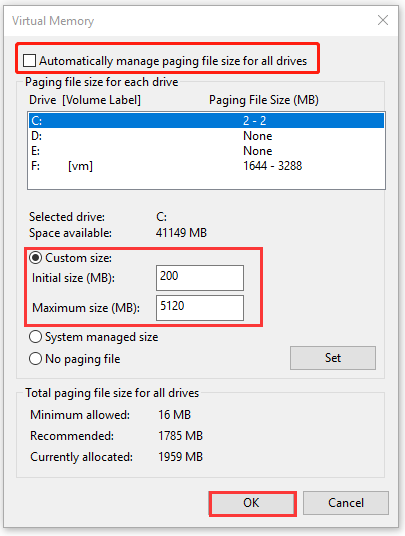
Once done, reboot your computer and check if hardware reserved RAM Windows 10 is resolved.
Fix 4. Update BIOS
Sometimes an outdated BIOS is also responsible for hardware reserved memory Windows 10. To get rid of this error, you can try updating BIOS. If you are unclear about the operation steps, don’t worry. This post “How to Update BIOS Windows 10 | How to Check BIOS Version” walks you through a full guide.
Fix 5. Check for Windows Updates
The hardware reserved memory Windows 10 issue can be caused by some Windows bugs. As you know, Microsoft will release patches and updates on a regular basis to resolve these bugs. So, you can try updating your Windows 10 to the latest build.
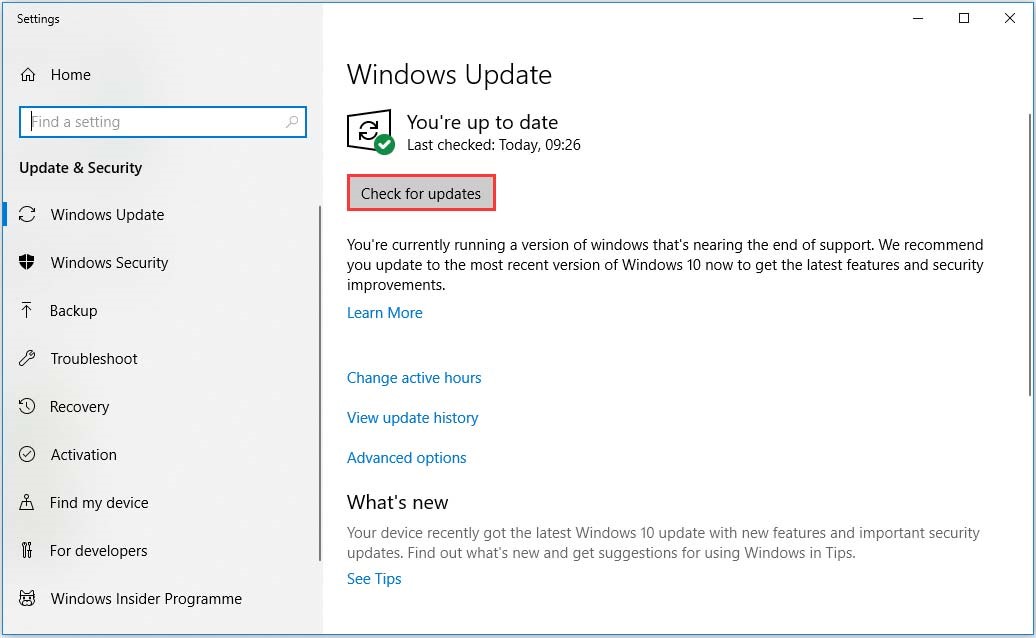
Step 1. Press Win + I keys to open the Settings app and navigate to the Update & Security section.
Step 2. Click on Check for updates button to start updating Windows 10. If there are any available Windows 10 updates, you can install them and see if the hardware reserved RAM problem can be resolved.
Fix 6. Restore BIOS to the Default Settings
If all the above methods fail to work, then the hardware reserved RAM Windows 10 problem may be caused by improper BIOS configurations. To fix it, you can try restoring BIOS to the factory defaults. Here’s how to do that:
Step 1. Enter BIOS by pressing the F2 or Delete key when the Windows startup screen appears.
Step 2. Click on Restore Settings (or Load Defaults) at the bottom of the right pane and confirm this change to restore BIOS.
Step 3. Exit the BIOS and restart your computer.
MiniTool System Booster TrialClick to Download100%Clean & Safe


User Comments :