If you see a black screen with a Windows logo and a message saying “Fixing (C:) Stage 1” when you boot the Windows PC, it means your system is checking for disk error. It will detect hard drive issues and fix them during the process, which usually takes a long time to finish. And sometimes the process even gets stuck at a certain percentage. That will really bother you a lot.
The following are some possible factors that can lead to the Fixing (C:) Stage 1 screen:
- Improper shutdown
- Power failure
- Corrupted or old hard drive
- Heavy-loaded junk files on the hard drive
- …
Once the message comes out, you have to stop the checking process, or it will show up whenever you start your computer. So, how to stop Fixing (C:) Stage 1? You can have a look at the guide below.
This guide may also help when you are stuck on the Fixing (C:) Stage 2 Windows 10/11 screen.
Method 1: Press the Power Button
When you are in the process of Windows Fixing (C:) Stage 1, trying to press the Power button for 2 to 3 seconds may help to some degree. Please note you can only speed up the progress instead of stopping it. And remember not to press the button for more than 3 seconds, or you will shut down your computer.
If the Windows 10/11 Fixing (C:) Stage 1 message remains on the screen, you are supposed to go on with the next solution.
Method 2: Change the Value in Registry Editor
You can also attempt to stop Windows 10/11 Fixing (C:) Stage 1 or Fixing (C:) Stage 2 by running the Registry Editor in Safe Mode. To get into Safe Mode through Windows RE (Recovery Environment), you can use the Windows installation disc to boot your computer. If you don’t have Windows installation media, the steps below can work as well.
Step 1: Press and hold the Power button on your PC for several seconds to force shut down your computer, and then press the Power button to turn it on. As soon as the screen lights up, hold the Power button again to turn off the computer.
Step 2: Repeat the action of turning on and turning off your computer 3 times until a blue screen with Recovery shows up.
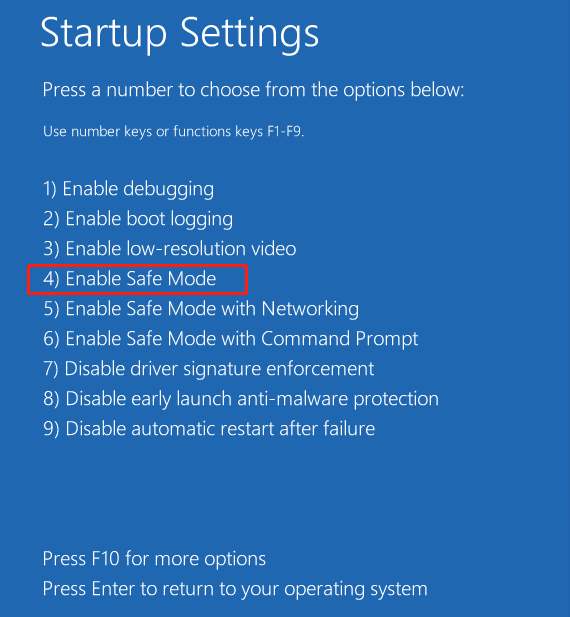
Step 3: Press F8 to go to Startup Settings.
Step 4: In the next window, select Enable Safe Mode by pressing 4 or F4 on your keyboard.
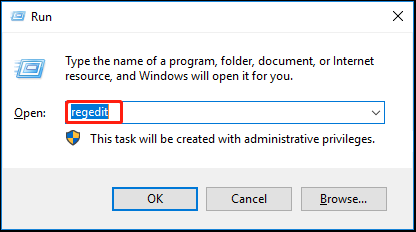
Step 5: After booting into the Safe Mode, press Windows + R to open the Run dialog.
Step 6: Type regedit in the box and then press Enter to open Registry Editor.
Step 7: In the Registry Editor, navigate to the following path: HKEY_LOCAL_MACHINE\SYSTEM\CurrentControlSet\Control\Session Manager
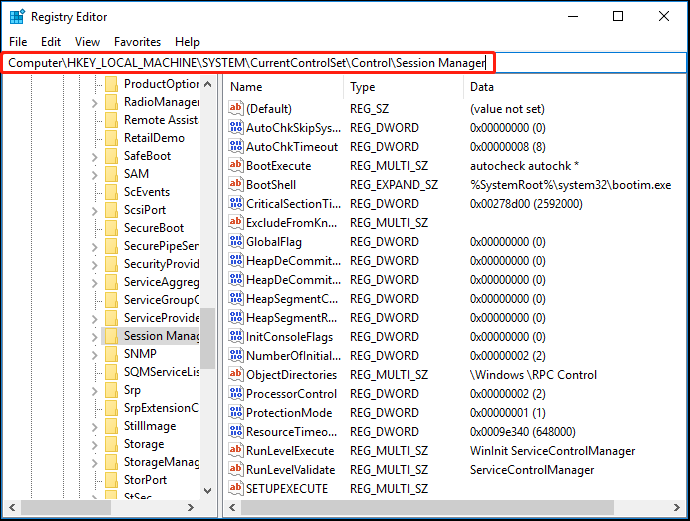
Step 8: In the right pane, double-click the file named BootExecute and change its value data to autocheck autochk *.
Once you complete the operation, restart your computer to see if the message Fixing (C:) Stage 1 has been removed.
Method 3: Check Hard Disk for Errors with MiniTool Partition Wizard
When the Windows Fixing (C:) Stage 1 message comes out and prevents you from starting your computer normally, it may indicate that there are some errors in the hard disk. In this case, you can check the hard disk and fix errors using MiniTool Partition Wizard. It is a comprehensive partition manager that offers different features to help you manage your hard disks.
With this tool, you can try to check both logical and physical errors existing on the hard drive.
Before that, you are supposed to build a bootable USB flash drive with MiniTool Bootable Media Builder on another computer so that you can boot your computer with the bootable disk.
To create the bootable media, follow the steps below.
Step 1: Connect your USB flash drive to acomputer that can run normally.
Step 2: Download and install MiniTool Partition Wizard first. And then launch it to enter the main interface.
MiniTool Partition Wizard DemoClick to Download100%Clean & Safe
Step 3: To build a bootable USB flash drive, select the Bootable Media feature in the top-right corner.
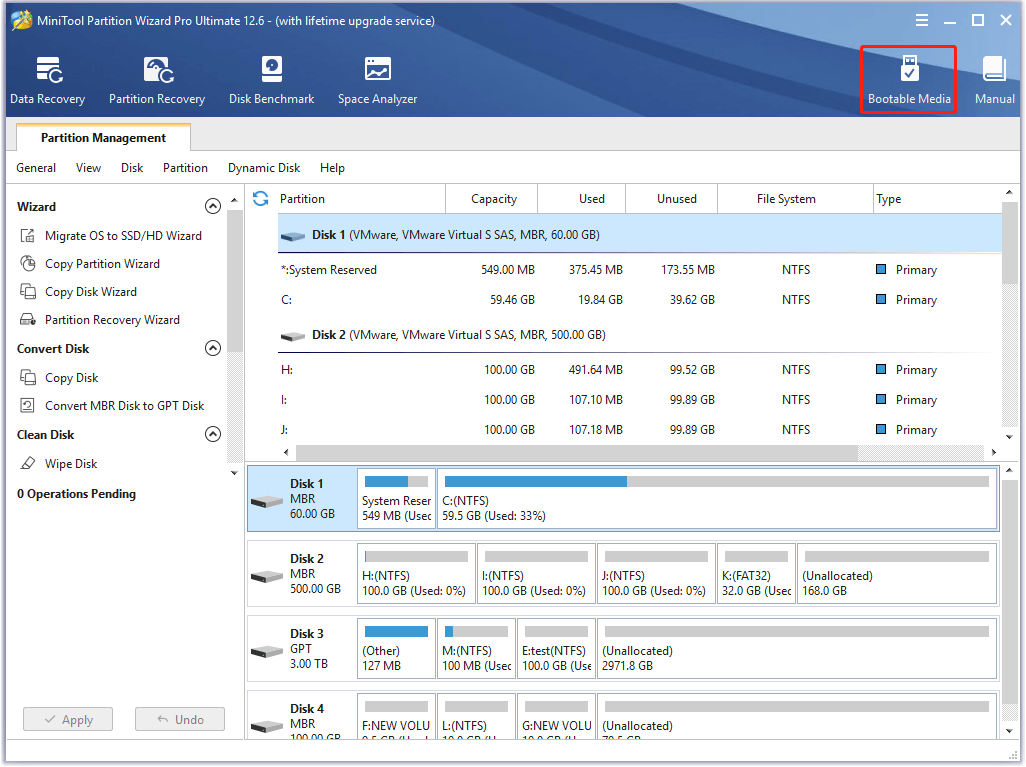
Step 4: Click WinPE-based media with MiniTool plug-in to continue.
Step 5: In the next window, check the USB Flash Disk and then click Yes to continue when there is a warning saying that the data on the USB flash drive will be destroyed.
Step 6: Wait until the MiniTool Bootable Media Builder finishes to build the bootable USB disk. Finally, click Finish.
Once the bootable USB flash drive is built, you can continue to check your hard disk.
Way 1: Check and Fix Corrupted File System
This method can help you check and fix issues related to the file system.
Step 1: Boot your computer from the bootable USB drive. Then you will enter the main interface of MiniTool Partition Wizard automatically.
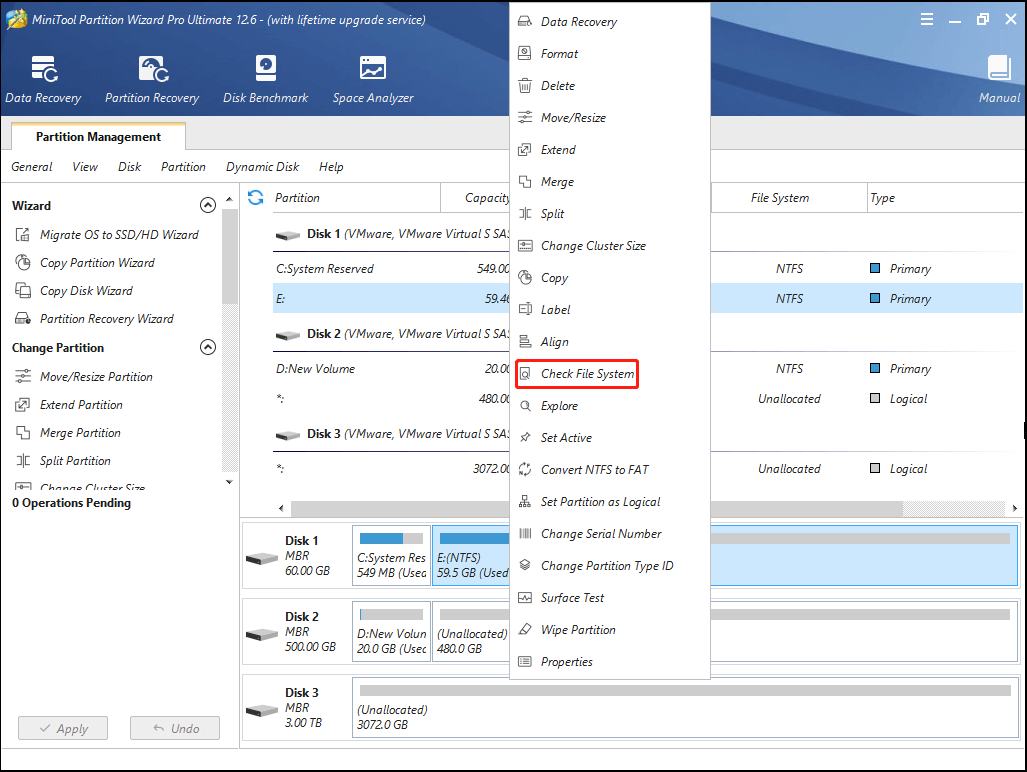
Step 2: Right-click the problematic partition and select Check File System.
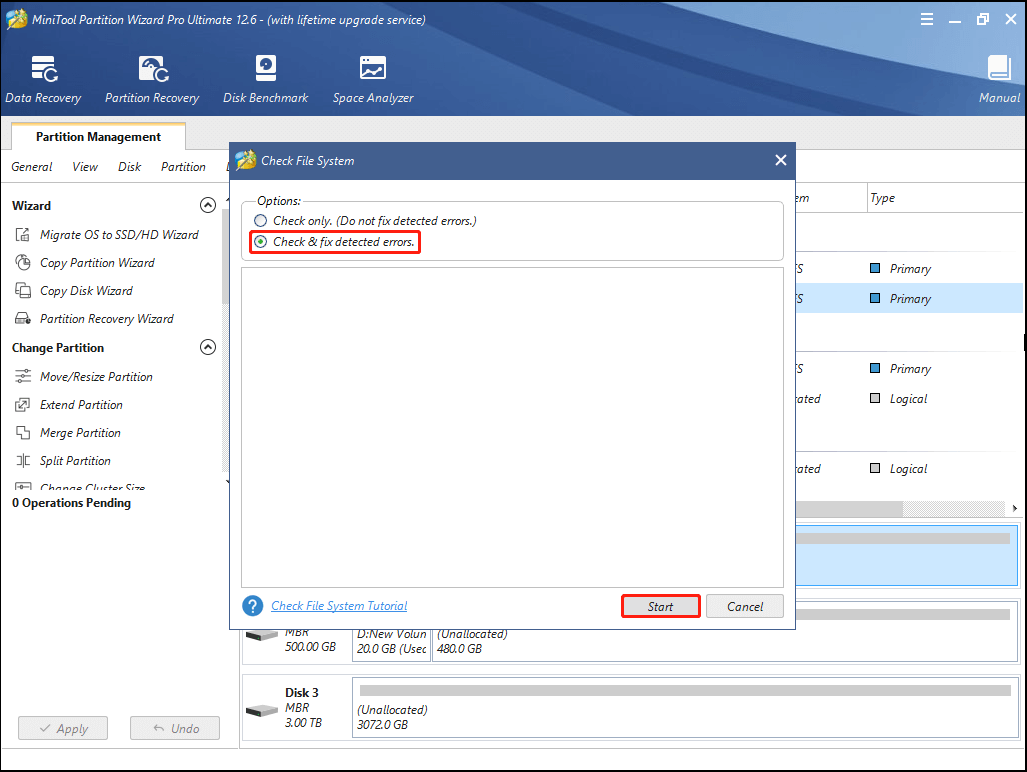
Step 3: Choose the Check & fix detected errors option and then click Start.
Step 4: After the operation, close MiniTool Partition Wizard and restart your computer.
Way 2: Check for Bad Sectors
MiniTool Partition Wizard can also help you to check for bad sectors on the disk.
Step 1: Boot your computer from the bootable media and then enter MiniTool Partition Wizard.
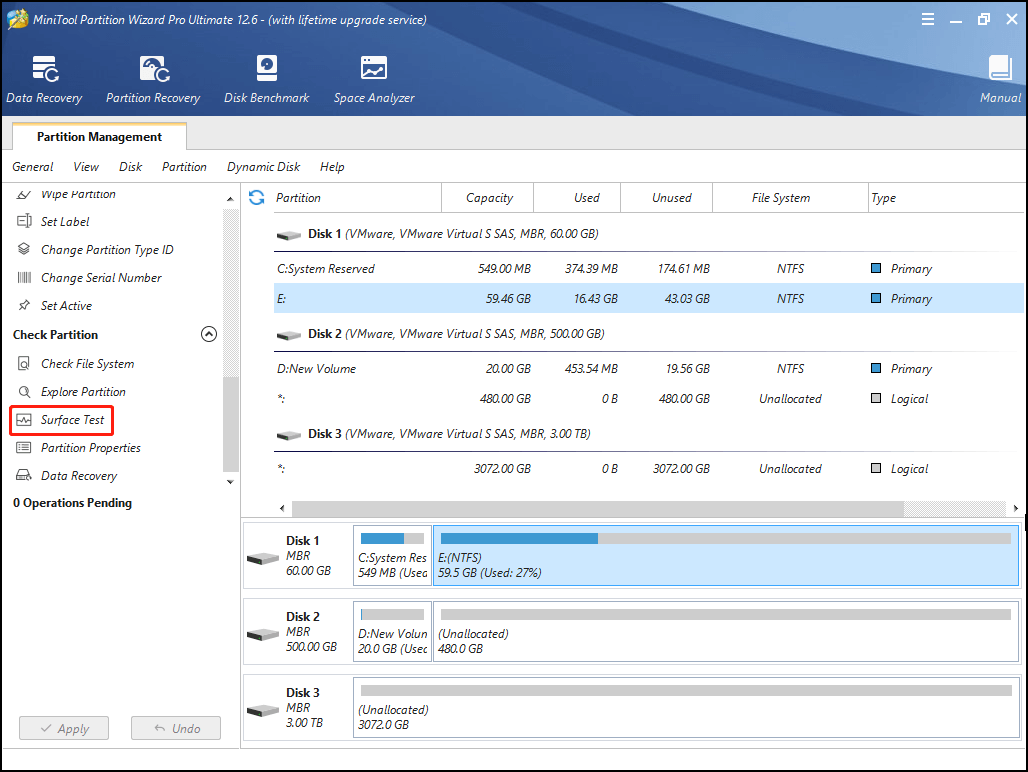
Step 2: Find the target partition and then select Surface Test from the left action pane.
Step 3: Click Start Now to begin scanning the bad sectors.
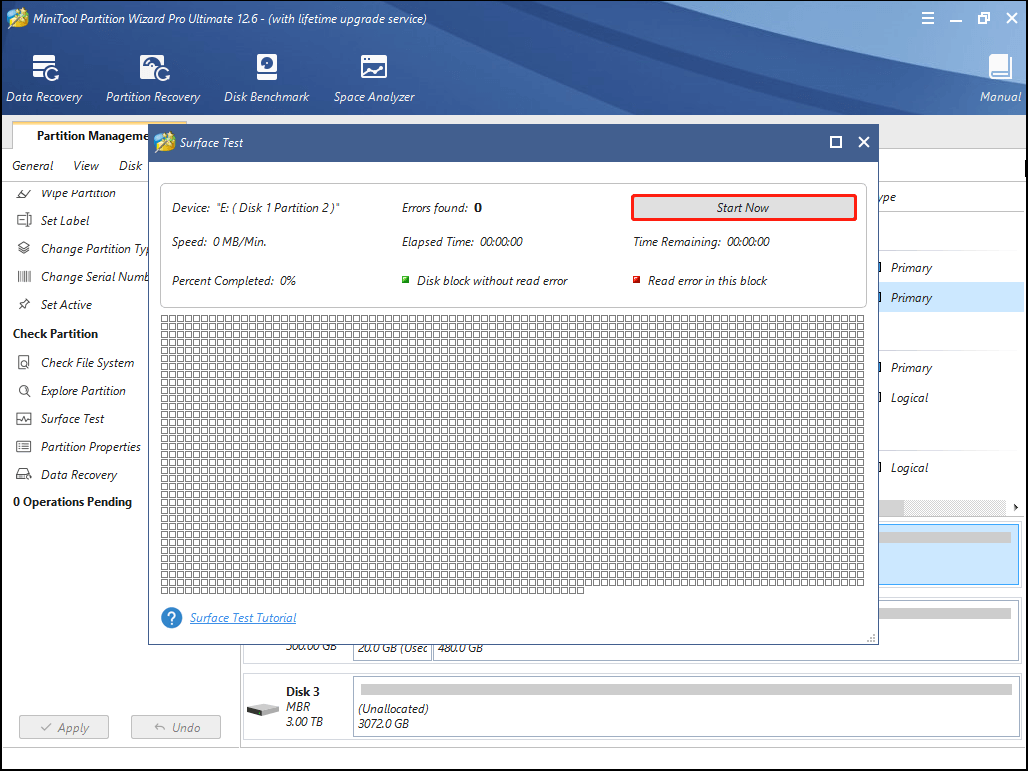
If any bad sectors are found during the process, they will be marked as red. You need to back up the files to avoid data loss.
In addition, you can also try to mark the bad sectors as unavailable through the CHKDSK tool, which is explained in detail in the Way 1 of the next method. And after the operation is completed, the system will skip the bad sectors and you may start your computer successfully.
If there are too many bad sectors in the hard disk, it is better for you to replace the disk with a new one.
Method 4: Run the CHKDSK Utility
As a matter of fact, the Fixing (C:) Stage 1 or Fixing (C:) Stage 2 screen indicates that your system is running the CHKDSK utility to repair disk errors. It won’t disappear until the process is completed. So, to end the Fixing (C:) Stage 1, you can try to open Command Prompt and run CHKDSK in Win-RE.
How to stop Fixing (C:) Stage 1 or 2 with it? There are two ways available to you.
Way 1: Run the chkdsk c: /r Command
With this command, you are able to fix logical errors and mark physical errors as unreadable on your disk.
Step 1: Boot your computer into the Windows RE.
Step 2: Go to See advanced repair options > Troubleshoot > Advanced Options > Command Prompt.
Step 3: In the Command Prompt panel, type chkdsk c: /r and then press Enter to execute the command.
Step 4: After the process finishes, restart your computer, and the Fixing (C:) Stage 1 may disappear.
Way 2: Run the chkntfs /x c: Command
This command can exclude a specified partition from checking when your computer starts up. If you want to skip the process of checking partitions while starting your PC, you can run the command.
Step 1: Enter Command Prompt in the Windows RE.
Step 2: In the Command Prompt panel, type chkntfs /x c: and then press Enter to run the command.
Step 3: Reboot your computer to check if the message Fixing (C:) Stage 1 still exists.
Method 5: Replace the Old Hard Disk with a New One
The Windows Fixing (C:) Stage 1 appears mainly because the hard disk you are using is corrupted or damaged. To avoid the issue, you’d better replace the old hard disk with a new SSD/HDD to improve the performance of your computer and hard disk.
Before replacing your disk, you’d better migrate data including the operating system and personal files to your new hard drive. In this way, you are able to use the new disk without reinstalling Windows or applications.
To execute the operation, you are recommended to use the professional software – MiniTool Partition Wizard. The following are detailed steps.
Step 1: Connect the new SSD/HDD you prepared to the computer with a SATA to USB cable, and then boot your computer from the bootable USB flash drive created with MiniTool Partition Wizard.
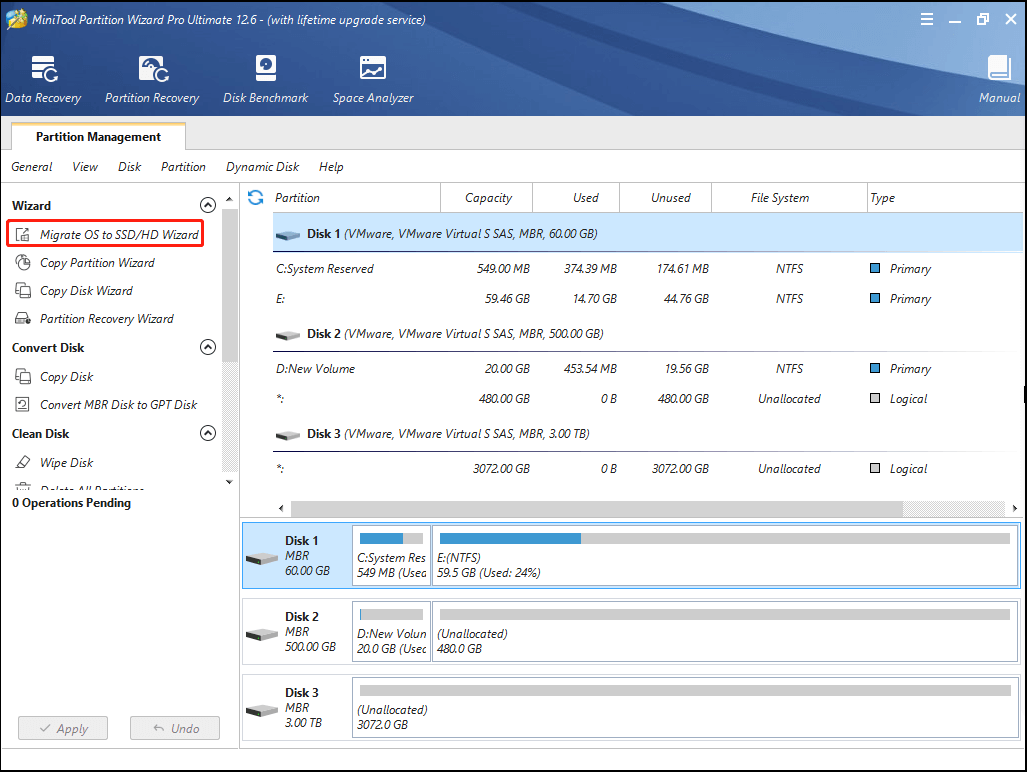
Step 2: Choose Migrate OS to SSD/HD Wizard from the left action pane. Then there will be two options provided to you, and you can choose one according to your needs.
Step 3: Select the SSD you prepared as the destination disk and click Next. Click Yes to go on when you see a pop-up warning window.
Step 4: On the Review the changes page, you can make and review certain changes to meet your needs.
Step 5: In the next window, click Finish to accomplish the settings of the migration. And finally, don’t forget to click Apply to carry out these changes.
Step 6: You may wait for a long time until the migration is finished. After that, boot your PC from the new disk to make sure that you migrate the OS and data successfully. Then shut down your PC and disconnect all external devices including the power source and monitor.
Step 7: Open your computer case and remove the original hard disk with the instructions in the user’s manual. Then install the new hard disk. Please be careful to avoid any possible issues. But if there is an additional slot that is suitable for the new disk, you don’t need to remove the old one.
Once you accomplish all the steps, you can boot your computer successfully without meeting the Fixing (C:) Stage 1.
Bottom Line
Are you bothered by the Fixing (C:) Stage 1? Do you know how to stop it? These methods mentioned in the post are available. Try them to solve your problem if you get stuck on the Fixing (C:) Stage 1 screen.
You can also leave a message in our comment part below if any other problems with this issue trouble you. In addition, if you have anything confused when using MiniTool Partition Wizard, please contact us via [email protected].
User Comments :