Primary partition is of great importance as system files and boot files of an operating system must be saved to a primary partition. However, many users don't know how to set partition as primary without data loss. This post will show users how to set partition as primary with a professional partition manager.
About Set Partition as Primary
As we all know, partitions on an MBR disk can be divided into two types: primary partition and extended partition and the latter can be subdivided into several logical partitions. What users actually see in disk is logical partition and primary partition. Well, in which situation do users need to set partition as primary? How to set a logical partition as primary?
First of all, we’d like to explain the reason for setting partition as primary.
If users want to install a second operating system to computer but have no more primary partitions, they have to set a logical partition as primary. That is because all the system files and boot files of an operating system must be saved to a primary partition and this partition should be different from the one that saves files of the original operating system.
In this article, we are going to give users a MiniTool Partition Wizard tutorial to show how to set partition as primary.
How to Set Partition as Primary
2 main limitations in setting partition as primary on MBR disk:
- Users can’t finish this task if there are already 3 primary partitions and more than one logical partition on the disk (since an MBR disk can support at most 4 primary partitions or 3 primary partitions and 1 extended partition).
- Even though there are only 1 or 2 primary partitions, users still can’t set a logical partition as primary if the adjacent partitions of this logical partition are both logical partitions (since MBR disk can support at most one extended partition; if this task could be made, there would be 2 extended partitions on the disk).
Now, please follow the MiniTool Partition Wizard tutorial given below:
MiniTool Partition Wizard FreeClick to Download100%Clean & Safe
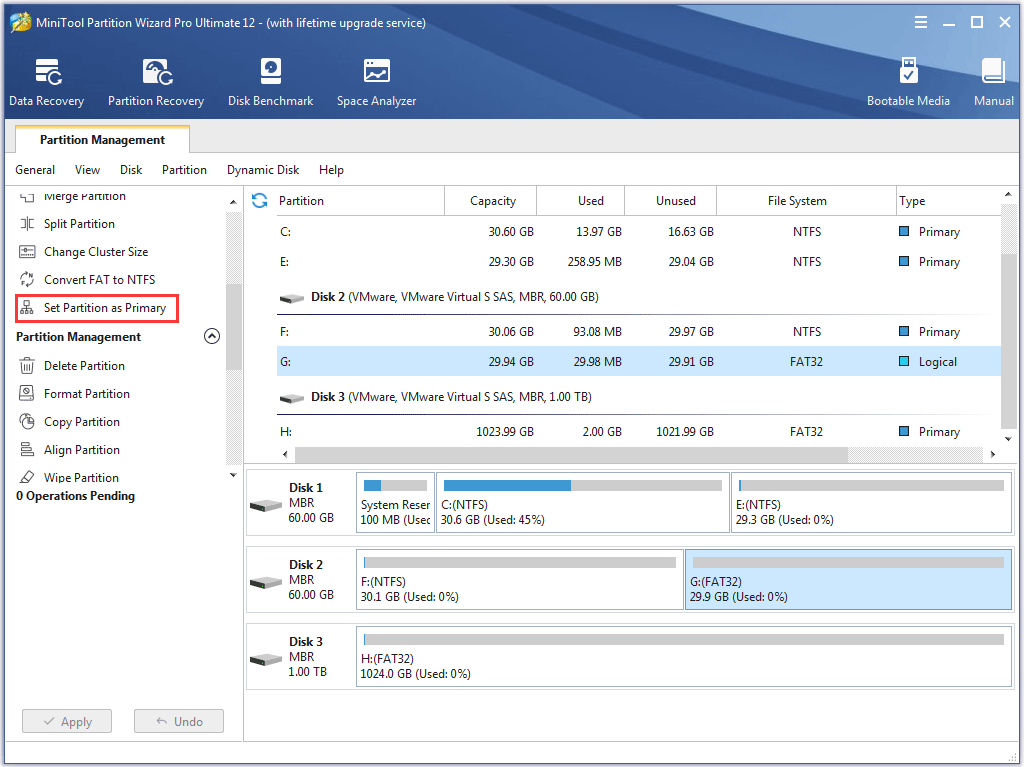
Step 1. Choose the logical partition that needs to be set as primary partition. Then choose Set Partition as Primary directly from left action panel.
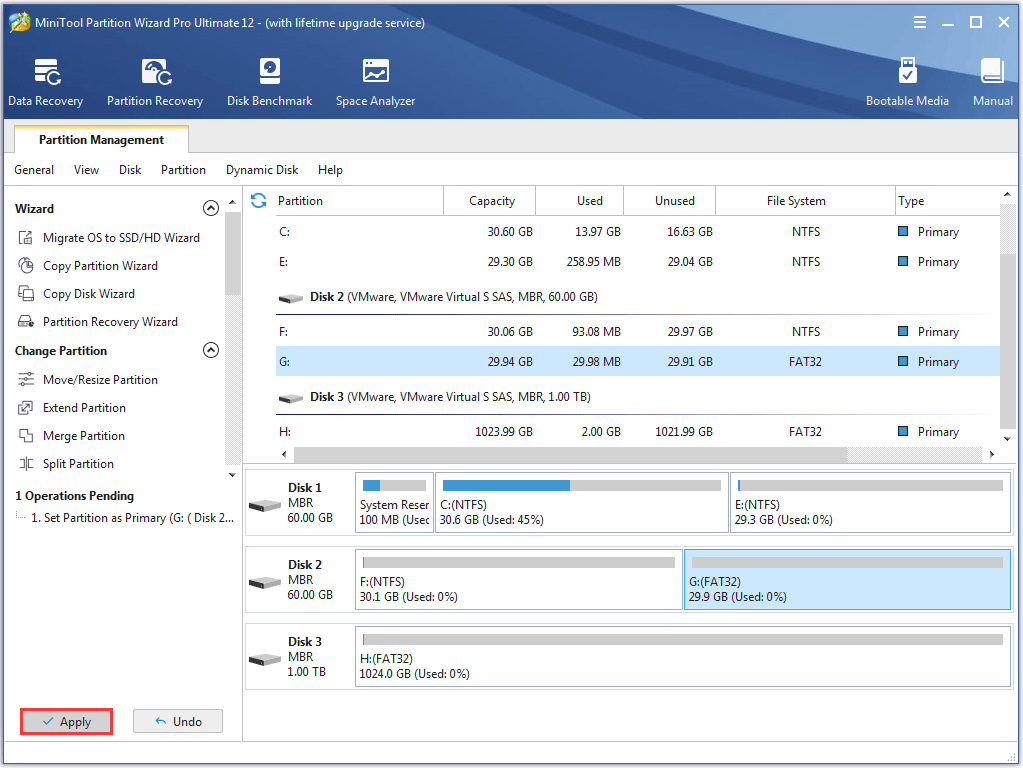
Step 2. Click Apply to all the pending operation.
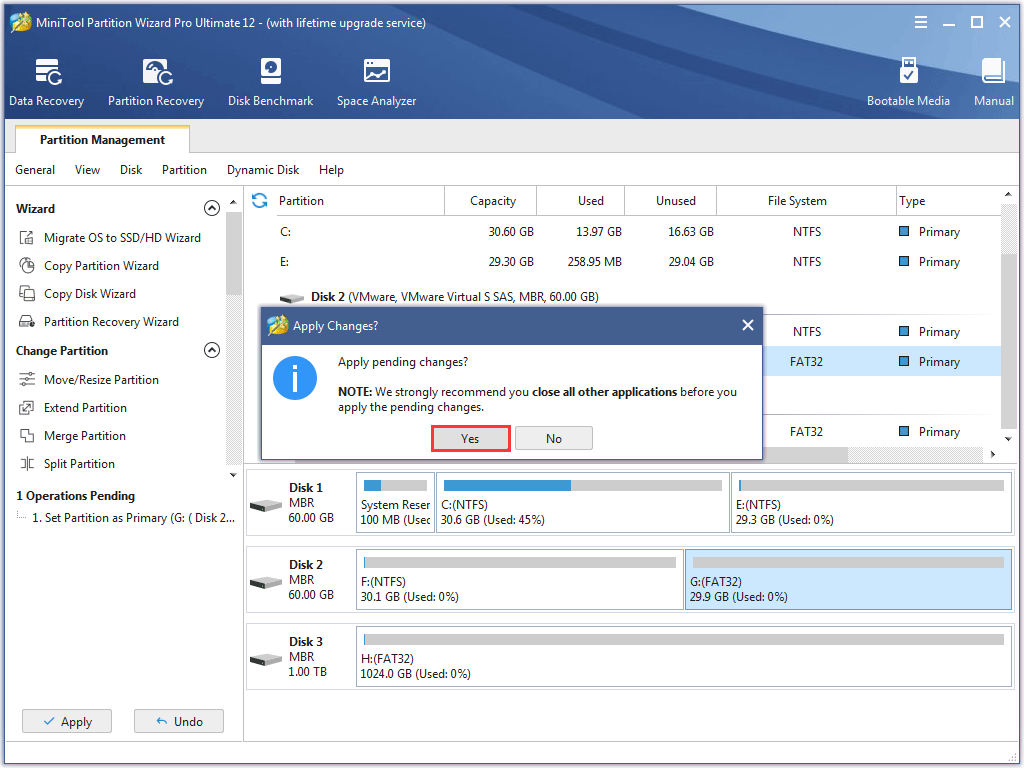
Step 3. Tap Yes button to confirm changes on the selected logical partition.
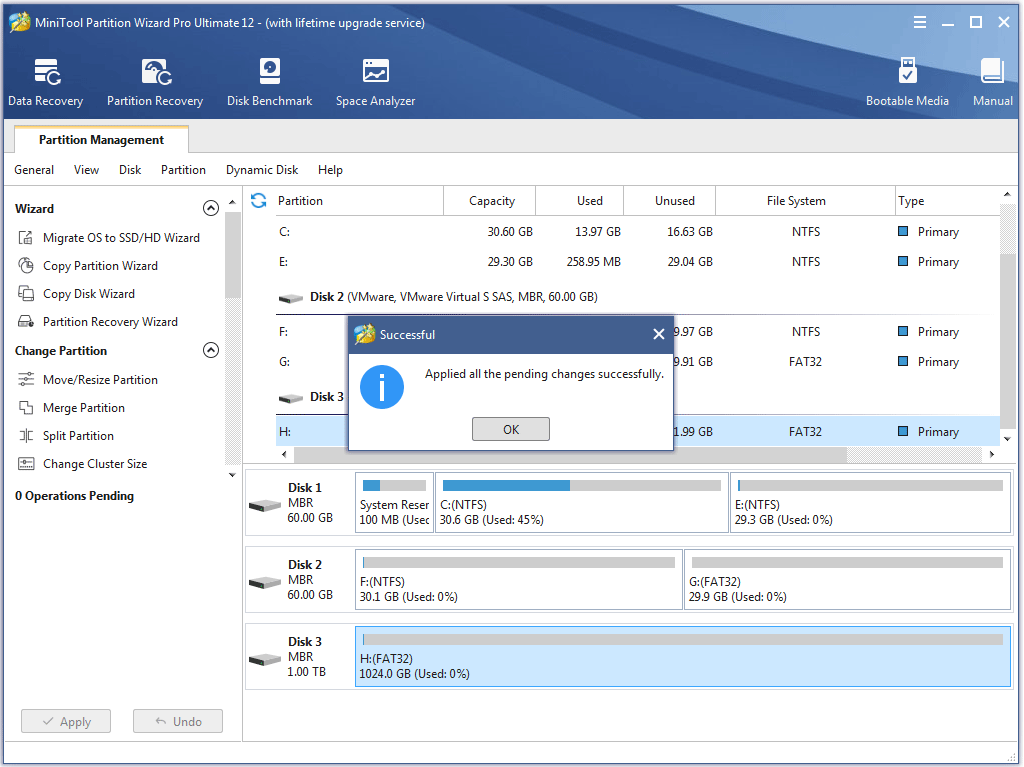
Step 4. Tap OK button in the prompt window at the end of the task.
User Comments :