With volume label, it is more easily for users to identify what kind of data are saved in a specific volume. This MiniTool Partition Wizard tutorial shows how to change volume label in simple steps.
About Change Volume Label
By default, disk partitions are displayed as Local Disk C: Local Disk D: etc. At this moment, disk partitions have no label. But users can label every partition to make them easy to distinguish, such as labeling partition C: as System C:
The function Change Volume Label of MiniTool Partition Wizard gives each volume a unique label to facilitate management and memorizing.
How to Change Volume Label
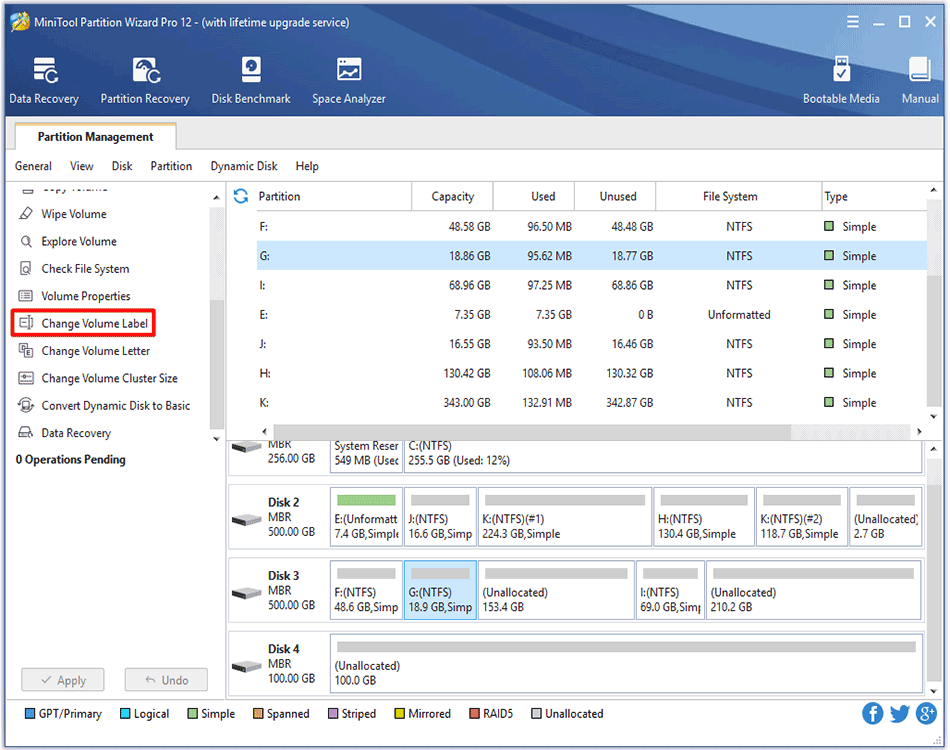
Step 1. Select the target volume and click Change Volume Label from the action panel OR right click the target volume to select this feature.
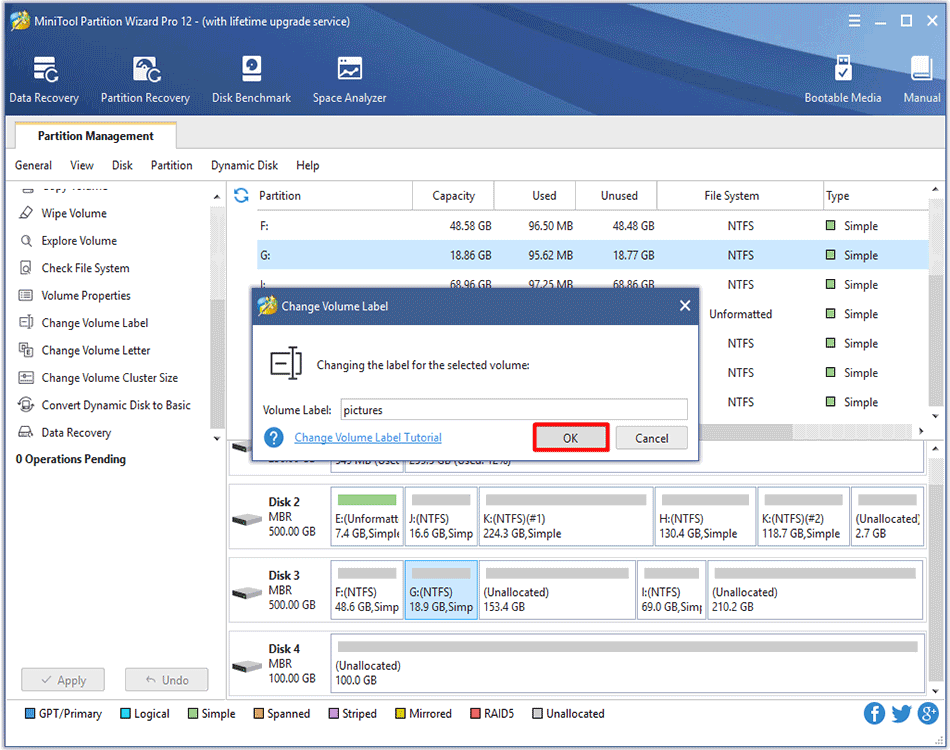
Step 2. Next, input new volume label and click OK button to go back to the main interface.
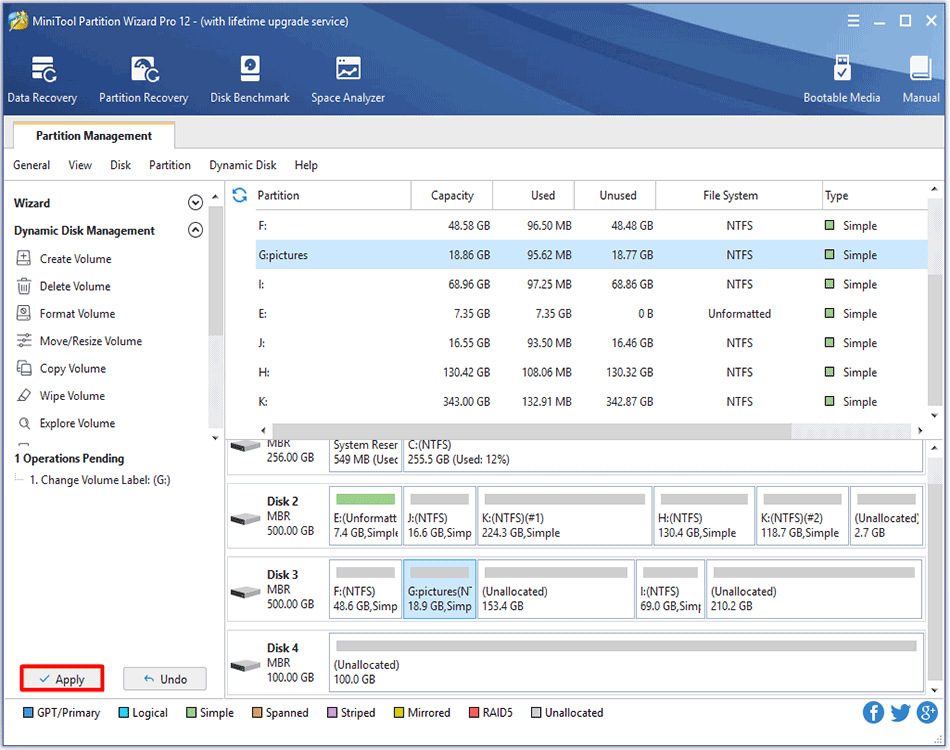
Step 3. Finally, click Apply to execute the change to computer.
About The Author

Position: Columnist
Rodin is an enthusiastic IT writer focusing on Windows trends, disk partition management and data recovery. She loves to write and share her idea about the useful tips and tricks on personal computers' maintenance. If you are looking for methods to improve your computer performance, manage hard drives and recover data from different devices, Rodin can provide reliable solutions for data management.