To many Server administrators, it is not easy to resize Server partition, for they pay great attention to the data safety. MiniTool offers best Server partition manager to resize partition on Windows Server 2003 (R2)/2008 (R2)/2012 (R2)/2016/2019. Check out the details.
Today there are a large amount of partition magic with diverse functions and features in the market to resize Server partition. And many Server users are wondering: “Do we have a partition manager to resize Server free? If not, is there any server partition manager that is worth paying?”
Fortunately, we do have freeware, and it is the built-in Disk Management tool of Windows Server. However, this free tool is limited to a large extent in resizing partition. Words of mouth cannot be trusted, so we will take a living example to show the limits.
Disk Management Is Restricted to Resize Server Partition
As we have referred above, Windows Server’s built-in Disk Management tool is free to manage disks and partitions. However, you get what you paid for. Free means a lot of restrictions. Let’s see how Disk Management performs in resizing partition.
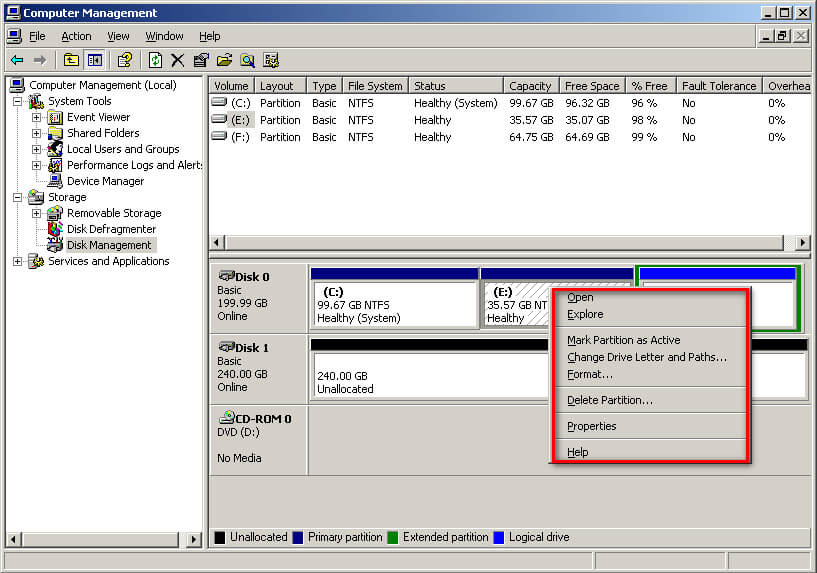
Before Windows Server 2008 (Server 2000, Server 2003 included), Disk Management does not offer the option “Extend Volume” and “Shrink Volume”. Below is a screenshot of the available functions listed in Windows Server 2003 Disk Management. We can clearly see that there is no way to resize partition Windows Server 2003.
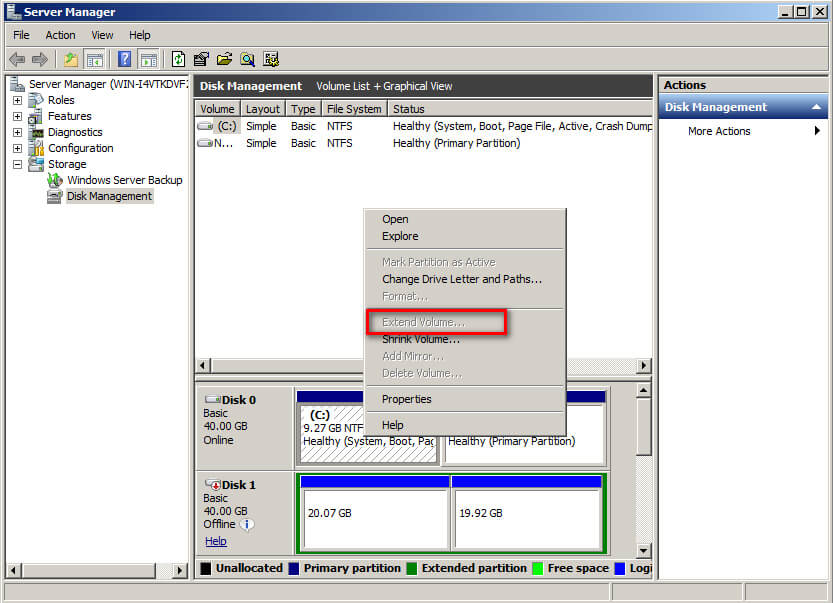
Since Windows Server 2008, these two features are finally added. However, there are also lots of restrictions. For example, you cannot extend a partition that is not adjacent with an unallocated space. The option “Extend Volume” is grayed out.
So we have to find another way out like trying a third-party Windows Server partition software to break these limits. Is there any reliable partition magic for Server 2008/2008 R2 as well as for Server 2003? Yes, indeed. And MiniTool Partition Wizard Server is such a choice for all Windows Server Users to manage server partitions of Windows Server 2003/2008/2012/2016/2019.
Why MiniTool Partition Wizard Server
Developed by MiniTool Software Ltd., Partition Wizard possesses powerful functions including Create Partition, Merge Partition, Resize Partition, Copy Partition, Delete Partition, Format Partition, Wipe Partition, Recover lost Partition, Convert File System, etc. To discover the full features of Partition Wizard, you can experience the FREE Demo Edition and then determine whether or not you need it.
MiniTool Partition Wizard DemoClick to Download100%Clean & Safe
Besides, Partition Wizard is compatible with all editions of Windows Server 2000, Windows Server 2003, Windows Server 2008, Windows Server 2012 R2, Windows XP, Windows Vista, Windows 7, Windows 8, and Windows 10, both 32 bit and 64 bit..
Furthermore, this program supports file systems like FAT16, FAT32, NTFS, Ext2*, and Ext3* (File systems marked with * indicate users can only execute limited functions like Create Partition and Delete Partition.).
Due to the deficiency of Disk Management in Server 2003, this tool is honored as the best partition software for Server 2003, for it overcomes difficulties that Disk Management can not complete, such as extending Server partition without adjacent unallocated space. We will show you the vast difference.
How Does Partition Wizard Resize Server Partition
When it comes to resizing partition, it includes two aspects, i.e. extend partition and shrink partition. Then how does Partition Wizard performs when dealing with Server 2003 resize Partition? Let’s talk about these two aspects one by one.
Resize Server Partition – Extend:
There are three situations when users extend a partition: adjacent with unallocated space (can be achieved by Disk Management), not adjacent with unallocated space, no unallocated space. Luckily, MiniTool Partition Wizard has put forward the corresponding solutions.
In fact, all these three situations can be perfectly solved by using “Extend Partition“. Here are the specific operations:
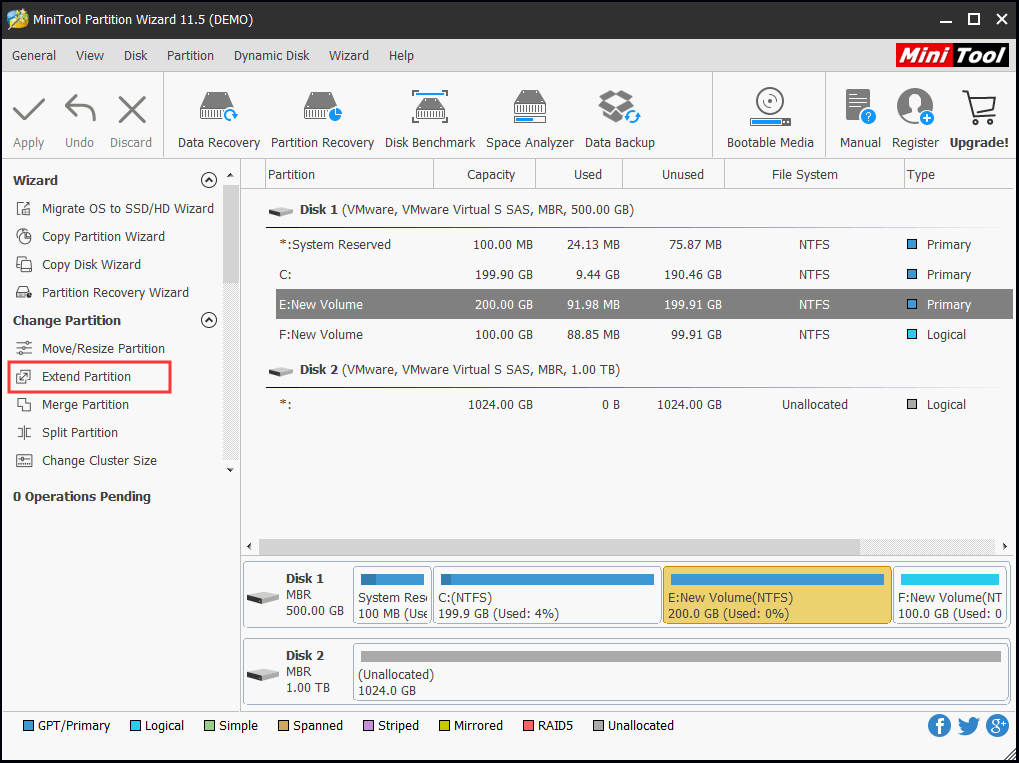
Step 1. Right click the target partition and select “Extend Partition“, then a new window pops up.
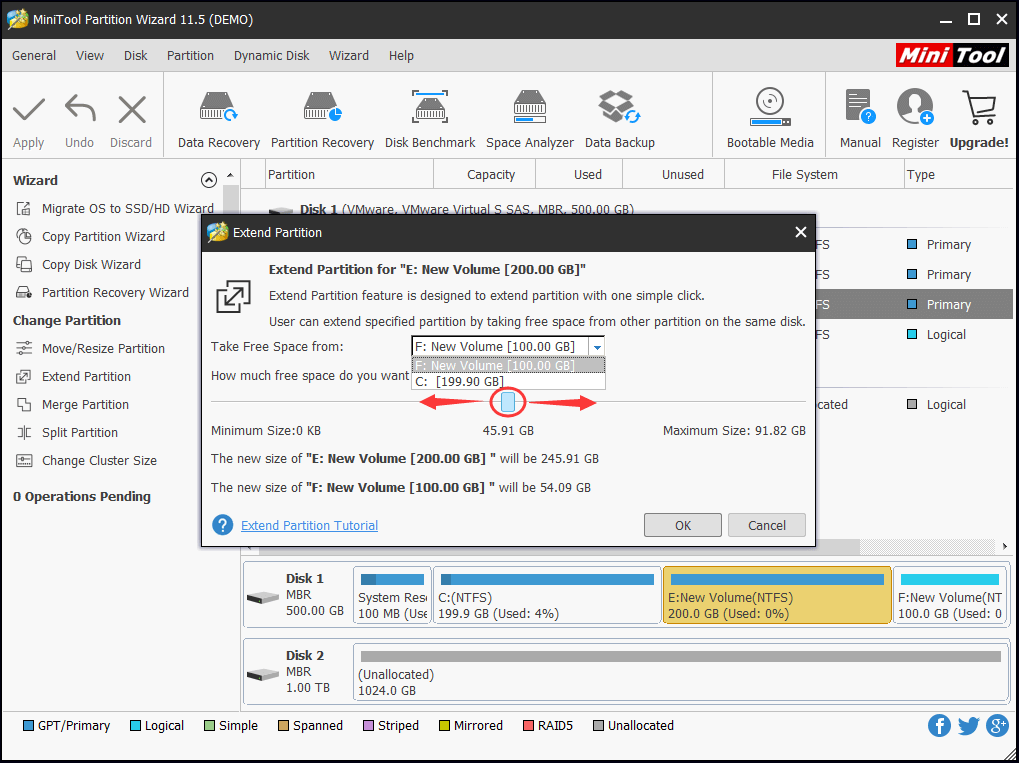
Step 2. Drop down the small box to choose which partition you are going to take free space from. Also, you can slide the button to determine how much free space you want. Click “OK” to go back to the main interface.
Step 3. Click “Apply” to execute all the changes you have made.
Resize Server Partition – Shrink:
In some cases, you may want to shrink a partition to release some free space to create a new partition. The shortcoming of Using Disk Management to shrink partition is that Disk Management only allows to shrink at most half of the original partition. What if you want to shrink more? Try MiniTool Partition Wizard Server.
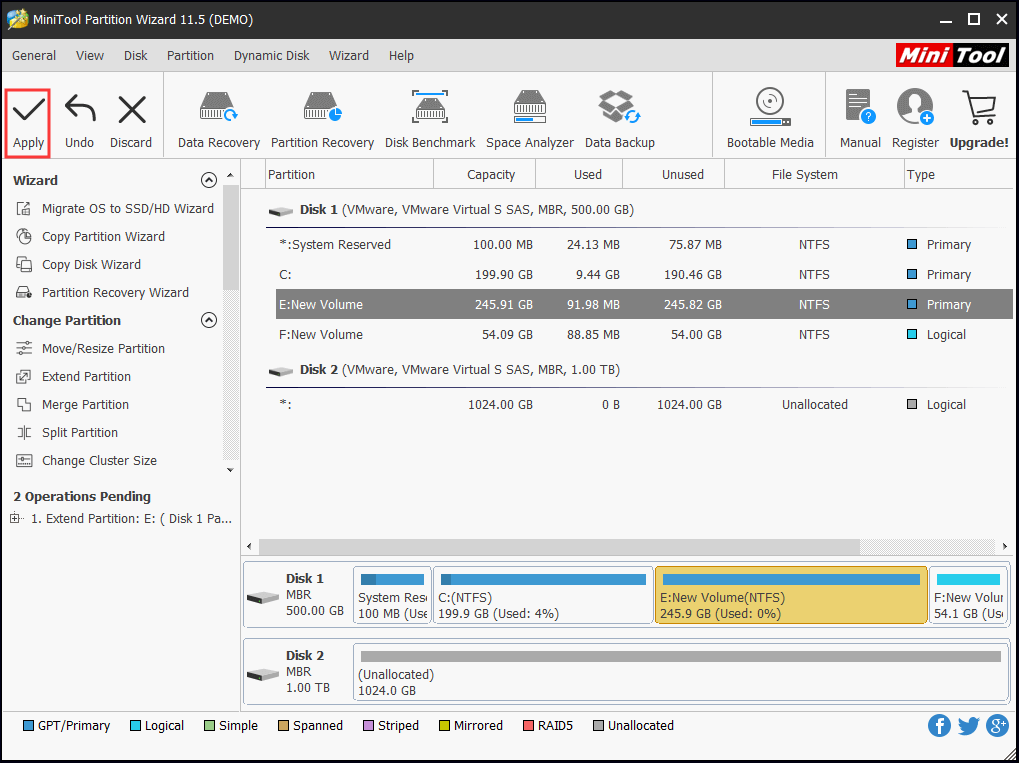
Step 1. Right click the partition you want to shrink and select “Move/Resize“. Then a new window pops up.
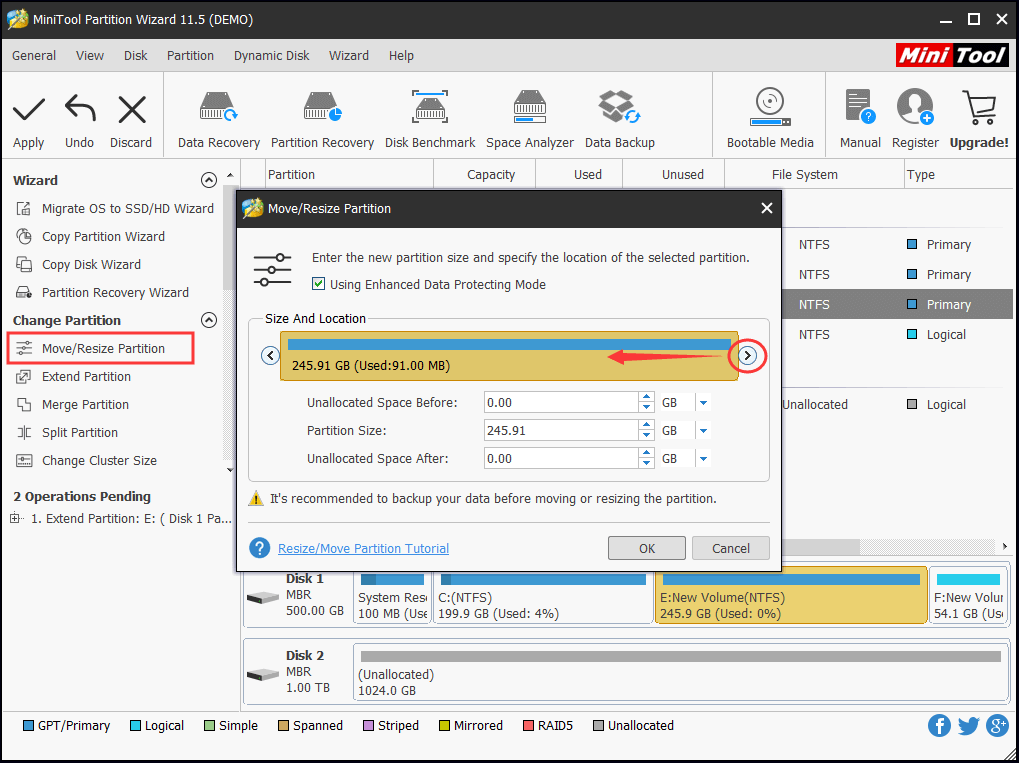
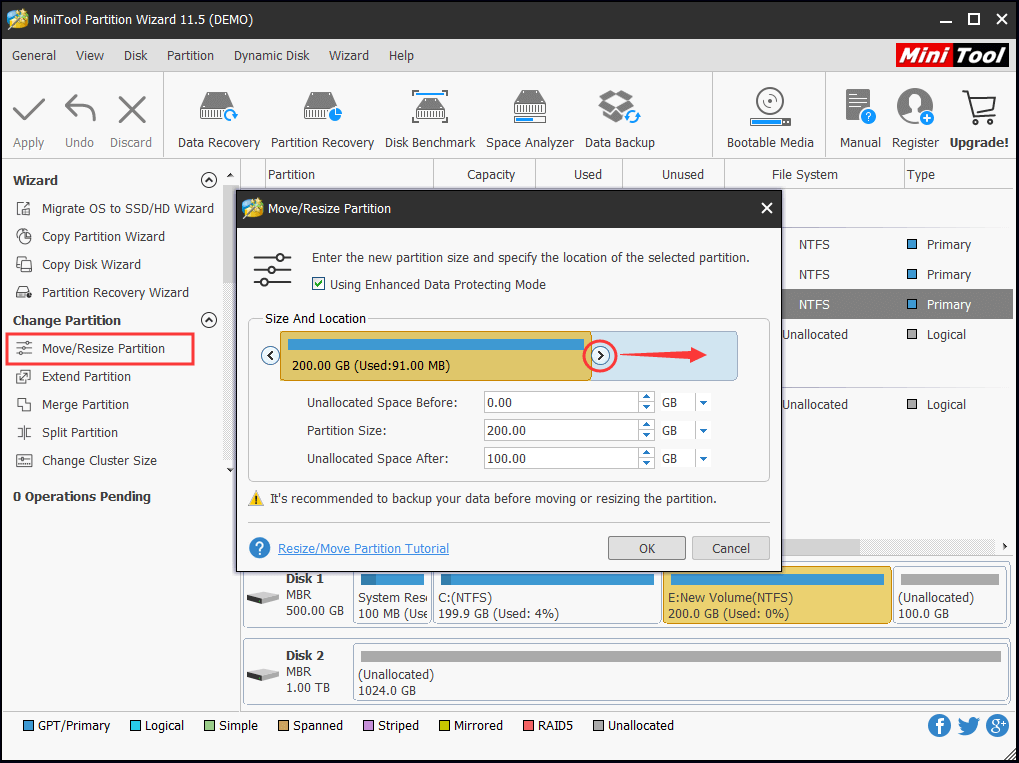
Step 2. Drag the triangle to the left side to release some partition size and click “OK” to go back to the main interface.
Step 3. Press “Apply” on the top left corner of the main interface to execute all changes.
- It is recommended to turn off all running applications when you resize a partition.
- “Move/Resize” can be used to extend partition when there is unallocated space adjacent to the target partition.
- Based on the location of the unallocated space, you just need to drag the triangle to cover the free space.
If the operations involves system partition, you need to restart your computer for data safety.
Bottom Line
Quite useful, isn’t it? With this Windows Server partition software, users can resize server partition freely when there is a need. For more information about this partition magic, please go to the official page.
If you are seeking for such a user-friendly partition magic, click the buttons below to start your journey of changing partition size in Windows Server and Windows PC. We expect your success.
MiniTool Partition Wizard DemoClick to Download100%Clean & Safe
About The Author

Position: Columnist
Rodin is an enthusiastic IT writer focusing on Windows trends, disk partition management and data recovery. She loves to write and share her idea about the useful tips and tricks on personal computers' maintenance. If you are looking for methods to improve your computer performance, manage hard drives and recover data from different devices, Rodin can provide reliable solutions for data management.
User Comments :